Do you remember that moment when someone placed a slice of pristine white cake in front of you, and the simple elegance took your breath away? There’s something profoundly comforting about white cake—it transcends occasions and generations. Whether you’re reminiscing about childhood birthday parties or envisioning your daughter’s wedding day, white cake represents tradition, sophistication, and pure joy wrapped in buttercream and vanilla.
For many of you, the challenge isn’t wanting to bake a white cake; it’s knowing how to make one that turns out absolutely perfect. You’ve likely scrolled through countless recipes, wondering which one will deliver that cloud-like texture and delicate flavor you’re chasing. You might have experienced disappointment with dense layers or frosting that slides right off. This article changes that narrative.
Throughout this guide, you’ll discover everything you need to transform basic ingredients into the best classic white cake recipe your family will ever taste. Your kitchen will become your personal bakery, and your loved ones will wonder if you hired a professional pastry chef.
Understanding White Cake: More Than Just Vanilla
What Makes White Cake the Perfect Canvas
White cake holds a unique position in the baking world. Unlike yellow cake, which contains egg yolks that contribute richness and color, your white cake uses only egg whites, creating a pristine, delicate crumb that’s absolutely stunning. This fundamental difference means you’re working with a recipe that demands precision but rewards you with unparalleled elegance.
Your white cake recipe isn’t complicated—it’s deliberately designed to showcase other flavors. Whether you pair it with strawberry frosting, chocolate ganache, or classic American buttercream, your white cake serves as the perfect foundation for culinary creativity.
The Science Behind Your Perfect White Cake
When you’re making white cake, several factors work together to create that coveted tender crumb:
- Egg whites provide structure without adding color, allowing you to achieve pure white layers
- Cake flour (not all-purpose) contains less protein, resulting in your more delicate texture
- Proper creaming incorporates air into your butter-sugar mixture, creating lift
- Alternating wet and dry ingredients prevents overmixing, preserving your tender crumb
- Room-temperature ingredients ensure smooth emulsification and even baking
Understanding these elements helps you appreciate why each step in your best classic white cake recipe matters.

Gathering Your Ingredients for the Best White Cake Recipe
Your Complete Ingredient List
Before you begin your white cake baking journey, gathering quality ingredients is essential. Your success depends on using the right components in proper proportions.
| Ingredient | Measurement | Purpose | Quality Tips |
|---|---|---|---|
| Cake flour | 2⅓ cups | Creates tender crumb structure | Sift before measuring for accuracy |
| Sugar (granulated) | 1¾ cups | Sweetness and moisture | Use fine crystals, not superfine |
| Baking powder | 2¾ teaspoons | Leavening agent | Check expiration date |
| Salt | 1 teaspoon | Enhances flavor balance | Use fine sea salt or table salt |
| Butter (unsalted) | ½ cup (115g) | Richness and structure | Room temperature, softened |
| Vegetable oil | ⅓ cup | Moisture and tenderness | Neutral-flavored oil recommended |
| Egg whites (room temp) | 5 large | Structure and volume | Separated carefully, no yolk traces |
| Whole milk | 1 cup | Moisture and tenderness | Room temperature preferred |
| Vanilla extract | 1½ teaspoons | Flavor depth | Pure vanilla, not imitation |
| Almond extract | ¼ teaspoon | Subtle flavor complexity | Optional but enhances your cake |

Ingredient Substitutions for Your Flexibility
Your baking journey doesn’t have to follow one rigid path. Consider these alternatives:
For Dairy-Free White Cake: Replace regular milk with unsweetened almond milk or oat milk. Use vegan butter (1:1 ratio) or coconut oil in place of traditional butter.
For Gluten-Free White Cake: Substitute cake flour with gluten-free cake flour blend. Add ¼ teaspoon xanthan gum per cup of flour to improve binding.
For Oil-Free White Cake: Replace the vegetable oil with the same amount of applesauce or mashed banana, though this slightly alters your texture.
Preparation and Setup for Your White Cake Success
Setting Up Your Baking Space
Your preparation determines your outcome. Taking 10 minutes to set up properly saves you frustration later:
- Preheat your oven to 350°F (175°C) for 15 minutes. Use an oven thermometer for accuracy—most home ovens run hot or cold.
- Prepare your pans by greasing with softened butter or cooking spray, then lightly flouring. Line the bottom with parchment paper for foolproof removal.
- Gather room-temperature ingredients. Remove eggs, milk, and butter from your refrigerator at least one hour before baking. Room temperature ingredients incorporate smoothly, preventing lumps and separation.
- Sift your cake flour into your dry ingredients bowl. This aerates the flour and prevents dense pockets in your finished cake.
- Have your tools ready: electric mixer, mixing bowls, measuring cups and spoons, rubber spatula, wire whisk, and toothpick.
Step-by-Step Instructions for Your Best White Cake
Step One – Combine Your Dry Ingredients
In a medium bowl, whisk together your cake flour, sugar, baking powder, and salt. Whisking for about 30 seconds incorporates air and ensures even distribution. This step prevents pockets of unmixed baking powder, which can create an unpleasant mineral taste in your cake.
Your dry ingredients should look light and uniform, with no visible clumps of baking powder.
Step Two – Cream Your Butter and Sugar
Place your softened butter in your mixing bowl and beat on medium speed for 2-3 minutes until pale, fluffy, and increased in volume. Add your sugar gradually, beating for another 3-4 minutes until your mixture resembles fine sand with a slightly aerated texture.
This creaming process is crucial for your light, tender crumb. You’re literally whipping air into your mixture, and this air helps your cake rise in the oven.

Step Three – Prepare Your Egg Whites
Separate your eggs carefully, ensuring absolutely no yolk gets into your whites. Even a speck of yolk contains fat that prevents proper whipping. If you’re nervous about separation, use fresh eggs—older eggs separate more easily than very fresh ones.
In a separate, completely grease-free bowl, beat your egg whites on medium-high speed for 1-2 minutes until they reach soft peaks (the peaks curl slightly when the beaters are lifted).
Step Four – Create Your Wet Ingredients Mixture
In another bowl, combine your room-temperature milk, oil, vanilla extract, and almond extract. Stir until well combined. This mixture should be smooth and uniform.
Step Five – Begin Your Alternating Method
Here’s where your attention matters most. Start with your dry ingredients, adding one-third to your creamed butter-sugar mixture. Mix on low speed just until combined—about 15 seconds.
Add half of your wet ingredients mixture, mixing gently until just combined. Then add half of your remaining dry ingredients, followed by the remaining wet mixture, and finally your last of the dry ingredients.
Important: After each addition, mix only until you see no flour streaks. Overmixing develops gluten and creates a dense, tough cake—the opposite of what you want.
Step Six – Fold In Your Egg Whites
Using a rubber spatula, gently fold your whipped egg whites into your batter in three additions. Folding (not mixing) preserves the air you’ve incorporated into your egg whites.
Your finished batter should be light, fluffy, and pale—noticeably different from the denser texture of typical cake batters.
H3: Step Seven – Pour and Distribute
Divide your batter evenly between your prepared pans. Tap each pan gently on your counter three times to release air bubbles. Smooth your tops with a spatula.
H3: Step Eight – Bake Your Cake Layers
Place your pans in your preheated oven and bake for 28-32 minutes. Your cake is done when a toothpick inserted in the center comes out clean or with a few moist crumbs—not wet batter.
Look for these visual cues: the edges should pull slightly away from your pan sides, and the tops should spring back when lightly touched.
Step Nine – Cool Your Layers
Allow your cakes to cool in your pans for 10-15 minutes, then turn them out onto wire racks to cool completely. This gradual cooling prevents sudden temperature shock that can cause cracking.
Pro tip: Cool your cakes completely before frosting. Even slightly warm cake causes frosting to melt and slide off your beautiful layers.

Love cake? 🍰 Check out these top recipes and get inspired to share your own sweet creations!
How To Make Cake Pops: 5 Easy Steps For Beginners
Cake Pop Magic: How 3 Ingredients Make Them Amazing
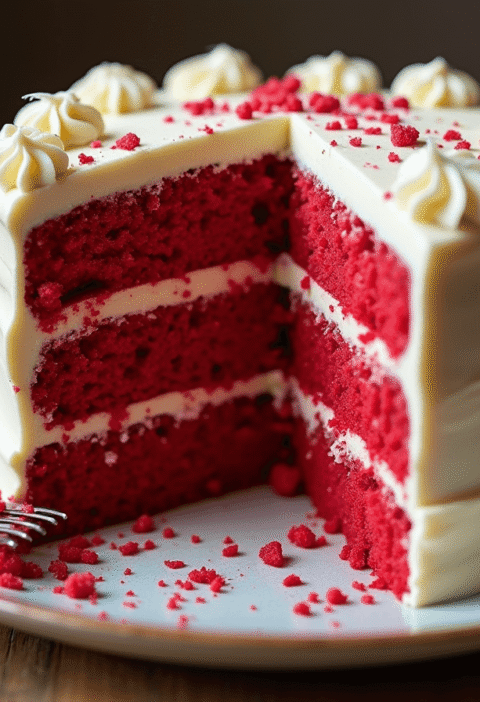
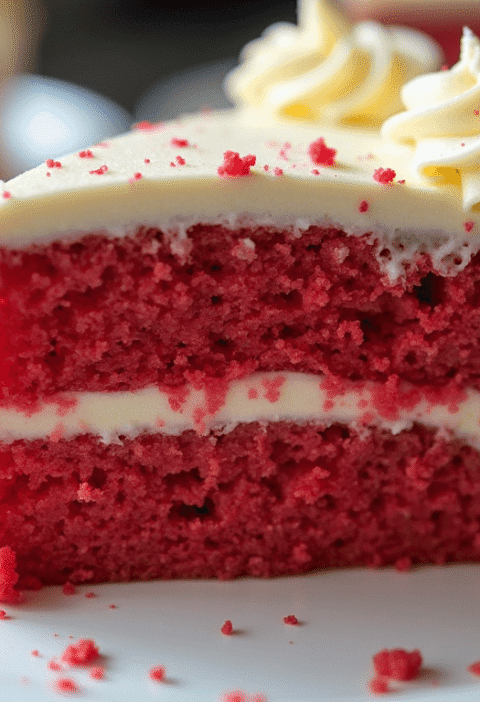
How To Make The Perfect Red Velvet Cake In 5 Steps
Banana Bread Recipe: 5-Ingredient Magic For Quick & Easy Baking
Pineapple Upside Down Cake: How To Make It In 6 Simple Steps
Frosting Your White Cake Like a Professional
Classic Vanilla Buttercream for Your White Cake
Your frosting is as important as your cake. This simple buttercream complements your delicate white cake perfectly:
Ingredients:
- 1 pound (454g) unsalted butter, room temperature
- 3-4 cups powdered sugar, sifted
- 3-4 tablespoons heavy cream or milk
- 1½ teaspoons vanilla extract
- Pinch of salt
Instructions:
Beat your butter for 2-3 minutes until light and creamy. Add your powdered sugar one cup at a time, beating well after each addition. Add your cream and vanilla, then beat for 3-4 minutes until fluffy.
Your frosting should be spreadable but hold its shape. If it’s too soft, refrigerate for 10 minutes. If it’s too stiff, add cream by the teaspoon.
Assembly Techniques for Your Stunning Presentation
How to Stack and Frost Your White Cake
Your presentation transforms your homemade cake into something special:
- Level your layers: Use a serrated knife or cake leveler to create flat surfaces on your cake tops. This prevents your frosting from sliding off.
- Add your crumb coat: Apply a thin layer of frosting to your first layer. Refrigerate for 15 minutes. This seals in crumbs before your final frosting.
- Build your layers: Place your second layer on top, then add frosting. Continue alternating until your final layer sits on top.
- Frost your exterior: Apply frosting to your sides, using a bench scraper or knife for smooth or textured finishes, depending on your preference.
- Add your decorations: Your white cake is now a blank canvas. Add fresh flowers, berries, sprinkles, or fresh fruit for visual interest.
Storage and Shelf Life for Your White Cake
Keeping Your Cake Fresh and Delicious
Your white cake, when properly stored, maintains quality for several days:
Room Temperature: Cover loosely with a cake dome or plastic wrap for up to 2 days. Keep your cake away from direct sunlight and heat sources.
Refrigerator: Store in an airtight container for 4-5 days. The cold actually helps frosting stay firm, making slicing cleaner.
Freezer: Wrap unfrosted cake layers individually in plastic wrap, then foil. Freeze for up to 3 months. Thaw at room temperature for 2-3 hours before frosting.
Make-Ahead Strategy: Bake your cake layers several days ahead and freeze them unfrosted. Prepare your frosting the day before. Assemble everything the day of serving for freshest results.
Common Mistakes That Undermine Your White Cake
What Goes Wrong (And How You Fix It)
Dense, Gummy Texture: You’ve likely overmixed your batter or used all-purpose flour instead of cake flour. Mixing just until ingredients are combined and using proper flour makes all the difference.
Cake Sinks in the Middle: This indicates underbaking or oven temperature issues. Use an oven thermometer and check your cake earlier than expected. Every oven behaves differently.
Frosting Slides Off: Your cake layers weren’t level or completely cooled. Always level your layers and ensure your cake is room temperature before frosting.
Overly Sweet Cake: You might be using too much sugar or not balancing it with salt. The pinch of salt is essential for flavor balance.
Dry Cake: Too much baking time or using all-purpose flour instead of cake flour creates dry texture. Set your timer for the minimum recommended time and check for doneness.
Egg White Streaks: Your egg whites weren’t fully incorporated. Fold gently in three additions, making sure each addition is fully combined before adding the next.
Creative Variations of Your Classic White Cake
Beyond the Traditional: Your Flavor Adventures
Your white cake base opens doors to countless flavor possibilities:
Lemon White Cake: Replace ½ teaspoon vanilla with ½ teaspoon lemon extract and add 1 tablespoon lemon zest to your dry ingredients. Pair with lemon buttercream.
Almond White Cake: Replace vanilla with almond extract (½ teaspoon more than the recipe calls for). Add ½ cup finely ground almonds to your dry ingredients.
Coconut White Cake: Replace half your milk with coconut milk and add 1 cup shredded coconut to your batter. Frost with coconut buttercream.
Champagne White Cake: Replace ¼ cup milk with champagne for a celebration-worthy variation. Pair with strawberry or raspberry frosting.
Marble Cake Twist: Divide your batter in half. Add chocolate to one portion, then pour alternately into your pan for a marbled effect.
Nutritional Information and Dietary Considerations
Understanding Your White Cake’s Nutritional Profile
Per Slice (12 slices, with frosting):
- Calories: 420
- Total Fat: 22g
- Saturated Fat: 13g
- Cholesterol: 65mg
- Sodium: 320mg
- Carbohydrates: 54g
- Fiber: 0g
- Sugar: 42g
- Protein: 3g
Making Your White Cake Healthier:
You don’t have to sacrifice health for taste. Consider these modifications:
- Reduce sugar: Decrease sugar by ¼ cup and use unsweetened applesauce for moisture
- Add whole grains: Replace 25% of cake flour with whole wheat pastry flour
- Greek yogurt frosting: Replace half your butter with Greek yogurt for protein and reduced calories
- Reduce frosting quantity: Use slightly less frosting or choose a lighter whipped variety
Frequently Asked Questions About Your White Cake
Your White Cake Questions Answered
Q: What’s the difference between white cake and vanilla cake?
A: White cake uses only egg whites, creating a pure white color and delicate texture. Vanilla cake typically contains whole eggs (yolks and whites), resulting in a slightly yellow hue and richer flavor. Your white cake is more elegant and refined, while vanilla cake is more versatile.
Q: Can you make white cake without almond extract?
A: Absolutely. Almond extract enhances your white cake’s subtle flavor complexity, but your recipe works beautifully without it. Simply omit the almond extract and increase vanilla to 2 teaspoons for your white cake.
Q: How do you prevent your white cake from browning?
A: White cake browning usually results from oven temperature running too hot. Use an oven thermometer and place your pan on a lower oven rack. If your white cake still browns too quickly, cover it loosely with aluminum foil during the last 5-10 minutes of baking.
Q: Should you refrigerate your white cake before frosting?
A: Yes, completely. Your white cake must be completely cooled to room temperature before frosting. Refrigerating your cooled cake for 2-3 hours firms it up, making frosting easier and more precise. However, allow your white cake to return to room temperature before serving for best flavor.
Q: Can you freeze your white cake with frosting already applied?
A: Yes. Your frosted white cake freezes well for up to 2 months. Allow it to set in your freezer for several hours before wrapping in plastic wrap and foil. Thaw overnight in your refrigerator before serving.
Q: What’s the best way to slice your white cake neatly?
A: Use a long, serrated knife dipped in hot water, wiping it clean between cuts. For your cleanest slices, refrigerate your frosted white cake for at least 1 hour before cutting. Some bakers use dental floss—gently pressing it through the cake creates remarkably clean cuts.
Q: How do you troubleshoot if your white cake is too dense?
A: Dense white cake typically indicates overmixing or insufficient creaming time. Start fresh with another batch, creaming your butter and sugar for the full 3-4 minutes, and mix gently once you start adding wet and dry ingredients alternately.
Pairing Your White Cake with Complementary Flavors
Creating Your Perfect Dessert Combination
Your white cake’s delicate flavor profile pairs beautifully with countless accompaniments:
Fruit Pairings: Fresh strawberries, raspberries, blueberries, and fresh peaches complement your white cake’s subtle sweetness. The tartness of berries balances your cake’s richness.
Frosting Combinations: Red velvet frosting, cream cheese frosting, chocolate ganache, or lemon curd layer your white cake with exciting flavors without overwhelming it.
Beverage Pairings: Serve your white cake with champagne for celebrations, coffee for brunches, or tea for afternoon gatherings. Each pairing enhances different flavor notes.
Why Your White Cake Deserves a Place in Your Kitchen
The Lasting Appeal of Your Classic Choice
Your white cake transcends trends. While elaborate desserts come and go, white cake remains eternally elegant. It’s equally at home at intimate family dinners and grand celebrations. Your white cake works for countless occasions: weddings, anniversaries, birthdays, baby showers, and simple Tuesday evenings.
The beauty of your white cake lies in its versatility. Your canvas accepts any frosting, filling, or decoration you imagine. Your white cake adapts to your creativity while maintaining its sophisticated identity.
Troubleshooting Your White Cake Issues
Solutions for Common Baking Challenges
Your Cake Has a Dome Top: Your oven runs hot or your baking temperature was too high. Lower your oven temperature by 25°F and try again. Your white cake should bake gently and evenly.
Your Cake Sticks to Your Pan: Ensure you greased and floured your pans adequately. Using parchment paper on your pan bottom provides extra insurance against sticking.
Your Frosting Is Grainy: Your powdered sugar wasn’t sifted or your frosting temperature is too warm. Always sift powdered sugar before using, and ensure all ingredients are at proper temperature.
Your Cake Layers Have Air Pockets: You didn’t tap your pans on your counter after pouring batter. Tap gently three times to release trapped air bubbles before baking.
Making Your White Cake Journey Easier
Professional Tips for Your Success
- Invest in proper equipment: Cake flour, an oven thermometer, a bench scraper, and wire cooling racks make substantial differences in your outcomes.
- Keep detailed notes: Record your oven temperature, exact baking time, and any adjustments you made. Your notes help you perfect your white cake recipe.
- Practice your technique: Your first white cake might not be perfect, and that’s okay. Each attempt teaches you something valuable about your oven and your skills.
- Join baking communities: Online forums and social media groups for bakers provide support, troubleshooting help, and inspiration for your white cake variations.
Conclusion
Your journey to creating the best classic white cake recipe doesn’t require professional pastry training or expensive equipment. By understanding the science behind your recipe, gathering quality ingredients, following precise techniques, and learning from common mistakes, you’ll produce white cake that impresses everyone who tastes it.
Your white cake represents more than just dessert—it’s an expression of care and attention to detail. Every layer symbolizes the time you invested, the love you put into your baking, and your commitment to creating something beautiful and delicious for the people you care about.
Start today. Gather your ingredients, preheat your oven, and embark on your white cake adventure. Your family deserves the taste of homemade excellence, and you possess all the knowledge and skills to deliver exactly that.
Your Next Step: Share your white cake creation with us! Comment below with your results, variations you tried, or any questions about your white cake baking experience. Subscribe to our newsletter for more classic dessert recipes, baking tips, and culinary inspiration delivered directly to your inbox. Join our community of home bakers who believe that homemade truly tastes better. Don’t keep your success to yourself—tag us on social media with your stunning white cake photos, and you might be featured in our baking hall of fame!