Do you remember that moment when you took your first bite of something so delicious it transported you back to childhood? That perfect blend of creamy sweetness and satisfying crunch that makes your taste buds dance with pure joy? For countless dessert lovers, strawberry crunch cake delivers exactly that magic. Whether you’re planning a birthday celebration, hosting a summer gathering, or simply craving something extraordinary, this stunning dessert combines velvety cake layers with a signature crispy topping that’s become an absolute sensation on social media. The best part? You don’t need professional pastry skills to create this showstopper in your own kitchen. Today, you’ll discover how to make an authentic strawberry crunch cake that’ll have everyone asking for your secret recipe.
What Makes Strawberry Crunch Cake So Irresistible?
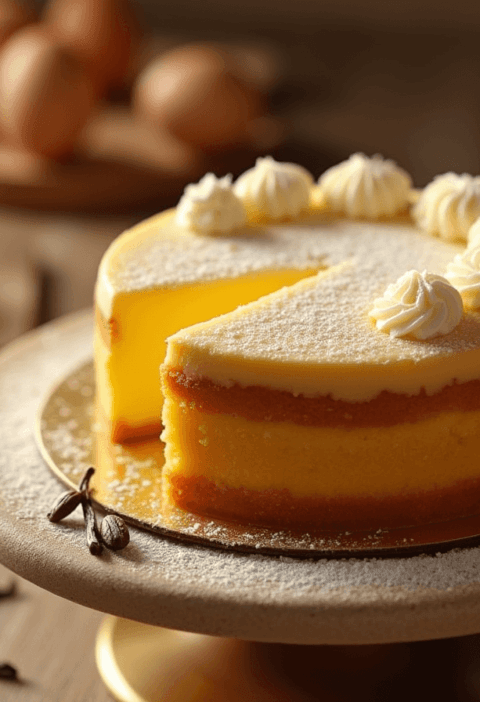
This beloved dessert has taken the baking world by storm, and for good reason. The strawberry crunch cake features layers of moist vanilla or strawberry cake, luscious strawberry-infused frosting, and that distinctive crunchy coating that provides an unforgettable textural contrast.
The iconic crunch topping typically comes from crushed Golden Oreos mixed with strawberry gelatin powder and melted butter. This combination creates that nostalgic flavor reminiscent of strawberry shortcake ice cream bars from your childhood. When you bite through the crispy exterior into the soft, creamy layers beneath, you experience a symphony of textures and flavors that keeps you reaching for just one more slice.
The Origin Story
While the exact origins remain somewhat mysterious, strawberry crunch cake gained massive popularity through social media platforms, particularly when home bakers started recreating versions of popular ice cream treats in cake form. The dessert pays homage to classic strawberry shortcake bars while elevating the concept into an elegant, shareable creation.
Your Dream Cake is One Click Away! Tap to Get The Ultimate Cake Cookbook NOW!


Essential Ingredients You’ll Need
Before diving into the preparation process, gather all your ingredients. This ensures smooth sailing through each step without interruptions.
Cake Ingredients
| Ingredient | Quantity | Purpose |
|---|---|---|
| Boxed vanilla or strawberry cake mix | 1 box (15.25 oz) | Base cake layers |
| Eggs | 3 large | Binding and structure |
| Vegetable oil | 1/2 cup | Moisture |
| Whole milk | 1 cup | Richness and tenderness |
| Vanilla extract | 1 teaspoon | Flavor enhancement |
| Strawberry gelatin powder | 3 oz package | Color and flavor boost |
Frosting Ingredients
| Ingredient | Quantity | Purpose |
|---|---|---|
| Cream cheese | 16 oz (softened) | Tangy, rich base |
| Unsalted butter | 1 cup (softened) | Smooth texture |
| Powdered sugar | 4 cups | Sweetness and structure |
| Strawberry preserves | 1/2 cup | Intense berry flavor |
| Heavy cream | 2-3 tablespoons | Consistency adjustment |
| Vanilla extract | 2 teaspoons | Flavor depth |
Crunch Coating Ingredients
| Ingredient | Quantity | Purpose |
|---|---|---|
| Golden Oreos | 1 package (14.3 oz) | Crunch base |
| Strawberry gelatin powder | 3 oz package | Flavor and color |
| Unsalted butter (melted) | 6 tablespoons | Binding agent |

Step 1: Baking Your Perfect Cake Layers
Your journey to strawberry crunch cake perfection begins with creating moist, flavorful cake layers that serve as the foundation for this spectacular dessert.
Preparing the Batter
Start by preheating your oven to 350°F (175°C). This temperature ensures even baking without drying out your cake layers. While the oven heats, prepare two 9-inch round cake pans by generously greasing them with butter or non-stick spray, then dusting with flour. This prevents sticking and ensures clean removal after baking.
In a large mixing bowl, combine your cake mix with eggs, vegetable oil, and milk. Here’s where you’ll add a special touch that sets this cake apart: incorporate half of your strawberry gelatin powder directly into the batter. This infuses your cake with beautiful color and subtle strawberry essence.
Beat the mixture on medium speed for approximately two minutes until the batter becomes smooth and slightly thickened. You’ll notice the gorgeous pink hue developing as the gelatin incorporates fully.
Baking to Perfection
Divide your batter evenly between the prepared pans. A kitchen scale helps ensure equal distribution, which means your layers will bake uniformly and stack beautifully. Pour slowly to avoid creating air pockets.
Place both pans on the center rack of your preheated oven, spacing them apart for proper air circulation. Bake for 25-30 minutes, checking for doneness at the 25-minute mark. You’ll know your cakes are ready when:
- A toothpick inserted in the center comes out clean or with just a few moist crumbs
- The edges pull slightly away from the pan sides
- The cake springs back when gently pressed in the center
- The top develops a light golden color
Once baked, remove the pans from the oven and let them cool in the pans for exactly 10 minutes. This resting period allows the structure to set without becoming soggy. After ten minutes, carefully invert the cakes onto wire cooling racks and allow them to cool completely before frosting. Rushing this step leads to melted frosting and a structural disaster.
Pro Tip: If you’re short on time, place your cooled cake layers in the refrigerator for 30 minutes. Chilled cakes are significantly easier to frost and less likely to develop crumbs in your frosting.
Step 2: Creating the Dreamy Strawberry Frosting
While your cake layers cool, turn your attention to crafting the luscious frosting that brings moisture, flavor, and visual appeal to your strawberry crunch cake.
Achieving the Perfect Consistency
Begin with room temperature cream cheese and butter. This detail matters tremendously because cold dairy products won’t blend smoothly, creating lumpy frosting instead of silky perfection. If you forgot to soften them ahead of time, cut both into small cubes and let them sit at room temperature for 30-45 minutes.
In your stand mixer fitted with the paddle attachment (or using a hand mixer), beat the cream cheese and butter together on medium-high speed for approximately three minutes. You’re aiming for a light, fluffy mixture with no visible lumps. The color should lighten slightly as air incorporates.
Gradually add your powdered sugar, one cup at a time, beating on low speed initially to prevent a sugar cloud in your kitchen. Once incorporated, increase to medium speed and beat for another two minutes.
Adding Strawberry Magic
Here’s where your frosting transforms from standard to spectacular. Add the strawberry preserves and vanilla extract, then beat on medium-high speed for two full minutes. The preserves introduce genuine fruit flavor that artificial extracts simply cannot match.
Evaluate your frosting consistency. You want it spreadable but firm enough to hold the cake’s weight and maintain clean edges. If it seems too thick, add heavy cream one tablespoon at a time, beating after each addition. Too thin? Add more powdered sugar in quarter-cup increments.
The finished frosting should hold soft peaks when you lift the beater, spreading smoothly without running down the cake sides.
Step 3: Assembling Your Strawberry Crunch Cake
Now comes the exciting part where your creation takes shape. Proper assembly techniques ensure a stable, professional-looking cake that tastes as amazing as it looks.
Leveling and Layering
If your cake layers domed during baking (they usually do), use a long serrated knife to carefully level the tops. This creates flat surfaces that stack without sliding. Some bakers prefer keeping the natural dome on the bottom layer for stability, leveling only the top layer.
Place your first cake layer on your serving plate or cake stand. Consider placing strips of parchment paper around the edges to catch any frosting drips, keeping your presentation surface spotless.
Using an offset spatula, spread approximately one cup of frosting evenly across the first layer, extending it nearly to the edges. You want a generous filling layer that creates that beautiful frosting reveal when you slice the cake.
Stacking and Crumb Coating
Carefully position your second cake layer on top, pressing down gently but firmly to eliminate air gaps. Check that your layers align properly before proceeding.
Apply a thin “crumb coat” of frosting over the entire cake—top and sides. This initial layer traps any loose crumbs, preventing them from marring your final coating. The crumb coat doesn’t need to look perfect; you’ll barely see the cake through it, and that’s completely fine.
Refrigerate your crumb-coated cake for 30 minutes minimum. This chilling period sets the frosting, creating a stable foundation for your final frosting layer and crunch coating.
Final Frosting Application
Remove your chilled cake from the refrigerator. Apply your remaining frosting generously, using smooth, even strokes with your offset spatula. For the sides, hold your spatula at a slight angle and rotate the cake stand or plate as you work, creating uniform coverage.
For the top, start from the center and work outward in a spiral pattern. You can create swirls, keep it smooth, or add textured patterns—the crunch coating will cover most of it anyway.
Some decorators prefer leaving the sides smooth while creating texture on top, while others reverse this approach. Choose whatever appeals to your aesthetic preferences.
Step 4: Making and Applying the Signature Crunch Coating
This final step transforms your lovely strawberry cake into the legendary strawberry crunch cake that’s conquered social media feeds and dessert tables everywhere.
Creating the Crunch Mixture
Place your entire package of Golden Oreos into a food processor. Pulse until you achieve fine crumbs with some slightly larger pieces for textural variety. You want the consistency of coarse sand rather than powder. If you don’t own a food processor, place the cookies in a sealed plastic bag and crush them with a rolling pin. This method requires more effort but works perfectly well.
Transfer your cookie crumbs to a large mixing bowl. Add the remaining package of strawberry gelatin powder and stir thoroughly to distribute evenly. The gelatin powder provides that characteristic pink color and enhances the strawberry flavor profile.
Pour your melted butter over the crumb mixture, stirring with a fork or your hands until everything becomes uniformly moist and holds together slightly when squeezed. The mixture should resemble wet sand that clumps when pressed.
Applying Your Coating
Working quickly before the butter sets, take handfuls of the crunch mixture and gently press it against the frosted cake sides. Start at the bottom and work your way up, pressing firmly enough for the mixture to adhere but not so hard that you disturb the frosting beneath.
Continue around the entire cake until the sides are completely covered. Don’t worry if some mixture falls—simply scoop it up and reuse it.
For the top, sprinkle the crunch mixture generously, then use your hands to gently press it into the frosting. You can cover the entire top surface or create a border around the edges with a smooth frosting center—both presentations look stunning.
Finishing Touches: Consider garnishing with fresh strawberries arranged decoratively on top. Their bright red color against the pink coating creates visual interest and signals the flavor profile to your guests.

Love cake? 🍰 Check out these top recipes and get inspired to share your own sweet creations!
How To Make Cake Pops: 5 Easy Steps For Beginners
Cake Pop Magic: How 3 Ingredients Make Them Amazing
How To Make The Perfect Red Velvet Cake In 5 Steps
Banana Bread Recipe: 5-Ingredient Magic For Quick & Easy Baking
Pineapple Upside Down Cake: How To Make It In 6 Simple Steps
Essential Tips for Strawberry Crunch Cake Success
Creating a flawless strawberry crunch cake becomes easier when you know these insider tricks:
Storage Recommendations
- Refrigeration: Store your completed cake in the refrigerator, loosely covered with plastic wrap or in a cake container. The cream cheese frosting requires cold storage for food safety
- Duration: Your cake stays fresh for up to five days when properly refrigerated
- Serving Temperature: Remove from refrigeration 30 minutes before serving for optimal flavor and texture
- Freezing: You can freeze unfrosted cake layers wrapped tightly in plastic wrap for up to three months
Common Mistakes to Avoid
Frosting Warm Cake: This rookie error melts your frosting, creating a sliding, messy disaster. Patience pays off tremendously here.
Skipping the Crumb Coat: While tempting to rush through, this step prevents crumbs from ruining your smooth final frosting layer.
Over-processing the Cookies: Turning your cookies into powder instead of crumbs results in a coating that lacks the signature crunch texture.
Using Cold Dairy: Room temperature ingredients incorporate smoothly and create superior frosting texture.
Customization Options
Chocolate Strawberry Version: Substitute chocolate cake mix and add cocoa powder to your crunch coating for a chocolate-strawberry combination.
Natural Food Coloring: Replace artificial gelatin with freeze-dried strawberry powder for natural coloring and intense fruit flavor.
Different Cookies: Experiment with vanilla wafers, graham crackers, or even shortbread cookies for varied flavor profiles.
Filling Variations: Add fresh sliced strawberries between your cake layers for additional fruit and moisture.
Troubleshooting Common Issues
Even experienced bakers encounter challenges. Here’s how to handle common strawberry crunch cake problems:
Crunch Coating Won’t Stick
Cause: Your frosting layer might be too thin, or you waited too long and the frosting dried.
Solution: Apply additional frosting to problem areas, then immediately press on more crunch mixture while the frosting remains tacky.
Cake Layers Cracked or Broke
Cause: Removing cakes from pans too quickly or while too warm causes structural damage.
Solution: If breaks occur, use them as interior layers where frosting conceals damage. For severe breaks, transform your cake into a trifle by layering cake pieces with frosting and crunch in a clear serving bowl.
Frosting Too Runny
Cause: Ingredients were too warm, or you added excessive liquid.
Solution: Refrigerate the frosting for 15-20 minutes to firm up, or gradually incorporate more powdered sugar until you achieve proper consistency.
Dry Cake Texture
Cause: Overbaking or using old cake mix can create dry, crumbly layers.
Solution: Brush each layer with simple syrup (equal parts sugar and water, heated until sugar dissolves) before frosting. This adds moisture and prevents dryness.

Frequently Asked Questions About Strawberry Crunch Cake
Can I make strawberry crunch cake ahead of time?
Absolutely! Your strawberry crunch cake actually benefits from overnight refrigeration, which allows flavors to meld beautifully. Prepare the entire cake up to two days before your event, storing it covered in the refrigerator. The crunch coating maintains its texture surprisingly well, though it softens slightly compared to freshly applied coating.
What can I substitute for Golden Oreos in strawberry crunch cake?
Several alternatives work wonderfully. Vanilla wafers create a lighter, more delicate crunch. Graham crackers offer a classic strawberry shortcake flavor profile. Nilla wafers provide sweetness with less flavor interference. For a gluten-free version, use gluten-free vanilla cookies or almond flour combined with sugar.
How do I transport strawberry crunch cake without damage?
Transporting this delicate dessert requires care. Place your cake on a non-slip mat inside a sturdy cake box. If traveling far, refrigerate the cake thoroughly before transport so the frosting firms up completely. Drive carefully, avoiding sudden stops. For very long distances, consider assembling the cake at your destination, bringing components separately.
Can I make strawberry crunch cake without food coloring or gelatin?
Yes! Replace strawberry gelatin with freeze-dried strawberry powder mixed with your cookie crumbs. This provides natural color and concentrated strawberry flavor. For the cake, reduce milk by two tablespoons and add strawberry puree. The resulting cake will have a more natural, less vibrant pink color but authentic strawberry taste.
Why is my strawberry crunch cake crunch coating falling off?
This frustrating issue usually stems from insufficient butter in your crunch mixture or applying coating to dried frosting. Ensure your melted butter thoroughly coats all crumbs. Work quickly after frosting your cake while the surface remains tacky. Press firmly when applying coating to ensure proper adhesion.
How do I cut clean slices of strawberry crunch cake?
Clean slicing requires the right technique. Use a long, sharp knife warmed under hot water, then wiped dry. Make one smooth downward cut without sawing motions. Wipe the knife clean between each slice and rewarm as needed. This prevents dragging the crunch coating and creating messy cuts.
Conclusion
Creating a spectacular strawberry crunch cake in four straightforward steps puts an impressive, crowd-pleasing dessert within your reach. From baking moist cake layers to crafting velvety strawberry frosting, assembling with precision, and finishing with that signature crunchy coating, each step builds toward dessert perfection. This stunning treat delivers nostalgia, flavor, and texture in every single bite, making it ideal for birthdays, holidays, or any celebration deserving something extraordinary.
You now possess all the knowledge needed to create this social media sensation in your own kitchen. The combination of detailed instructions, helpful tips, and troubleshooting advice ensures your success, whether you’re a baking novice or an experienced home baker looking to expand your dessert repertoire.
Ready to create your own strawberry crunch cake masterpiece? Gather your ingredients, clear your counter space, and start baking today! Share your beautiful creation with friends and family, then snap a photo to show off your accomplishment. Don’t forget to save this recipe for future celebrations—once people taste your strawberry crunch cake, they’ll request it repeatedly.
Your dessert table will never be the same once you master this show-stopping recipe. Happy baking, and enjoy every delicious, crunchy bite!