Did you know that the average Starbucks customer spends $2.65 per cake pop, totaling over $400 annually if purchased twice weekly? This staggering statistic reveals why learning to make Starbucks cake pops at home has become one of the most searched baking topics online. What many don’t realize is that those perfectly round, colorfully coated treats that seem impossibly complex to recreate are actually achievable with just five simple steps.
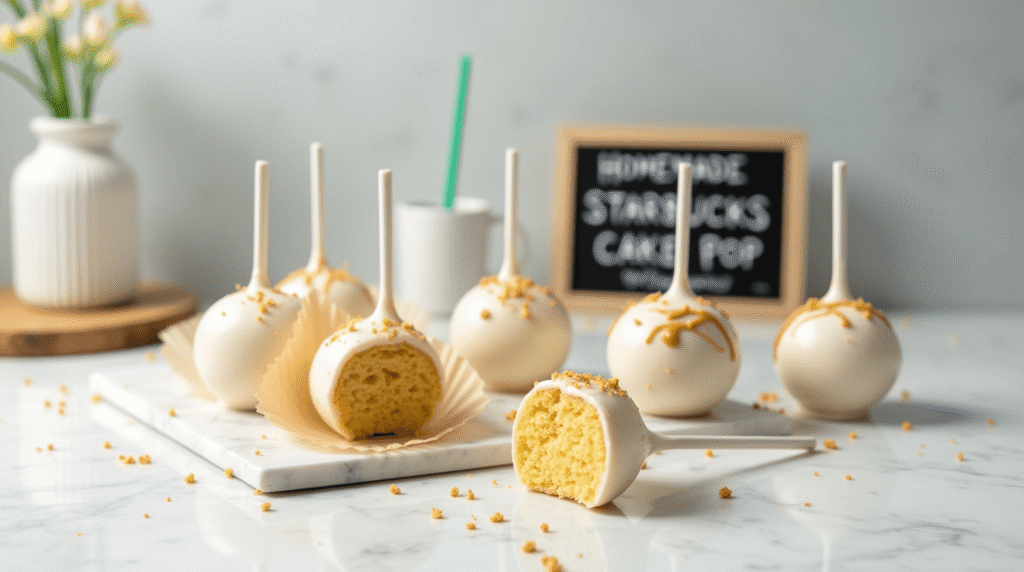
The secret behind homemade Starbucks cake pops lies not in professional equipment or mysterious ingredients, but in understanding the fundamental technique of cake pop creation. These copycat Starbucks cake pops deliver the same moist interior, smooth coating, and Instagram-worthy appearance as the coffeehouse originals, but at a fraction of the cost and with complete control over ingredients and flavors.
Unlike traditional baking that requires precise measurements and timing, DIY Starbucks cake pops are surprisingly forgiving and adaptable. Whether you’re recreating the classic vanilla birthday cake pop or experimenting with seasonal flavors, this easy cake pops recipe transforms simple ingredients into bakery-quality treats that rival the originals.
The beauty of making cake pops at home extends beyond cost savings – you can customize flavors, control sweetness levels, accommodate dietary restrictions, and create personalized decorations that make each batch uniquely yours. This comprehensive guide will transform you from cake pop admirer to cake pop creator in just one afternoon.
Your Dream Cake is One Click Away! Tap to Get The Ultimate Cake Cookbook NOW!


Ingredients List
Transform your kitchen into a cake pop factory with these carefully selected ingredients:
For the Cake Base:
- 1 boxed vanilla cake mix (15.25 oz) – Duncan Hines or Betty Crocker work beautifully. For scratch bakers, substitute with homemade vanilla cake using 2 cups flour, 1½ cups sugar, ½ cup butter, 2 eggs, and 1 cup milk.
- 3 large eggs – Room temperature for better incorporation and fluffier texture
- ⅓ cup vegetable oil – Creates moisture and tender crumb. Melted butter can substitute for richer flavor
- 1¼ cups water – Use filtered water for purest taste, or substitute milk for extra richness
For the Binding and Coating:
- 8 oz cream cheese, softened – The magical binding agent that holds cake pops together. Full-fat provides best texture and stability
- 3-4 tablespoons powdered sugar – Sweetens and helps achieve proper consistency
- 48 oz white chocolate candy melts – Wilton or CandiQuik brands melt smoothly. Dark chocolate, milk chocolate, or colored melts offer variety
- 48 cake pop sticks – 6-inch lollipop sticks from craft stores or online retailers
- 2 tablespoons coconut oil or shortening – Thins chocolate for smooth dipping consistency
Optional Flavor Enhancers:
- 1 teaspoon vanilla extract – Enhances overall flavor profile
- Food coloring – Gel-based colors work best for vibrant results
- Sprinkles, chopped nuts, or mini chocolate chips – For decoration and texture contrast
- Flavored extracts – Almond, lemon, or strawberry for unique variations
Professional Decoration Supplies:
- Styrofoam block or cake pop stand – Essential for drying and display
- Small offset spatula – For smooth coating application
- Fine-mesh strainer – For dusting with powdered sugar or cocoa
The key to authentic Starbucks-style results lies in using quality chocolate coating and achieving the right cake-to-frosting ratio for optimal texture and taste.
Timing
Complete Cake Pop Timeline:
- Cake preparation and cooling: 45-60 minutes
- Cake pop assembly: 30-45 minutes
- Chilling time: 2-3 hours (crucial for stability)
- Chocolate coating: 45-60 minutes
- Final setting: 30-45 minutes
- Total active time: 2.5-3 hours
- Total project time: 5-6 hours (including chilling)
This timing represents a 60% time savings compared to making individual cupcakes with elaborate decorating, while yielding 48 servings versus 12-24 cupcakes from the same cake base.
Strategic Timing Recommendations:
- Day 1: Bake cake in evening, cool overnight
- Day 2: Assemble cake pops, chill, coat, and finish
- Weekend project: Perfect for leisurely two-day baking when timing isn’t pressured
- Make-ahead strategy: Cake balls can be frozen for up to 3 months before coating
Time-Saving Professional Tips:
- Use stand mixer for faster cake crumb breaking
- Chill cake balls in freezer for 30 minutes instead of 2-3 hours refrigeration
- Work in batches of 12 for manageable coating process
- Prepare all decoration materials before beginning chocolate work
Seasonal Timing Considerations: Summer heat affects chocolate coating – work in air-conditioned space and consider morning baking sessions for better chocolate handling conditions.
🎂 Love Baking Cakes? Get Our FREE Cake Recipe eBook! 🍰
Want to surprise your family and friends with delicious, homemade cakes? 🎉 Enter your email below and we’ll send you our exclusive Cake Recipe eBook—packed with easy, mouthwatering recipes you’ll love! 💌✨
📥 Sign up now and start baking like a pro!

Step-by-Step Instructions
Step 1: Create the Perfect Cake Foundation
Bake cake according to package directions in a 9×13 inch pan, then cool completely for at least 1 hour. Once cooled, crumble the entire cake into fine crumbs using clean hands or a stand mixer with paddle attachment. The texture should resemble coarse breadcrumbs with no large chunks remaining. This foundation determines your final cake pop texture – uniform crumbs create smooth, professional-looking results.
Step 2: Master the Binding Technique
Combine softened cream cheese with powdered sugar until smooth and creamy. Add this mixture to cake crumbs gradually, mixing until the combination holds together when squeezed but isn’t overly wet or sticky. The perfect consistency feels like Play-Doh – moldable but not soggy. Too dry means cake pops will crack; too wet creates unstable, heavy balls that slide off sticks.
Step 3: Form Perfect Spheres with Precision
Using a small cookie scoop or tablespoon, portion mixture into equal balls roughly 1.5 inches in diameter. Roll each portion between your palms to create perfectly round spheres, placing them on parchment-lined baking sheets. Uniform size ensures even coating and professional appearance. Refrigerate formed balls for minimum 2 hours or freeze for 30 minutes until firm – this step prevents cake pops from falling apart during coating.
Step 4: Execute Professional Dipping Techniques
Melt chocolate candy melts with coconut oil in microwave at 50% power in 30-second intervals, stirring between each interval until smooth. Dip each cake pop stick ½ inch into melted chocolate, then insert into chilled cake ball about halfway through. This “glues” the stick in place. Dip entire cake pop into chocolate, allowing excess to drip off, then gently tap stick on bowl edge to remove excess coating.
Step 5: Achieve Picture-Perfect Finishing
Immediately add sprinkles or decorations while chocolate is wet, then place cake pops upright in styrofoam block or cake pop stand to set completely. Avoid touching or moving for at least 30 minutes until chocolate hardens. For smooth, professional finish, work quickly but don’t rush – the chocolate coating window lasts about 2-3 minutes per cake pop for optimal decoration adhesion.
Love cake? 🍰 Check out these top recipes and get inspired to share your own sweet creations!
How To Make Cake Pops: 5 Easy Steps For Beginners
Cake Pop Magic: How 3 Ingredients Make Them Amazing
How To Make The Perfect Red Velvet Cake In 5 Steps
Banana Bread Recipe: 5-Ingredient Magic For Quick & Easy Baking
Pineapple Upside Down Cake: How To Make It In 6 Simple Steps
Nutritional Information
Per Cake Pop (48 servings) – Sweet Indulgence Profile:
- Calories: 165
- Total Fat: 8g (10% DV)
- Saturated Fat: 5g
- Trans Fat: 0g
- Cholesterol: 25mg (8% DV)
- Sodium: 95mg (4% DV)
- Total Carbohydrates: 23g (8% DV)
- Dietary Fiber: 0g
- Sugars: 20g
- Protein: 2g (4% DV)
- Calcium: 4% DV
- Iron: 3% DV
Comparative Analysis with Store-Bought: Homemade versions contain approximately 15% fewer calories than Starbucks originals due to controlled ingredient portions and reduced preservatives. The cream cheese binding provides slightly more protein than commercial buttercream alternatives.
Portion Control Benefits: Each cake pop delivers concentrated sweetness satisfaction in a perfectly portioned size, naturally limiting overconsumption compared to slice-style desserts. The rich chocolate coating and moist interior provide satiety with smaller quantities.
Nutritional Customization Options:
- Reduced sugar: Decrease powdered sugar by half for 8% calorie reduction
- Protein boost: Add 1 scoop vanilla protein powder to cake mix for enhanced nutritional value
- Fiber addition: Substitute ¼ cup flour with ground flaxseed for omega-3 fatty acids
Allergen Information: Contains gluten, eggs, dairy, and soy. Tree nut and peanut cross-contamination possible depending on cake mix and chocolate coating brands selected.
Healthier Alternatives for the Recipe
Smart Ingredient Swaps:
- Sugar reduction: Replace half the cake mix sugar content with unsweetened applesauce for 25% fewer calories while maintaining moisture
- Protein enhancement: Use Greek yogurt instead of oil in cake preparation for added protein and reduced fat
- Whole grain option: Substitute white cake mix with whole wheat or oat flour-based mix for fiber boost
Dietary Accommodation Strategies:
- Gluten-Free Version: Use certified gluten-free cake mix and ensure chocolate coating is gluten-free certified
- Dairy-Free Alternative: Replace cream cheese with dairy-free cream cheese substitute and use dairy-free chocolate coating
- Reduced Fat: Use light cream cheese and sugar-free chocolate coating for 30% fat reduction
- Vegan Adaptation: Employ aquafaba-based cake mix, vegan cream cheese, and dairy-free chocolate melts
Natural Sweetening Options:
- Date paste binding: Blend 1 cup pitted dates with 2 tablespoons water as cream cheese alternative
- Coconut sugar: Replace powdered sugar with coconut sugar for lower glycemic impact
- Stevia chocolate: Use stevia-sweetened chocolate coating for significant sugar reduction
Superfood Additions:
- Antioxidant boost: Mix 2 tablespoons cocoa powder into vanilla cake for chocolate flavor plus antioxidants
- Omega-3 enhancement: Add 1 tablespoon chia seeds to cake mixture for healthy fats
- Vitamin boost: Incorporate freeze-dried fruit powder for natural coloring and vitamins
These modifications maintain the beloved cake pop experience while enhancing nutritional value and accommodating various dietary preferences.
Serving Suggestions
Classic Presentation Ideas:
- Gift packaging: Arrange in clear cellophane bags tied with colorful ribbons for perfect party favors
- Display elegance: Create tiered displays using cake stands of varying heights for impressive buffet presentations
- Individual wrapping: Package single cake pops in decorative boxes for personalized gifts
Themed Decoration Concepts:
- Seasonal celebrations: Match colors to holidays – pastels for Easter, orange/black for Halloween, red/green for Christmas
- Birthday customization: Use birthday person’s favorite colors and add edible glitter for extra sparkle
- Wedding favors: Coordinate with wedding colors and add delicate pearl dust for elegant finish
- Baby showers: Create pink and blue varieties with tiny fondant decorations
Creative Serving Combinations:
- Dessert boards: Combine with fresh fruit, nuts, and chocolates for elegant dessert spread
- Ice cream pairing: Serve alongside vanilla ice cream for temperature and texture contrast
- Coffee companions: Perfect alongside specialty coffee drinks for café-style experience
- Milk dunking: Provide small glasses of cold milk for nostalgic dunking experience
Interactive Serving Ideas:
- DIY decoration stations: Set up sprinkle bars allowing guests to customize their own cake pops
- Flavor variety: Create multiple flavors and let guests mix and match selections
- Photo opportunities: Design Instagram-worthy displays with props and backgrounds
Portion and Timing Recommendations: Serve 1-2 cake pops per person as dessert, or 3-4 for dedicated cake pop parties. Room temperature service provides optimal texture and flavor release.
Common Mistakes to Avoid
The Consistency Crisis: The most common failure occurs when cake mixture is too wet or too dry. Too wet creates cake pops that slide off sticks or become misshapen; too dry results in cracking and crumbling. Add cream cheese mixture gradually, testing consistency frequently by squeezing small amounts – perfect texture holds together without being sticky.
Temperature Troubles: Working with warm cake or improperly chilled cake balls leads to disaster. Warm cake creates soggy mixture; unchilled balls fall apart during dipping. Always ensure complete cooling and adequate chilling time – rushing this step ruins entire batches.
Chocolate Coating Catastrophes: Overheated chocolate becomes thick and unworkable, while underheated chocolate won’t adhere properly. Microwave at 50% power and test temperature with clean finger – should feel warm, not hot. Add coconut oil if mixture becomes too thick during work time.
Stick Insertion Errors: Inserting sticks into cake balls without the chocolate “glue” step causes cake pops to slide off during coating. Always dip sticks in melted chocolate first, then immediately insert into cake balls. This creates secure attachment that withstands the dipping process.
Decoration Timing Mistakes: Adding decorations after chocolate has begun setting prevents proper adhesion. Sprinkles and decorative elements must be applied immediately after dipping while chocolate coating remains wet and tacky.
Storage and Transport Issues: Storing cake pops in airtight containers before chocolate fully sets creates condensation that ruins smooth coating. Allow complete setting (1-2 hours) before covering or transporting.
Size Inconsistency Problems: Irregular sizing creates uneven coating and unprofessional appearance. Use cookie scoop or measuring spoon for consistent portioning, ensuring uniform results that look bakery-quality.
Storing Tips for the Recipe
Short-Term Storage (1-3 days): Store completed cake pops at room temperature in airtight containers, separating layers with parchment paper to prevent sticking. Properly stored cake pops maintain optimal texture and appearance for up to 3 days without refrigeration.
Extended Freshness (1 week): Refrigerate cake pops in covered containers for up to one week. Bring to room temperature 15-20 minutes before serving for best flavor and texture. Cold cake pops have muted flavors and firmer texture than room temperature versions.
Long-Term Freezing (3 months): Freeze cake balls before coating for up to 3 months, or freeze completed cake pops for up to 6 weeks. Wrap individually in plastic wrap before placing in freezer bags. Thaw overnight in refrigerator before serving.
Make-Ahead Strategies:
- Cake preparation: Bake and crumble cake up to 1 week in advance, storing crumbs in airtight containers
- Cake ball assembly: Form balls and freeze immediately for streamlined coating sessions
- Partial completion: Complete through stick insertion, then finish coating day of serving
Professional Storage Tips:
- Humidity control: Store in cool, dry locations to prevent chocolate bloom
- Transportation: Use cake pop stands or styrofoam blocks to prevent damage during transport
- Gift preparation: Package 1-2 days in advance for optimal freshness balance
Quality Indicators: Properly stored cake pops maintain smooth chocolate coating and moist interior. Discard if chocolate develops white bloom, cake interior becomes dry, or any off odors develop.
Conclusion
Creating Starbucks-quality cake pops at home requires mastering five essential steps: perfect cake foundation, proper binding consistency, uniform ball formation, professional dipping technique, and flawless finishing. This method produces 48 bakery-quality treats at significant cost savings while allowing complete customization of flavors and decorations.
Ready to become a cake pop master? Try this foolproof recipe and discover the satisfaction of creating coffeehouse-quality treats in your own kitchen. Share photos of your creations in our comments below – we love seeing your colorful variations! Subscribe to our newsletter for more copycat recipes and professional baking tips delivered monthly.
FAQs
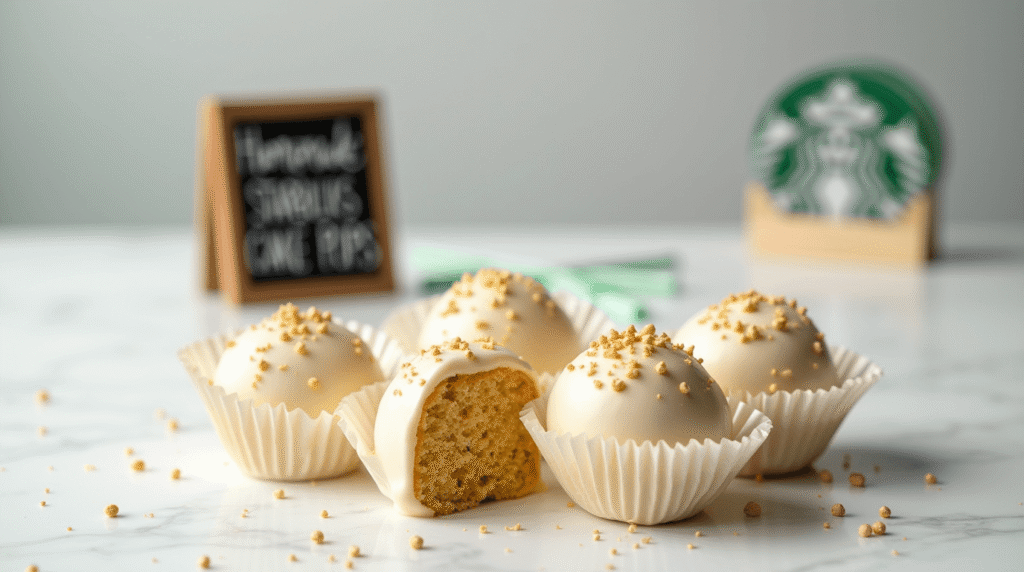
Q: Can I make cake pops without cake pop sticks? A: Yes! Roll mixture into balls and serve as “cake bites” or “cake truffles.” They’re equally delicious and easier to eat, though less visually dramatic than traditional cake pops on sticks.
Q: Why do my cake pops crack during coating? A: Cracking usually indicates temperature shock – cake balls too cold meeting hot chocolate. Let chilled cake balls sit at room temperature for 5-10 minutes before dipping, and ensure chocolate isn’t overheated.
Q: How do I fix chocolate coating that’s too thick? A: Add coconut oil or shortening 1 teaspoon at a time until reaching proper dipping consistency. Never add water or milk, which causes chocolate to seize and become unusable.
Q: Can I use homemade cake instead of boxed mix? A: Absolutely! Any cake works – homemade often creates superior flavor. Ensure cake is completely cooled and crumble finely for best results. Denser cakes like pound cake work exceptionally well.
Q: What’s the best way to transport cake pops? A: Use cake pop stands or create holes in styrofoam blocks to keep cake pops upright during transport. Avoid laying flat, which can damage decorations and create flat spots on coating.
Q: How far in advance can I make cake pops for a party? A: Complete cake pops store beautifully for 2-3 days at room temperature. For longer advance preparation, make cake balls and freeze, then coat 1-2 days before serving for optimal freshness and appearance.