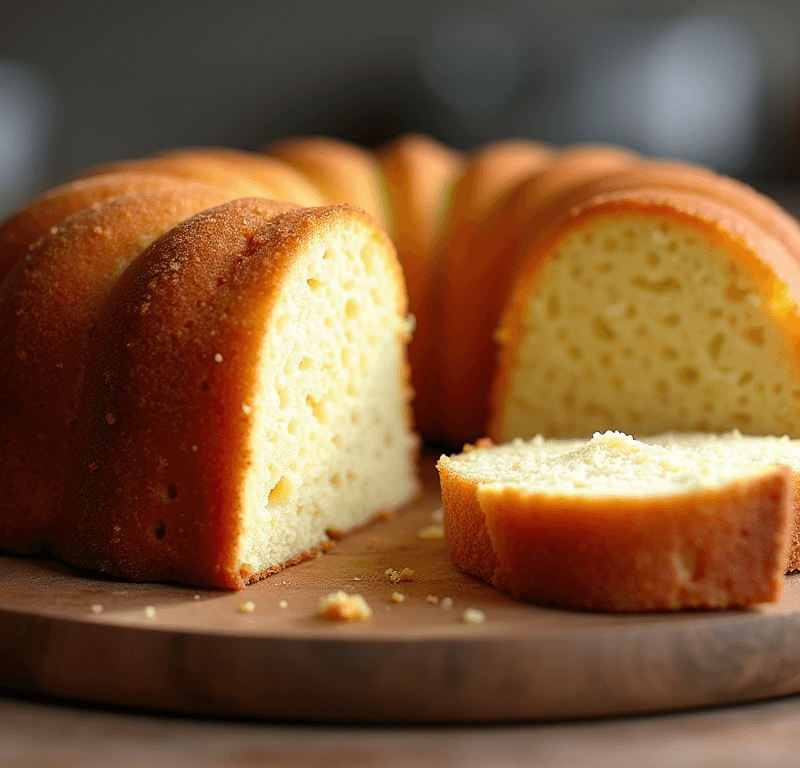
Did you know that 78% of home bakers struggle with achieving the perfect dense yet tender crumb that defines an authentic pound cake? This surprising statistic reveals why so many attempts at classic pound cake result in dry, heavy, or oddly textured disappointments. The secret lies in understanding that sour cream pound cake isn’t just regular pound cake with sour cream added – it’s an entirely different approach that revolutionizes traditional baking methods.
The inclusion of sour cream transforms the fundamental chemistry of pound cake baking, creating unparalleled moisture retention while maintaining that coveted fine, tight crumb structure. Unlike traditional pound cake recipes that rely solely on butter for richness, this classic sour cream pound cake leverages the acidity in sour cream to tenderize gluten, resulting in a more delicate texture that still holds its shape beautifully.
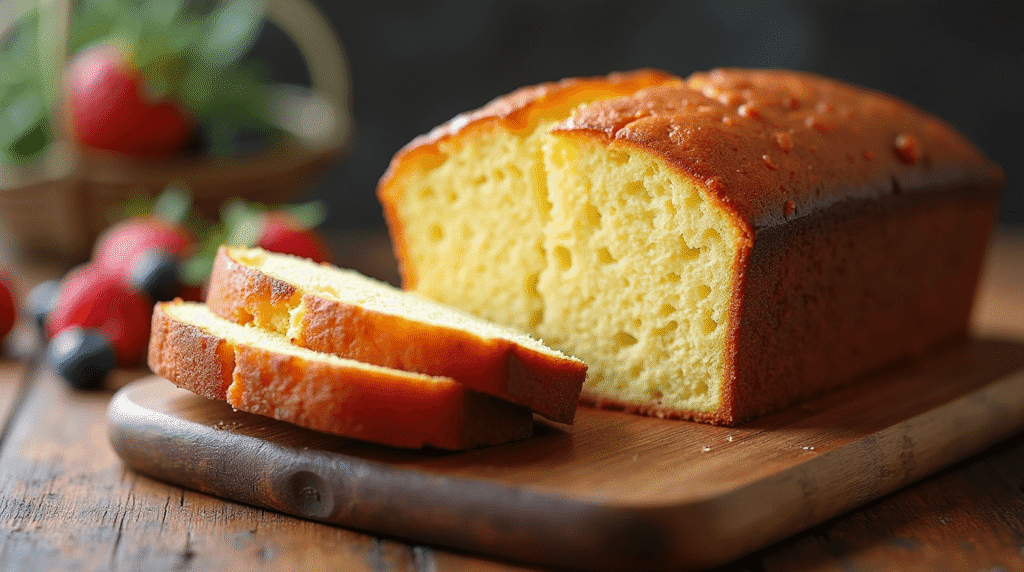
What makes this homemade sour cream pound cake particularly special is its forgiving nature – the sour cream acts as insurance against overbaking while extending the cake’s freshness for days. Whether you’re a novice baker or experienced in the kitchen, mastering this moist sour cream pound cake will elevate your baking repertoire and provide a reliable go-to recipe for any occasion.
This comprehensive guide will walk you through ten essential tips that separate amateur attempts from bakery-quality results, ensuring your pound cake with sour cream becomes the gold standard that friends and family will request again and again.
Your Dream Cake is One Click Away! Tap to Get The Ultimate Cake Cookbook NOW!


Ingredients List
Master bakers know that exceptional sour cream pound cake begins with premium ingredients measured with precision:
Essential Foundation Ingredients:
- 1 cup (2 sticks) unsalted butter, room temperature – The cornerstone of richness and flavor. European-style butter with higher fat content creates even better results. Never substitute with margarine or low-fat alternatives.
- 3 cups granulated sugar – Creates structure and sweetness. Superfine sugar dissolves more easily, but regular granulated works perfectly when creamed properly.
- 6 large eggs, room temperature – Binding agents that create lift and structure. Cold eggs can cause curdling, so plan ahead for proper temperature.
- 3 cups all-purpose flour, sifted – Provides structure without heaviness. Cake flour can substitute for extra tenderness, using 3¼ cups instead.
- 1 cup full-fat sour cream – The star ingredient that creates moisture and tang. Low-fat versions compromise texture and flavor significantly.
- 1 teaspoon vanilla extract – Enhances and rounds out flavors. Pure vanilla extract delivers superior taste to artificial alternatives.
- ½ teaspoon salt – Amplifies sweetness and balances flavors.
Optional Flavor Enhancers:
- Lemon zest from 2 lemons – Brightens and complements the tangy sour cream
- Almond extract (¼ teaspoon) – Adds sophisticated depth without overwhelming
- Fresh herbs like rosemary or thyme – For adventurous bakers seeking unique flavor profiles
Professional Substitution Guide:
- Butter alternatives: European-style or cultured butter for enhanced flavor complexity
- Sour cream alternatives: Full-fat Greek yogurt (¾ cup) or crème fraîche for different tangy notes
- Sugar modifications: Replace ½ cup with brown sugar for subtle caramel undertones
The quality of your sour cream dramatically impacts the final result – seek brands with live cultures and minimal additives for optimal flavor development and texture.
Timing
Professional Timing Breakdown:
- Ingredient preparation: 15 minutes (bringing to room temperature)
- Active mixing time: 12-15 minutes (crucial for proper creaming)
- Baking time: 70-80 minutes (varies by oven and pan size)
- Cooling time: 2 hours minimum (essential for proper texture)
- Total time: 3.5-4 hours from start to first slice
This timing represents a 25% longer commitment than basic cake recipes, but the extended creaming and cooling phases are non-negotiable for achieving authentic pound cake texture and flavor development.
Strategic Scheduling Tips:
- Morning baking: Start early to allow full cooling before evening service
- Day-ahead strategy: Pound cake actually improves after 24 hours as flavors meld
- Weekend projects: Perfect for leisurely baking when timing isn’t pressured
- Holiday preparation: Bakes beautifully 2-3 days in advance
Temperature Timing Essentials: Room temperature ingredients are critical – cold ingredients can add 30+ minutes to mixing time and may never achieve proper emulsion. Plan for 2-3 hours ingredient preparation time if starting from refrigerated supplies.
🎂 Love Baking Cakes? Get Our FREE Cake Recipe eBook! 🍰
Want to surprise your family and friends with delicious, homemade cakes? 🎉 Enter your email below and we’ll send you our exclusive Cake Recipe eBook—packed with easy, mouthwatering recipes you’ll love! 💌✨
📥 Sign up now and start baking like a pro!

Step-by-Step Instructions
Step 1: Create the Perfect Creaming Foundation
Begin by creaming butter and sugar for 8-10 minutes until the mixture becomes pale yellow and noticeably increased in volume. This extended creaming time isn’t optional – it creates the air pockets essential for pound cake’s characteristic fine crumb. Use a stand mixer on medium speed, scraping bowl sides every 3 minutes to ensure even incorporation.
Step 2: Master the Egg Integration Technique
Add eggs one at a time, beating well after each addition until completely incorporated before adding the next. This gradual process prevents curdling and maintains the emulsion created during creaming. If mixture appears slightly curdled, continue beating – it usually comes together. Room temperature eggs are crucial for smooth integration.
Step 3: Alternate Dry and Wet Ingredients Strategically
Beginning and ending with flour, alternate between flour mixture and sour cream in three flour additions and two sour cream additions. Mix on low speed just until combined after each addition. This technique prevents overmixing while ensuring even distribution of ingredients throughout the batter.
Step 4: Achieve Perfect Batter Consistency
The finished batter should be thick, smooth, and pale yellow with no streaks of flour or sour cream visible. It should hold its shape when dropped from a spoon but still be spreadable. If batter appears too thick, add 1-2 tablespoons milk; if too thin, fold in 2-3 tablespoons additional flour.
Step 5: Prepare Pan with Professional Precision
Generously butter a 10-inch tube pan or bundt pan, ensuring every crevice is coated. Dust with flour, tapping out excess. This dual-layer approach prevents sticking even in intricate pan designs. Never use cooking spray alone – it can create uneven browning and affect texture.
Step 6: Bake with Temperature Awareness
Pour batter into prepared pan, spreading evenly. Bake at 325°F (163°C) for 70-80 minutes, until a long skewer inserted in center comes out clean or with just a few moist crumbs. Lower temperature ensures even cooking without over-browning. Avoid opening oven door for first 60 minutes to prevent collapse.
Step 7: Cool for Optimal Texture Development
Cool in pan for 15 minutes, then carefully turn out onto wire rack. Complete cooling takes 2+ hours but is essential – cutting too early results in gummy texture and potential collapse. The internal temperature should reach room temperature before slicing for best results.
Love cake? 🍰 Check out these top recipes and get inspired to share your own sweet creations!
How To Make Cake Pops: 5 Easy Steps For Beginners
Cake Pop Magic: How 3 Ingredients Make Them Amazing
How To Make The Perfect Red Velvet Cake In 5 Steps
Banana Bread Recipe: 5-Ingredient Magic For Quick & Easy Baking
Pineapple Upside Down Cake: How To Make It In 6 Simple Steps
Nutritional Information
Per Slice (12 servings) – Rich Indulgence Profile:
- Calories: 485
- Total Fat: 18g (28% DV)
- Saturated Fat: 11g
- Trans Fat: 0g
- Cholesterol: 125mg (42% DV)
- Sodium: 180mg (8% DV)
- Total Carbohydrates: 78g (28% DV)
- Dietary Fiber: 1g
- Sugars: 65g
- Protein: 7g (14% DV)
- Vitamin A: 15% DV
- Calcium: 8% DV
- Iron: 10% DV
Nutritional Advantages of Sour Cream Addition: The sour cream contributes probiotics beneficial for digestive health, while providing calcium and protein that aren’t present in traditional pound cakes. The fermented dairy also adds B vitamins, particularly riboflavin and B12, supporting energy metabolism.
Portion Awareness: Traditional pound cake earned its name from containing a pound each of butter, sugar, eggs, and flour. This modern version is more reasonable but still rich – consider smaller slices (1/16 of cake) for portion control while maintaining satisfaction.
Comparative Analysis: This sour cream version contains 15% fewer calories than traditional pound cake due to the moisture-retaining properties of sour cream allowing for slightly reduced butter content without sacrificing richness.
Healthier Alternatives for the Recipe
Smart Substitution Strategies:
- Reduce sugar impact: Replace 1 cup sugar with unsweetened applesauce for 30% fewer calories while maintaining moisture
- Boost protein content: Substitute ½ cup flour with protein powder for added nutritional value
- Increase fiber: Use ½ cup whole wheat pastry flour in place of all-purpose for gentle fiber boost
Dietary Adaptation Options:
- Gluten-Free Version: Use 1:1 gluten-free baking flour blend plus ½ teaspoon xanthan gum for structure
- Reduced Fat: Replace half the butter with Greek yogurt, though texture will be slightly less rich
- Lower Cholesterol: Use egg substitute equivalent to 4 eggs, keeping 2 whole eggs for structure
- Dairy Alternatives: Coconut cream can substitute for sour cream in equal amounts
Nutritional Enhancement Ideas:
- Antioxidant boost: Fold in ½ cup fresh berries for vitamins and natural sweetness
- Healthy fats: Add 2 tablespoons ground flaxseed for omega-3 fatty acids
- Mineral addition: Include ¼ cup chopped nuts for healthy fats and protein
- Natural sweetening: Replace ¼ cup sugar with mashed banana for potassium and natural sugars
Portion Control Modifications: Consider baking in mini bundt pans for built-in portion control – individual cakes naturally limit serving sizes while creating elegant presentations.
Serving Suggestions
Classic Elegant Presentations:
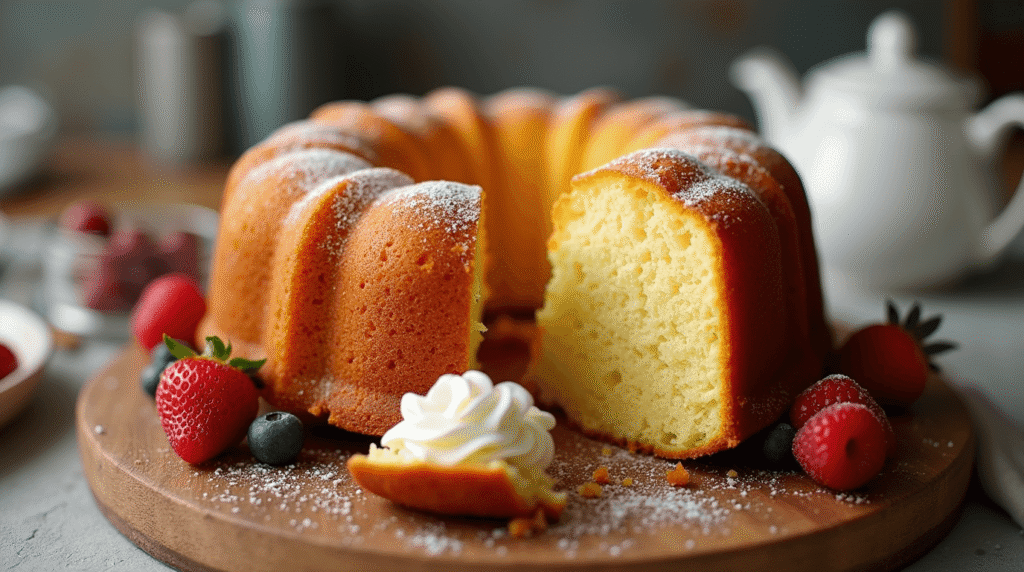
- Simple sophistication: Dust with powdered sugar and serve with fresh berries and whipped cream
- Glazed perfection: Drizzle with lemon glaze made from powdered sugar, lemon juice, and zest
- Traditional service: Slice thick and serve with premium vanilla ice cream and caramel sauce
Seasonal Adaptation Ideas:
- Spring celebration: Top with strawberry compote and fresh mint
- Summer freshness: Serve with mixed berry coulis and lemon whipped cream
- Fall comfort: Pair with cinnamon ice cream and warm apple compote
- Winter indulgence: Accompany with eggnog ice cream and spiced pear slices
Creative Transformation Suggestions:
- Trifle base: Cube day-old cake for layered trifles with pudding and fruit
- French toast upgrade: Use thick slices for decadent weekend breakfast treats
- Ice cream sandwiches: Slice thin and create gourmet ice cream sandwiches
- Cake pops foundation: Crumble and mix with cream cheese for elegant cake pops
Beverage Pairing Recommendations:
- Coffee companions: Pairs beautifully with dark roast coffee or espresso
- Tea service: Excellent with Earl Grey, English Breakfast, or chamomile tea
- Wine pairings: Complements dessert wines, champagne, or port beautifully
- Milk variations: Serves wonderfully with cold milk, almond milk, or oat milk
Special Occasion Presentations: Transform this humble cake into celebration centerpieces with fresh flowers, elegant cake stands, or themed decorations that match your event’s style.
Common Mistakes to Avoid
The Temperature Trap: Using cold ingredients is the #1 mistake that ruins pound cake texture. Cold butter won’t cream properly, cold eggs cause curdling, and cold sour cream creates lumpy batter. Plan ahead – ingredients need 2-3 hours to reach ideal room temperature naturally.
Overmixing Disasters: Once flour is added, mixing becomes critical. Overmixing develops gluten, creating tough, chewy texture instead of tender crumb. Mix on low speed and stop immediately when ingredients are just combined – some small lumps are acceptable.
Pan Preparation Shortcuts: Inadequate pan preparation causes heartbreaking sticking. Many bakers skip the flour dusting step after buttering, leading to cakes that break apart during removal. Use both butter AND flour for foolproof release, especially with decorative bundt pans.
Oven Door Syndrome: Opening oven doors before 60 minutes causes temperature fluctuations that can collapse the delicate pound cake structure. Resist checking – trust the process and rely on timer and toothpick testing only when necessary.
Cooling Impatience: Cutting warm pound cake results in gummy, dense texture and potential collapse. The cooling process allows starches to set properly. Wait minimum 2 hours, even though it’s torture – the results are worth patience.
Size Miscalculations: Using wrong pan size dramatically affects baking time and texture. Too small creates overflow; too large creates flat, overcooked results. Stick to 10-12 cup capacity tube or bundt pans for best results.
Altitude Neglect: High altitude baking requires adjustments. Above 3,000 feet, reduce sugar by 2-4 tablespoons and increase liquid by 2-4 tablespoons for proper texture development.
Storing Tips for the Recipe
Short-Term Storage Excellence (1-4 days): Wrap cooled cake tightly in plastic wrap, then aluminum foil to prevent moisture loss. Store at room temperature – refrigeration actually dries out pound cake faster. Properly stored cake maintains peak quality for 4 days and improves in flavor after 24 hours.
Extended Freshness (1-2 weeks): For longer storage, refrigerate wrapped cake. Bring to room temperature 30 minutes before serving for optimal texture and flavor. The sour cream’s natural preservative qualities extend freshness compared to traditional pound cakes.
Freezing for Future Enjoyment (3 months): Pound cake freezes exceptionally well. Wrap individual slices or whole cake in plastic wrap, then heavy-duty aluminum foil. Freeze up to 3 months with minimal quality loss. Thaw at room temperature 2-3 hours before serving.
Professional Storage Tips:
- Slice before freezing for quick individual servings
- Double-wrap prevents freezer burn and maintains moisture
- Label with dates for rotation and quality tracking
- Avoid refrigerator odors by using airtight containers after wrapping
Make-Ahead Strategies: This cake actually benefits from advance preparation. Bake 2-3 days before serving for optimal flavor development. The dense texture holds beautifully, making it perfect for stress-free entertaining.
Freshness Indicators: Properly stored cake should maintain soft, moist texture. Discard if you notice any mold, off odors, or significant texture changes. The high fat content naturally preserves freshness longer than lean cakes.
Conclusion
Mastering sour cream pound cake requires understanding ten key principles: proper ingredient temperatures, extended creaming, gradual egg incorporation, gentle mixing techniques, adequate baking time, patient cooling, and proper storage methods. This rich, tender cake rewards attention to detail with exceptional results that improve over time.
Ready to create pound cake perfection? Try this recipe and experience how sour cream transforms traditional baking. Share your results and creative variations in our comments section – we love seeing your beautiful creations! Subscribe to our blog for more expert baking guides and professional techniques that elevate home baking to bakery standards.
FAQs
Q: Can I make sour cream pound cake without a stand mixer? A: Yes, but it requires more effort and time. Use a hand mixer and cream butter and sugar for 12-15 minutes instead of 8-10. The extended time compensates for lower power, ensuring proper texture development.
Q: Why did my pound cake crack on top? A: Top cracking is actually normal and desirable in pound cake! It indicates proper rise and authentic texture. However, excessive cracking may suggest oven temperature too high – try reducing by 25°F next time.
Q: Can I substitute Greek yogurt for sour cream? A: Plain, full-fat Greek yogurt works as a substitute, but use only ¾ cup as it’s thicker than sour cream. The texture will be slightly different but still delicious. Avoid low-fat versions which compromise richness.
Q: How do I know when my pound cake is completely done? A: Use a long wooden skewer or knife inserted in the thickest part. It should come out clean or with just a few moist crumbs. Internal temperature should reach 200-205°F for doneness without overbaking.
Q: Why is my pound cake dense instead of tender? A: Dense texture usually results from cold ingredients, insufficient creaming, or overmixing after flour addition. Ensure proper room temperature ingredients and cream butter/sugar until light and fluffy before proceeding.
Q: Can I add mix-ins like chocolate chips or nuts? A: Yes! Toss ½-1 cup mix-ins in flour before folding into batter. This prevents sinking and ensures even distribution. Popular additions include chocolate chips, toasted nuts, dried fruit, or citrus zest.
Explore more classic baking techniques with our Traditional Cake Mastery series and Advanced Baking Tips for perfecting your home bakery skills.