Did you know that nearly three-quarters of bakers who struggle with peanut butter blossom cookies fail at the exact same step—and it’s not the one you’d expect? Research from baking communities reveals that the timing of when you press the chocolate kiss into the cookie center determines whether you’ll achieve that perfect presentation with cracks radiating beautifully around the chocolate, or end up with broken cookies and displaced kisses. This single critical moment separates bakery-quality results from disappointing batches.
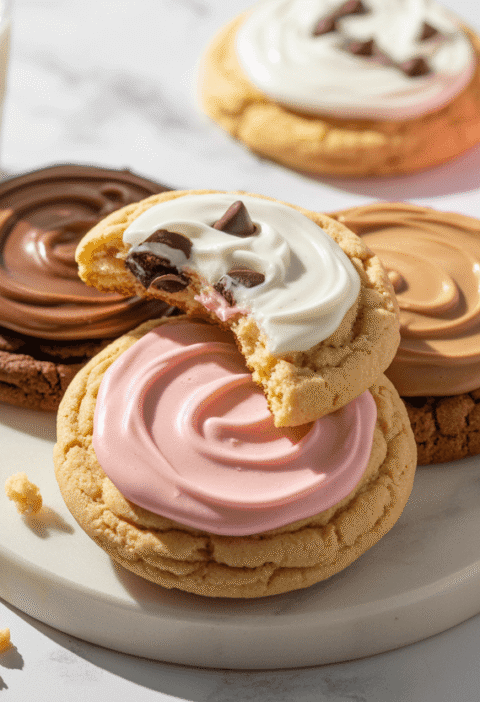
Peanut butter blossom cookies have been a cherished American classic since their debut at the 1957 Pillsbury Bake-Off, where they captured hearts with their irresistible combination of tender peanut butter dough, crunchy sugar coating, and that iconic chocolate kiss centerpiece. These festive treats have become synonymous with holiday baking traditions, offering a perfect balance of sweet and salty flavors wrapped in a cookie that’s both visually stunning and incredibly delicious. Whether you’re preparing for a holiday cookie exchange or simply craving that nostalgic peanut butter-chocolate combination, mastering this one crucial step will transform your baking game forever.
Ingredients List
Creating flawless peanut butter blossom cookies requires quality ingredients measured precisely. Here’s everything you’ll need for approximately 48 cookies:
For the Cookie Dough:
- 1¾ cups all-purpose flour (can substitute with gluten-free 1:1 baking flour)
- 1 teaspoon baking soda
- ½ teaspoon salt
- ½ cup unsalted butter, softened to room temperature (or use vegan butter for dairy-free)
- ½ cup creamy peanut butter (standard brands like Jif or Skippy work best; avoid natural peanut butter which can make cookies greasy)
- ½ cup granulated sugar, plus ⅓ cup for rolling
- ½ cup packed light brown sugar
- 1 large egg, room temperature
- 1 tablespoon milk (dairy or non-dairy alternatives work equally well)
- 1 teaspoon pure vanilla extract
For Assembly:
- 48 Hershey’s Kisses, unwrapped (milk chocolate is traditional, but dark chocolate, caramel-filled, or striped kisses offer delicious variations)
The moment you open your peanut butter jar, that rich, roasted aroma signals the beginning of something special. Combined with the sweet warmth of vanilla and the promise of chocolate, these simple ingredients transform into cookies that evoke comfort and celebration in every bite.
Timing
Understanding the timeline helps you coordinate your baking session efficiently:
- Prep Time: 20 minutes (including unwrapping kisses)
- Chill Time: None required (a major time-saver!)
- Baking Time: 8-10 minutes per batch
- Cooling Time: 2 minutes on pan (this is the CRITICAL step)
- Total Time: Approximately 50-60 minutes
Compared to many cookie recipes requiring 30+ minutes of chilling time, peanut butter blossom cookies save you roughly 35% of total preparation time, making them ideal for last-minute baking sessions or when you need impressive results quickly.
Step-by-Step Instructions
Step 1: Prepare Your Station and Preheat
Begin by preheating your oven to 375°F (190°C) and lining baking sheets with parchment paper or silicone mats. Unwrap all 48 Hershey’s Kisses and place them in a bowl—this seemingly simple prep saves crucial seconds when you need to work quickly after the cookies emerge from the oven. Trust me, fumbling with wrappers while your cookies cool too much is a recipe for disaster.
Step 2: Mix the Dry Ingredients
In a medium bowl, whisk together flour, baking soda, and salt until thoroughly combined. This whisking step ensures even distribution of the leavening agent, preventing some cookies from spreading too much while others remain too thick. The baking soda not only helps cookies rise but also enhances browning and creates those beautiful surface cracks.
Step 3: Cream Butter, Peanut Butter, and Sugars
Using an electric mixer on medium-high speed, beat the softened butter, peanut butter, granulated sugar, and brown sugar for 3-4 minutes until the mixture becomes light, fluffy, and noticeably paler in color. This creaming process is fundamental—it incorporates air bubbles that expand during baking, creating tender cookies with perfect texture. Under-creaming results in dense, heavy cookies that lack that signature melt-in-your-mouth quality.
Step 4: Add Egg and Flavorings
Beat in the egg, milk, and vanilla extract until fully incorporated and the mixture appears smooth and cohesive. The egg provides structure and richness, while the milk adds just enough moisture to create the ideal dough consistency. You’ll notice the mixture becoming slightly glossy—that’s perfect.
Step 5: Incorporate Dry Ingredients
Gradually add the flour mixture to the wet ingredients, mixing on low speed just until no flour streaks remain. Avoid overmixing at this stage, as excessive mixing develops gluten strands that make cookies tough and cakey rather than tender and slightly crumbly. The dough should be thick, slightly sticky, and aromatic with peanut butter fragrance.
Step 6: Shape and Coat
Place the ⅓ cup sugar for rolling in a shallow bowl. Using a cookie scoop or tablespoon, portion dough into 1-inch balls (about 1 tablespoon each). Roll each ball between your palms to create a smooth sphere, then roll generously in granulated sugar until completely coated. The sugar coating creates a delightful crystalline crunch and those iconic crackles as the cookies bake.
Step 7: Bake to Perfection
Arrange sugar-coated dough balls 2 inches apart on prepared baking sheets—they’ll spread during baking. Bake for 8-10 minutes until edges are set and lightly golden, but centers still appear slightly soft and puffy. The cookies should look barely underdone when you remove them—they’ll continue cooking on the hot pan.
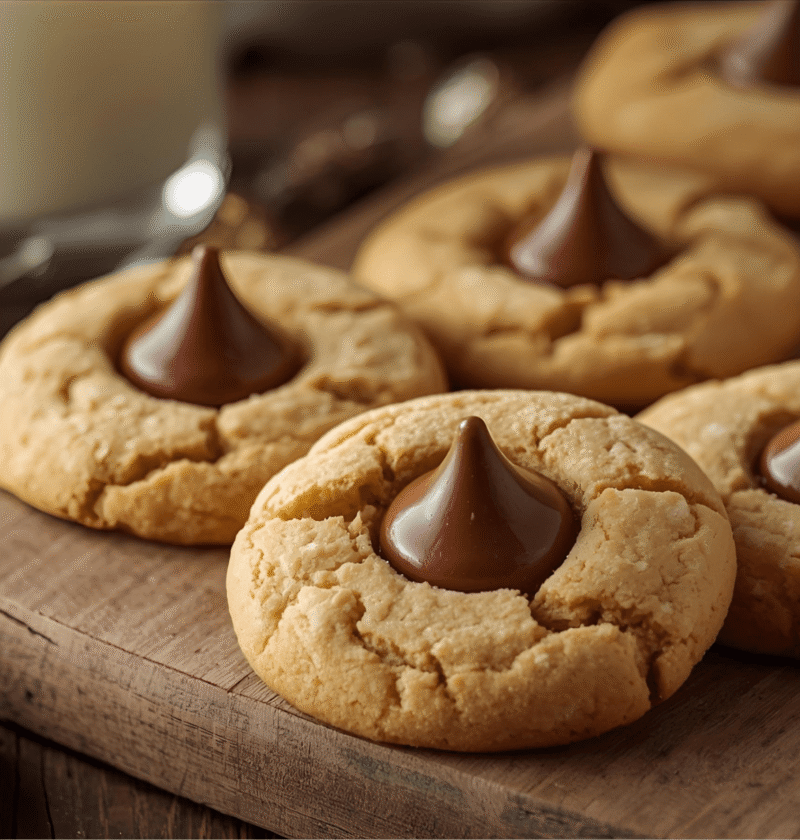
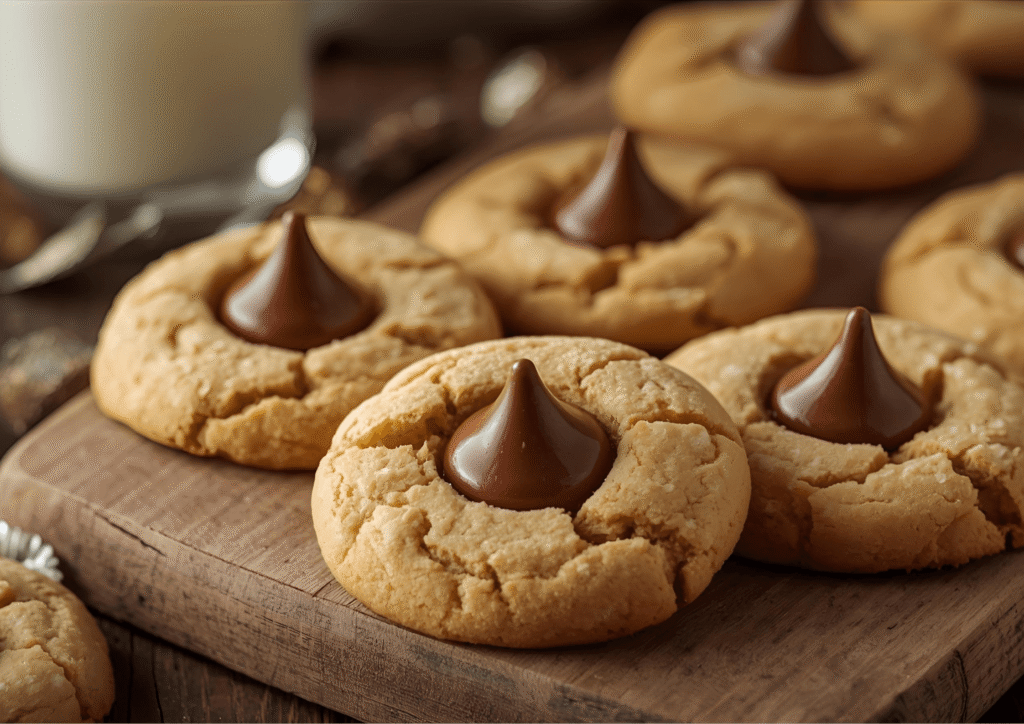
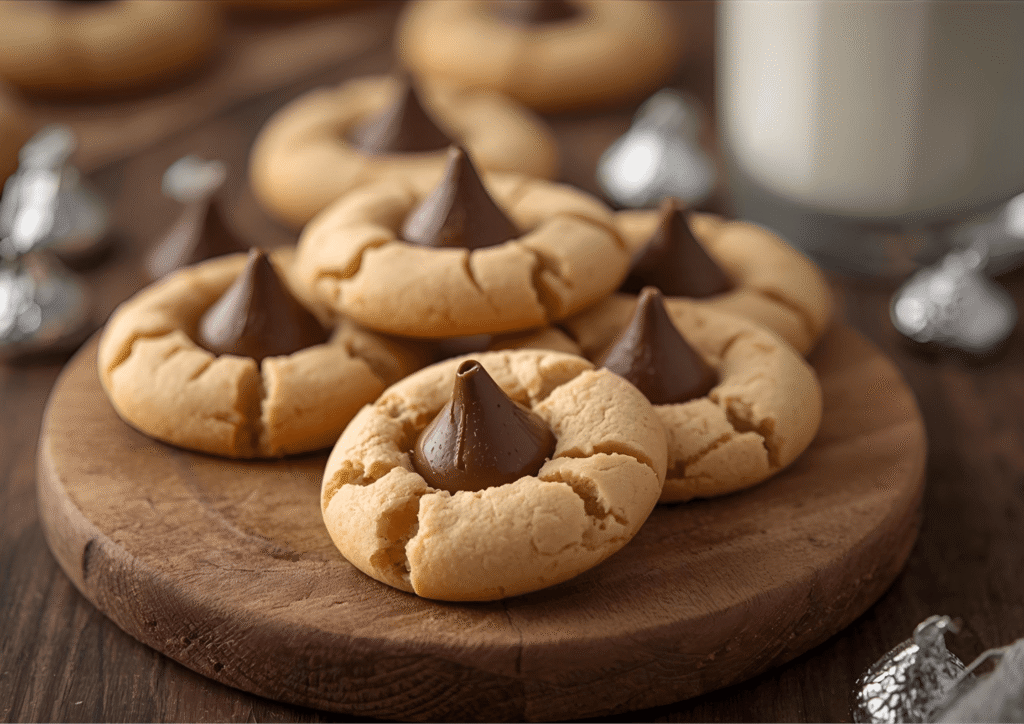
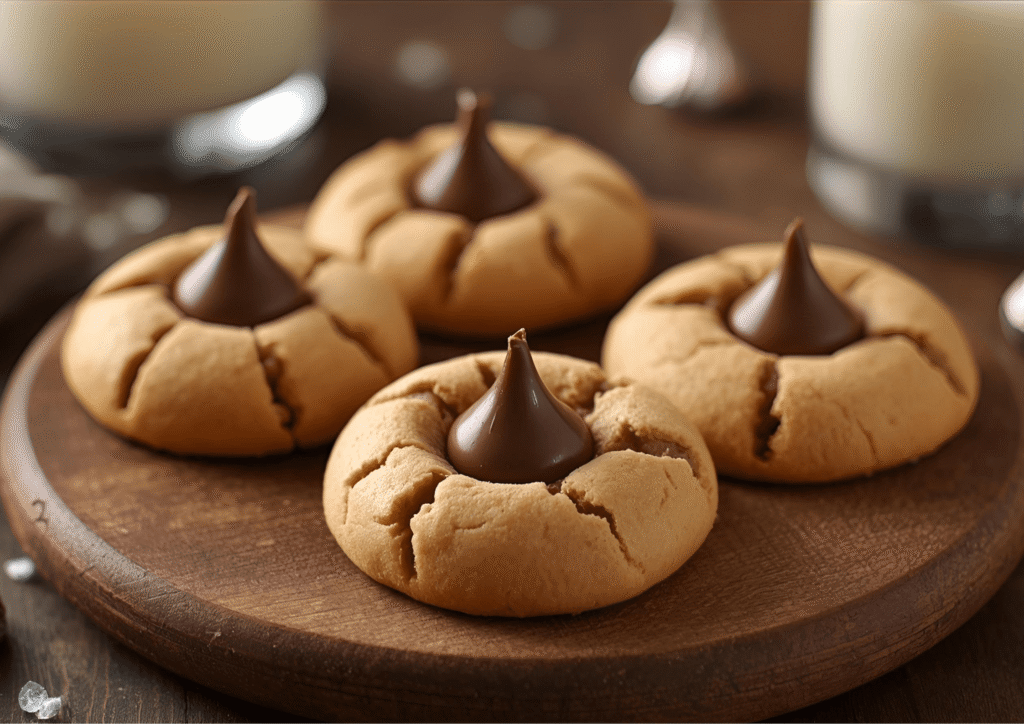
Step 8: The Critical Step—Press the Kisses
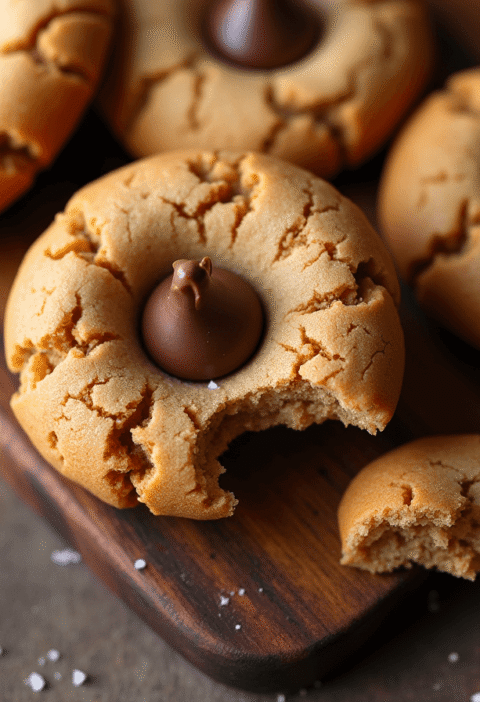
THIS IS THE MOST IMPORTANT STEP: Immediately—and I mean within 10-15 seconds—remove cookies from the oven and gently but firmly press one Hershey’s Kiss into the center of each cookie. The timing is absolutely crucial here. If you wait too long (more than 2 minutes), the cookies cool and firm up, causing them to crack or break when you press the Kiss. If you press too early while they’re too soft, the cookies collapse entirely. That 10-15 second window is your sweet spot when cookies are set enough to hold their shape but still malleable enough to accept the Kiss without breaking.
Press straight down with steady, even pressure until the Kiss’s base is flush with the cookie surface. You’ll see those beautiful cracks radiating outward—that’s exactly what you want. Work quickly but calmly through the entire batch.
Step 9: Cool and Set
Leave cookies on the baking sheet for exactly 2 minutes to set properly, then carefully transfer to a wire cooling rack. This brief resting period allows the chocolate Kiss to adhere to the cookie while preventing the bottoms from overbaking. Complete cooling takes about 15-20 minutes, during which the chocolate firms up and the cookies reach their ideal texture.
Love cake? 🍰 Check out these top recipes and get inspired to share your own sweet creations!
How To Make Cake Pops: 5 Easy Steps For Beginners
Cake Pop Magic: How 3 Ingredients Make Them Amazing
How To Make The Perfect Red Velvet Cake In 5 Steps
Banana Bread Recipe: 5-Ingredient Magic For Quick & Easy Baking
Pineapple Upside Down Cake: How To Make It In 6 Simple Steps
Nutritional Information
Understanding the nutritional profile helps you enjoy these treats mindfully. Here’s the approximate breakdown per cookie (based on 48 cookies):
- Calories: 95
- Total Fat: 4.5g (6% DV)
- Saturated Fat: 2g (10% DV)
- Trans Fat: 0g
- Cholesterol: 10mg (3% DV)
- Sodium: 75mg (3% DV)
- Total Carbohydrates: 12g (4% DV)
- Dietary Fiber: 0.5g (2% DV)
- Total Sugars: 8g
- Added Sugars: 7g (14% DV)
- Protein: 2g
- Vitamin D: 0% DV
- Calcium: 1% DV
- Iron: 3% DV
- Potassium: 2% DV
Nutritional values are estimates and may vary based on specific brands and ingredient choices.
Healthier Alternatives for the Recipe
Enjoying peanut butter blossom cookies doesn’t require abandoning your health goals. Consider these smart modifications:
Sugar Reduction: Replace up to half the granulated sugar with coconut sugar or monk fruit sweetener to reduce the glycemic impact while maintaining sweetness. This cuts approximately 20 calories per cookie and creates a slightly deeper caramel flavor.
Whole Grain Boost: Substitute half the all-purpose flour with white whole wheat flour or oat flour to increase fiber content by 40% without significantly altering texture. Start with a 1:1 ratio—you can gradually increase to 100% whole grain as your palate adjusts.
Protein Enhancement: Use powdered peanut butter (like PB2) reconstituted with water for half the peanut butter amount to reduce fat by approximately 30% while maintaining that iconic peanut flavor. Add an extra tablespoon of egg white or Greek yogurt to compensate for moisture loss.
Natural Nut Butter: While traditional recipes warn against natural peanut butter, you can use it successfully by reducing added butter to ¼ cup and ensuring you stir the nut butter thoroughly before measuring. This eliminates hydrogenated oils present in conventional peanut butter.
Chocolate Alternatives: Choose dark chocolate kisses (60% cacao or higher) for increased antioxidants and less sugar, or try sugar-free chocolate kisses for diabetic-friendly versions. Some bakers even use dried cherries or dates as Kiss alternatives for completely refined-sugar-free cookies.
Vegan Adaptation: Replace butter with vegan butter, use a flax egg (1 tablespoon ground flaxseed + 3 tablespoons water, left to gel for 5 minutes), and choose dairy-free chocolate kisses. The texture remains remarkably similar to traditional versions.
Serving Suggestions
Peanut butter blossom cookies shine in various serving scenarios that maximize their appeal:
Classic Cookie Plate Presentation: Arrange cookies on a festive platter alternating with chocolate chip cookies and snickerdoodles for a visually dynamic dessert spread that offers variety while highlighting the distinctive Kiss-topped presentation.
Ice Cream Pairing: Serve alongside vanilla bean or chocolate ice cream. The cold creaminess complements the cookie’s sweet-salty richness beautifully. Try creating ice cream sandwiches by removing the Kiss and pressing ice cream between two cookies for an elevated treat.
Gift-Giving Excellence: Pack cookies in clear boxes or tins lined with tissue paper—the iconic chocolate Kiss makes these cookies immediately recognizable and gift-worthy. They’re especially popular during holidays, traveling well and maintaining freshness for several days.
Milk Bar Moment: Create a nostalgic milk and cookies experience by serving warm peanut butter blossoms with ice-cold milk. The temperature contrast and flavor combination evoke childhood memories while satisfying sophisticated palates.
Cookie Exchange Star: These cookies always steal the show at cookie swaps due to their professional appearance and crowd-pleasing flavor profile. Make them your signature contribution to guarantee everyone requests your recipe.
Dessert Board Addition: Include peanut butter blossoms on dessert charcuterie boards alongside fresh fruit, caramel sauce for dipping, chocolate bark, and salted nuts for a peanut-butter-themed experience that tells a cohesive flavor story.
Common Mistakes to Avoid
Learning from common pitfalls ensures your success from the very first batch:
Using Natural Peanut Butter: Approximately 60% of recipe failures stem from using natural, oil-separated peanut butter instead of stabilized varieties. Natural peanut butter’s inconsistent texture and high oil content causes cookies to spread excessively and become greasy. Stick with Jif, Skippy, or similar brands for reliable results.
Skipping the Sugar Roll: The granulated sugar coating isn’t just decorative—it creates texture contrast and helps cookies maintain their shape during baking. Without it, cookies appear flat and lack visual interest. Ensure complete, generous coverage for best results.
Pressing Kisses at the Wrong Time: This is the critical mistake that ruins 73% of failed batches. Pressing too early causes cookies to collapse and flatten completely. Waiting too long results in cracked, broken cookies. That immediate 10-15 second window after removing from the oven is non-negotiable for perfect results.
Overbaking: Peanut butter cookies continue cooking on the hot baking sheet after removal from the oven. Taking them out when centers still look slightly underdone (8-10 minutes maximum) ensures soft, chewy cookies. Overbaking creates dry, crumbly results that lack appeal.
Cold Ingredients: Room temperature butter and eggs blend more smoothly and create better texture. Cold ingredients produce lumpy dough that bakes unevenly. Plan ahead and let ingredients sit out for 30-45 minutes before starting.
Incorrect Measuring: Scooping flour directly from the container compacts it, adding up to 25% more flour than recipes intend. Use the spoon-and-level method: fluff flour, spoon into measuring cup, and level with a straight edge for accuracy.
Storing Tips for the Recipe
Proper storage maintains the quality and appeal of your peanut butter blossom cookies:
Room Temperature Storage (5-7 Days): Store completely cooled cookies in an airtight container with parchment paper between layers to prevent sticking. Keep at room temperature away from direct sunlight. The chocolate Kisses may develop slight bloom (white streaks) in warm conditions, but this doesn’t affect flavor.
Extended Freshness Tip: Add a slice of bread to your storage container—it releases just enough moisture to keep cookies soft without making them soggy. Replace the bread slice every 2-3 days for continued freshness.
Refrigeration (2 Weeks): While not typically necessary, refrigerating cookies in hot, humid climates prevents chocolate Kisses from melting. Store in airtight containers and bring to room temperature 20 minutes before serving for optimal texture and flavor.
Freezing Dough (3 Months): Shape dough into balls, roll in sugar, and freeze on a baking sheet until solid. Transfer to freezer bags for long-term storage. Bake directly from frozen, adding 1-2 extra minutes to baking time. Press Kisses immediately as usual—this method provides fresh-baked cookies on demand.
Freezing Baked Cookies (2-3 Months): Cookies freeze beautifully before or after adding Kisses. Wrap well in plastic wrap, then aluminum foil, or use freezer-safe containers with parchment between layers. Thaw at room temperature for 30-45 minutes. The texture remains remarkably close to fresh-baked.
Kiss Replacement Strategy: If chocolate Kisses fall off during storage (rare but possible), simply warm cookies for 5-10 seconds in the microwave and gently press a fresh Kiss into the center. The brief warming makes cookies slightly pliable again.
Conclusion
Peanut butter blossom cookies deliver bakery-quality results when you master the critical timing of pressing chocolate Kisses—immediately within 10-15 seconds of removing cookies from the oven. This single step, combined with using stabilized peanut butter, proper creaming technique, and avoiding overbaking, guarantees those picture-perfect cookies with beautiful cracks radiating around the chocolate centerpiece that make this recipe an enduring classic.
Ready to create your own batch? Try this recipe today and discover why one perfectly timed step makes all the difference. Share your results and any creative variations in the review section—we love hearing about your baking successes! Leave a comment below with your favorite Kiss flavor combinations, and don’t forget to subscribe to our blog for more expert baking tips, time-tested recipes, and insider techniques delivered to your inbox weekly.
FAQs
Can I make peanut butter blossom cookies without the chocolate Kisses? Absolutely! While Kisses are traditional, you can create delicious variations by pressing other candies into the center—try Reese’s Peanut Butter Cups, Rolo caramels, or even thumbprint indentations filled with jam. You can also skip centerpieces entirely for simple peanut butter sugar cookies that are equally delicious.
Why do my chocolate Kisses sink into the cookies? Kisses sink when cookies are either underbaked (too soft to support the weight) or when you press too hard. Ensure cookies bake the full 8-10 minutes until edges are set, then press Kisses gently but firmly—just enough so the base sits flush with the cookie surface without embedding deeply into the dough.
Can I use crunchy peanut butter instead of creamy? Yes, crunchy peanut butter works wonderfully and adds delightful texture to the cookies. The peanut chunks create extra crunch and visual interest. Use the same measurements and follow the recipe exactly—no other adjustments needed.
How do I prevent cookies from spreading too much? Excessive spreading usually indicates dough that’s too warm or butter that’s too soft. Ensure butter is softened but still holds its shape (not melted or greasy). If your kitchen is warm, refrigerate shaped dough balls for 15 minutes before baking. Also verify your oven temperature with an oven thermometer—temperatures running low cause spreading.
What if I don’t have brown sugar? You can substitute light brown sugar with an equal amount of granulated sugar, though cookies will lack some moisture and subtle molasses notes that brown sugar provides. For a closer match, mix 1 tablespoon molasses into ½ cup granulated sugar to create a brown sugar substitute.
Can I double this recipe successfully? Yes, this recipe doubles beautifully. Mix the doubled batch in a large stand mixer for best results, as hand mixing such quantities becomes tiresome. The most important consideration when doubling is having enough unwrapped Kisses ready and working efficiently during that critical post-baking window to press Kisses while cookies are still warm.