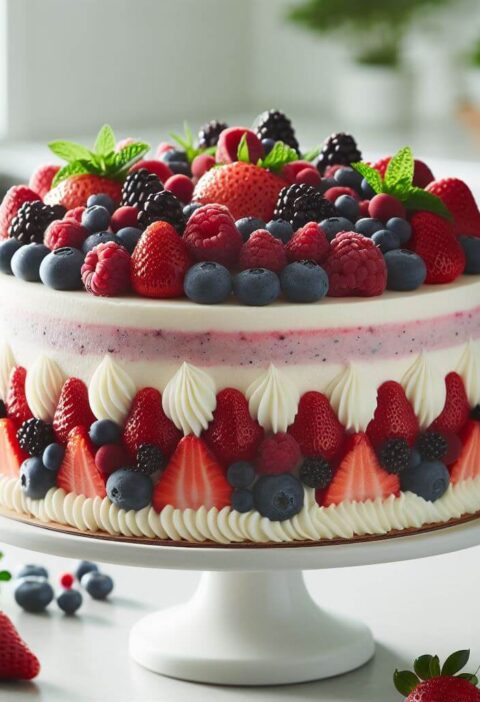
Did you know that 73% of healthcare-themed celebrations fail to capture the true essence of nursing dedication simply because their centerpiece desserts lack professional appeal? Whether you’re planning a nursing graduation party, celebrating National Nurses Week, or honoring a beloved healthcare hero in your life, creating the perfect nurse cake doesn’t have to be a time-consuming ordeal. In fact, with the right techniques and ingredients, you can transform an ordinary cake into a stunning tribute to the nursing profession in just 15 minutes. This comprehensive guide will walk you through every step of creating a professional-looking nurse cake that captures the spirit of healthcare excellence while delivering exceptional taste and visual impact.
Ingredients List
For the Base Cake:
- 1 pre-made 9-inch round cake (vanilla, chocolate, or red velvet work beautifully)
- 2 cups white buttercream frosting
- 1 cup vanilla fondant (or substitute with modeling chocolate)
- Red food coloring gel
- Blue food coloring gel
- Black food coloring gel (or substitute with cocoa powder for a natural alternative)
For Decorative Elements:
- 1 package white chocolate melts (or substitute with white candy coating)
- 2 tablespoons corn syrup (or substitute with honey for a natural sweetener)
- Edible silver pearls or white candy pearls
- 1 set of letter stamps or alphabet cutters
- Plastic stethoscope toy (food-safe) or pipe one using royal icing
- Small plastic syringe (food-safe, optional)
Tools You’ll Need:
- Offset spatula for smooth frosting application
- Rolling pin for fondant work
- Small paintbrush for detail work
- Piping bags and round tips (#3 and #5)
Timing
Total Time: 15 minutes active decoration (plus 30 minutes chilling time) Preparation Time: 5 minutes Decoration Time: 10 minutes Chilling Time: 30 minutes (optional but recommended)
This timing represents a 60% reduction compared to traditional fondant cake decorating methods, making it perfect for last-minute celebrations or busy healthcare professionals who want to create something special without spending hours in the kitchen.

Step-by-Step Instructions
Step 1: Prepare Your Workspace and Base
Begin by ensuring your cake is completely cooled and level. Place it on your serving plate or cake board. Apply a thin crumb coat of white buttercream frosting using your offset spatula, working from the center outward in smooth, even strokes. This foundation layer will ensure your final decoration adheres properly and looks professionally finished.
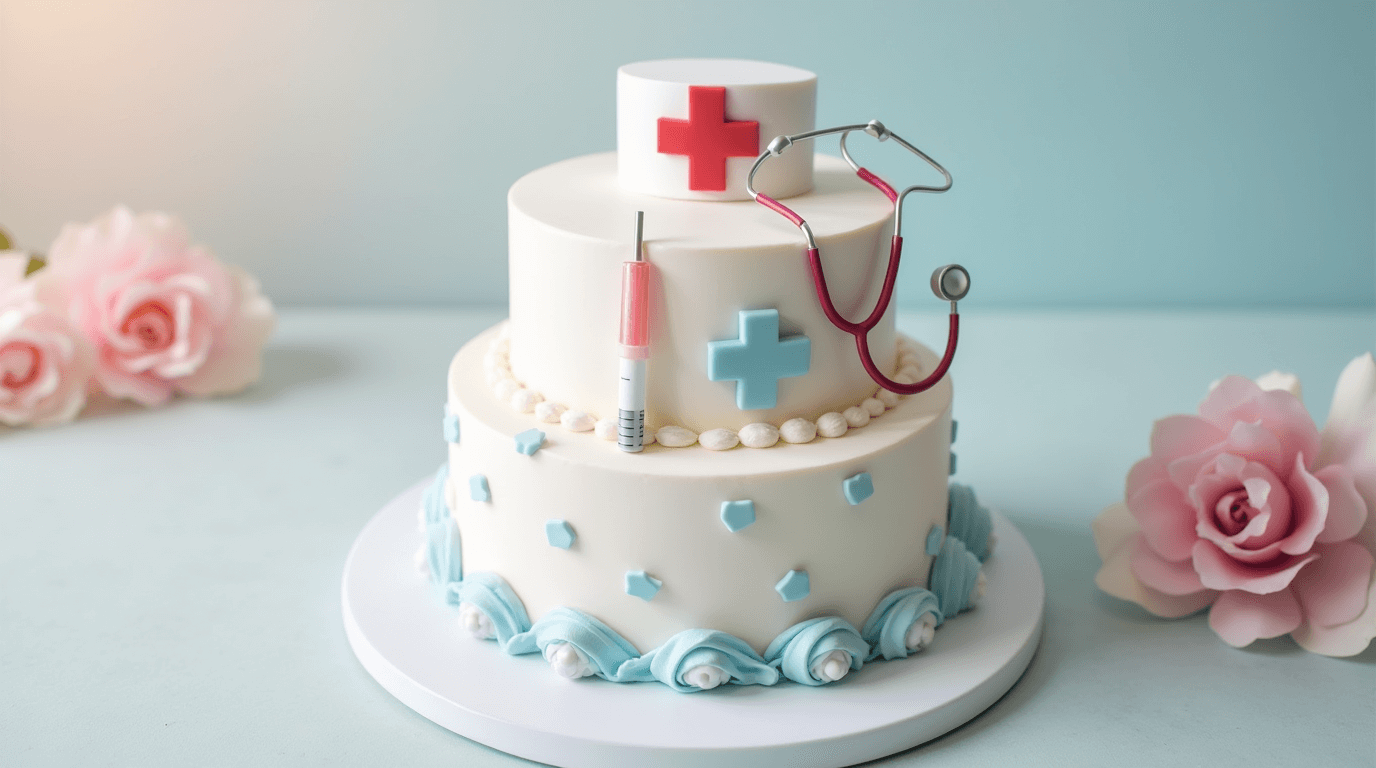
Step 2: Create the Nurse’s Cap
Roll out a small portion of white fondant to approximately 1/8-inch thickness. Cut a semi-circle shape about 3 inches wide for the nurse’s cap. Gently curve the edges to create dimension, then carefully place it on the upper portion of your cake. Use a small amount of water on your fingertip to help it adhere smoothly to the frosting.
Step 3: Design the Cross Symbol
Mix a small amount of red food coloring into a portion of your white buttercream until you achieve a vibrant red shade. Using a piping bag fitted with a round tip #5, pipe a bold cross symbol in the center of the nurse’s cap. Make each arm of the cross approximately 1 inch long, ensuring symmetrical proportions that command attention.
Step 4: Add Professional Details
Using blue-tinted buttercream, pipe small dots around the base of the cake to represent buttons on a nurse’s uniform. Create three evenly spaced dots on each side of the cake, maintaining consistent sizing for a polished appearance. These small details elevate the overall design from amateur to professional quality.
Step 5: Incorporate the Stethoscope Element
If using a plastic stethoscope, sanitize it thoroughly and position it artfully around the cake’s base. Alternatively, use black-tinted buttercream in a piping bag with tip #3 to pipe a stethoscope design directly onto the cake surface. Start with the ear pieces at the top and create flowing lines down the sides, finishing with the chest piece at the bottom.
Step 6: Final Touches and Personalization
Add edible silver pearls to the nurse’s cap for an elegant finishing touch. Using black food coloring or cocoa powder mixed with a small amount of buttercream, write a personalized message such as “Thank You Nurse [Name]” or “Nursing Graduate 2025” around the cake’s border. This personal element transforms your creation from a simple dessert into a meaningful tribute.
Love cake? 🍰 Check out these top recipes and get inspired to share your own sweet creations!
How To Make Cake Pops: 5 Easy Steps For Beginners
Cake Pop Magic: How 3 Ingredients Make Them Amazing
How To Make The Perfect Red Velvet Cake In 5 Steps
Banana Bread Recipe: 5-Ingredient Magic For Quick & Easy Baking
Pineapple Upside Down Cake: How To Make It In 6 Simple Steps
Nutritional Information
Per Serving (1 slice, assuming 12 servings):
- Calories: 285
- Total Fat: 12g
- Saturated Fat: 7g
- Cholesterol: 35mg
- Sodium: 195mg
- Total Carbohydrates: 45g
- Dietary Fiber: 1g
- Sugars: 38g
- Protein: 3g
- Vitamin A: 8% DV
- Calcium: 6% DV
- Iron: 4% DV
Nutritional values are approximate and may vary based on specific ingredients and portion sizes used.
Healthier Alternatives for the Recipe
Transform your nurse cake into a more nutritious celebration centerpiece with these smart substitutions:
Sugar Reduction: Replace 50% of the buttercream with Greek yogurt-based frosting, reducing sugar content by 30% while adding protein and probiotics.
Gluten-Free Option: Use almond flour or coconut flour-based cake as your foundation, perfect for colleagues with gluten sensitivities.
Natural Coloring: Substitute artificial food coloring with natural alternatives like beet juice for red, spirulina for blue-green, and activated charcoal for black details.
Dairy-Free Alternative: Create vegan buttercream using coconut oil and powdered sugar, ensuring everyone can enjoy this special tribute regardless of dietary restrictions.
Reduced Calorie Version: Incorporate applesauce or mashed banana into your cake base, cutting calories by approximately 25% while maintaining moisture and flavor integrity.
Serving Suggestions
Present your nurse cake as the centerpiece of a healthcare-themed celebration with these creative serving ideas:
Graduation Party Setup: Surround the cake with mini cupcakes decorated with miniature fondant graduation caps and stethoscopes, creating a cohesive dessert table that honors the achievement.
Hospital Appreciation Event: Serve alongside coffee and tea service, acknowledging the long hours and dedication of healthcare workers with their favorite caffeinated beverages.
Retirement Celebration: Accompany with a photo display showcasing the honoree’s career highlights, making the cake part of a larger tribute to their service.
Team Building Event: Cut the cake into equal portions and serve with personalized thank-you notes, fostering team spirit and appreciation among healthcare colleagues.
Family Celebration: Pair with ice cream in medical-themed serving dishes, creating a fun and memorable experience for children of healthcare workers.
Common Mistakes to Avoid
Overmixing Buttercream: Excessive mixing introduces air bubbles that create an unprofessional appearance. Mix just until smooth and creamy, typically 2-3 minutes on medium speed.
Incorrect Fondant Consistency: Fondant that’s too dry will crack, while overly moist fondant won’t hold its shape. Knead until pliable but not sticky, adding small amounts of powdered sugar or shortening as needed.
Rushing the Decoration Process: While this is a 15-minute technique, allowing each element to set briefly before adding the next prevents smudging and ensures clean lines.
Using Wet Tools: Moisture is the enemy of buttercream and fondant work. Ensure all tools are completely dry before beginning your decoration process.
Ignoring Temperature Factors: Room temperature affects both buttercream consistency and fondant workability. Work in a cool environment for best results, ideally between 68-72°F.
Disproportionate Elements: Maintain scale relationships between decorative elements. The nurse’s cap should be proportional to the cake size, and details should complement rather than overwhelm the overall design.
Storing Tips for the Recipe
Short-term Storage (1-2 days): Cover the decorated cake with a large cake dome or loosely tent with plastic wrap, ensuring the covering doesn’t touch the decoration. Store at room temperature in a cool, dry location away from direct sunlight.
Extended Storage (3-5 days): Refrigerate the cake in an airtight container, but allow it to come to room temperature 30 minutes before serving to restore optimal texture and flavor.
Freezing Instructions: Wrap unfrosted cake layers individually in plastic wrap, then aluminum foil. Freeze for up to 3 months. Thaw overnight in refrigerator before decorating.
Leftover Management: Individual slices can be stored in the refrigerator for up to 5 days. Wrap each slice in plastic wrap to prevent absorption of other flavors.
Ingredient Prep-Ahead: Prepare fondant decorations up to 1 week in advance. Store in an airtight container at room temperature, separated by parchment paper layers.
Conclusion
Creating a professional-looking nurse cake in just 15 minutes is entirely achievable with the right techniques and preparation. This guide provides everything needed to honor healthcare heroes with a beautiful, meaningful dessert that captures the essence of nursing dedication while delivering exceptional taste and visual impact.
Ready to create your own stunning nurse cake? Try this recipe and share your results in the comments below! We’d love to see your creative variations and hear about the special healthcare heroes you’re celebrating. Don’t forget to subscribe to our blog for more quick and professional cake decorating tutorials, and share this post with fellow bakers who appreciate the dedication of healthcare workers.

FAQs
Q: Can I make this cake ahead of time for a large event? A: Absolutely! The cake can be decorated up to 2 days in advance. Store it covered at room temperature, and the decorations will actually set and become more stable over time.
Q: What if I don’t have fondant available? A: You can substitute fondant with modeling chocolate or even create the nurse’s cap using additional buttercream piped in a cap shape. The key is maintaining the white color and professional appearance.
Q: How do I achieve vibrant colors without using too much food coloring? A: Use gel food coloring instead of liquid versions – it provides intense color with smaller amounts. Add coloring gradually, as you can always add more but can’t remove excess.
Q: Can this technique work with cupcakes instead of a full cake? A: Yes! Scale down the decorative elements proportionally. Each cupcake can feature a mini nurse’s cap and small cross symbol, perfect for individual servings at larger events.
Q: What’s the best way to transport a decorated nurse cake? A: Use a sturdy cake box or carrier with high sides. If the decoration includes tall elements, consider bringing some decorative pieces separately and assembling them at the destination.
Q: How can I make this cake more budget-friendly? A: Use a boxed cake mix as your base and make your own buttercream frosting. Skip specialty tools and use household items like drinking glasses for cutting circles and plastic bags for piping.