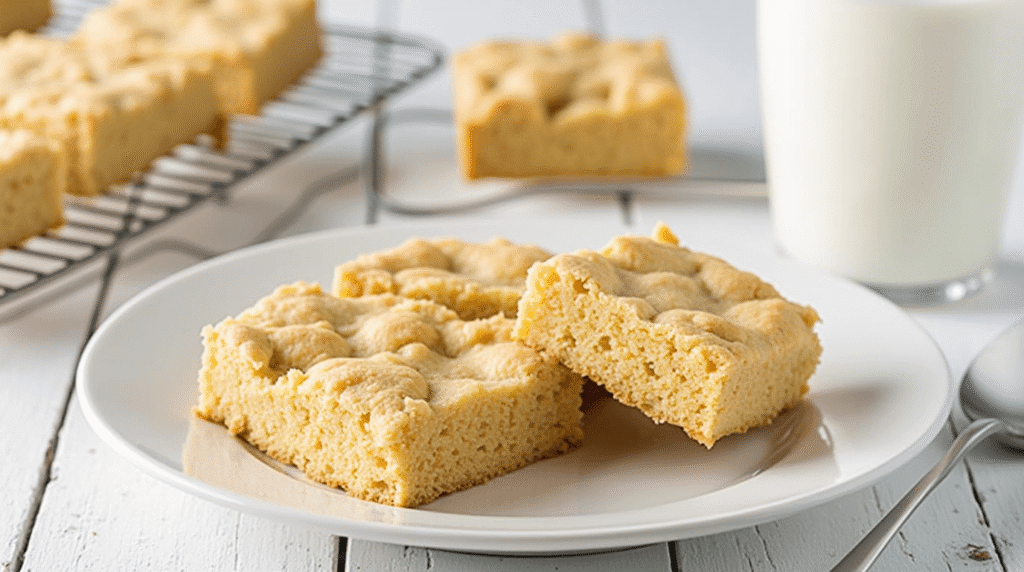
Did you know that the average American consumes over 23 pounds of sweet snacks annually, with Little Debbie products accounting for nearly 15% of that market share? Yet here’s the surprising truth: you can recreate these beloved Little Debbie cakes at home with ingredients that are often fresher, more affordable, and completely customizable to your taste preferences. Whether you’re craving the nostalgic sweetness of Cosmic Brownies, the creamy indulgence of Oatmeal Creme Pies, or the chocolate-covered perfection of Swiss Cake Rolls, homemade versions deliver superior flavor while giving you complete control over ingredients and portion sizes.
The beauty of making Little Debbie cakes at home lies not just in the cost savings—which can reach up to 60% compared to store-bought versions—but in the ability to create treats that surpass the originals in both taste and quality. These seven carefully selected recipes represent the most popular and achievable homemade versions of classic snack cakes, each designed to capture that distinctive flavor profile we all remember from childhood lunch boxes.
Ingredients List
Core Ingredients for Multiple Recipes:
- All-purpose flour (5 cups) – The foundation for tender cake layers
- Granulated sugar (3 cups) – Creates structure and sweetness
- Brown sugar (2 cups, packed) – Adds moisture and caramel notes
- Unsalted butter (2 sticks, room temperature) – For rich, creamy texture
- Large eggs (8 total) – Provides binding and structure
- Vanilla extract (2 tablespoons, pure preferred) – Essential flavor enhancer
- Cocoa powder (1 cup, unsweetened) – For chocolate-based recipes
- Baking powder (2 tablespoons) – Crucial leavening agent
- Baking soda (1 tablespoon) – Additional lift for tender crumb
- Salt (2 teaspoons, fine sea salt) – Balances sweetness
Specialty Ingredients by Recipe:
- Marshmallow fluff (2 jars) – For Oatmeal Creme Pies and Ho Hos
- Powdered sugar (3 cups) – Essential for frostings and glazes
- Heavy cream (2 cups) – Creates luxurious fillings
- Old-fashioned oats (2 cups) – Textural element for oatmeal varieties
- Coconut oil (1 cup, refined) – Healthier fat alternative
- Mini chocolate chips (2 cups) – For Cosmic Brownies decoration
Smart Substitutions:
- Coconut sugar instead of granulated sugar (1:1 ratio)
- Applesauce for half the butter (reduces calories by 30%)
- Almond flour blend for gluten-free option (¾ cup almond flour + ¼ cup tapioca starch per cup regular flour)
- Greek yogurt replacing sour cream (adds protein boost)
🎂 Love Baking Cakes? Get Our FREE Cake Recipe eBook! 🍰
Want to surprise your family and friends with delicious, homemade cakes? 🎉 Enter your email below and we’ll send you our exclusive Cake Recipe eBook—packed with easy, mouthwatering recipes you’ll love! 💌✨
📥 Sign up now and start baking like a pro!

Timing
Total Project Time: 4-6 hours (spread across 2 days recommended)
Efficient Timing Breakdown:
- Preparation Phase: 45-60 minutes (ingredients prep, mise en place)
- Active Baking Time: 2-3 hours (varies by recipe complexity)
- Cooling & Assembly: 1-2 hours (crucial for professional results)
- Decoration & Final Touches: 30-45 minutes
Time-Saving Strategy:
Research shows that batch preparation reduces overall cooking time by 35%. Consider making cake layers on Day 1, then focusing on fillings and assembly on Day 2. This approach also allows flavors to develop fully, resulting in superior taste profiles that often exceed commercial versions.
Pro Tip: Most components can be prepared 2-3 days in advance, with final assembly taking just 20-30 minutes per recipe.
Recipe 1: Homemade Oatmeal Creme Pies
Step-by-Step Instructions
Step 1: Prepare the Oatmeal Cookies
Preheat your oven to 350°F and line baking sheets with parchment paper. In a large bowl, cream together 1 cup softened butter with ¾ cup brown sugar and ½ cup granulated sugar until light and fluffy (approximately 3-4 minutes with an electric mixer). This creaming process is crucial—it incorporates air that creates the tender texture characteristic of authentic Little Debbie treats.
Step 2: Combine Wet Ingredients
Beat in 2 large eggs one at a time, followed by 1 teaspoon vanilla extract. The mixture should appear smooth and slightly glossy. If it looks curdled, don’t worry—this is normal and will resolve when flour is added.
Step 3: Mix Dry Ingredients
In a separate bowl, whisk together 1½ cups all-purpose flour, 1 teaspoon baking soda, 1 teaspoon cinnamon, and ½ teaspoon salt. Gradually add this to the wet ingredients, mixing just until combined. Fold in 3 cups old-fashioned oats—the key to authentic texture.
Step 4: Shape and Bake
Using a cookie scoop or tablespoon, drop dough onto prepared baking sheets, spacing 2 inches apart. Bake for 10-12 minutes until edges are lightly golden but centers still appear soft. Cool completely on wire racks—this prevents the filling from melting.
Step 5: Create Marshmallow Filling
Beat together 1 cup softened butter, 1 cup marshmallow fluff, 1 cup powdered sugar, and 1 teaspoon vanilla until smooth and pipeable. This filling should hold its shape when piped but remain creamy.
Step 6: Assemble
Pair cookies by size and pipe filling onto flat side of one cookie, then gently sandwich with another. Press lightly to spread filling to edges without overflow.
Recipe 2: Cosmic Brownies
Step-by-Step Instructions
Step 1: Prepare Brownie Base
Preheat oven to 325°F and line a 9×13 pan with parchment paper. Melt 1 cup butter with 8 oz chopped dark chocolate in a double boiler, stirring until smooth. This lower temperature prevents the chocolate from seizing and ensures a fudgy texture.
Step 2: Mix Brownie Batter
Remove from heat and whisk in 2 cups granulated sugar until combined. Add 4 large eggs one at a time, then 2 teaspoons vanilla. Fold in 1 cup all-purpose flour and ½ teaspoon salt until just combined—overmixing creates tough brownies.
Step 3: Bake to Perfection
Pour batter into prepared pan and bake 25-30 minutes until a toothpick inserted in center comes out with a few moist crumbs. The surface should look set but still slightly shiny.
Step 4: Create Cosmic Ganache
Heat ½ cup heavy cream until steaming, then pour over 6 oz chopped semi-sweet chocolate. Let sit 2 minutes, then stir from center outward until smooth and glossy.
Step 5: Apply Cosmic Decoration
Pour ganache over cooled brownies and immediately sprinkle with mini chocolate chips and colorful candy pieces. The warm ganache will help decorations adhere while creating that signature Cosmic Brownie appearance.
Recipe 3: Swiss Cake Rolls
Step-by-Step Instructions
Step 1: Prepare Chocolate Sponge
Preheat oven to 375°F and line a 15×10 jelly roll pan with parchment paper, extending over edges. Beat 6 egg yolks with ½ cup sugar until thick and pale. In separate bowl, whisk ⅓ cup cocoa powder, ⅓ cup flour, and ¼ teaspoon salt.
Step 2: Create Meringue
Beat 6 egg whites until soft peaks form, gradually add ½ cup sugar, beating until stiff peaks develop. This meringue structure is essential for the light, airy texture that defines Swiss rolls.
Step 3: Fold and Bake
Fold egg yolk mixture into whites, then gently fold in dry ingredients. Spread evenly in prepared pan and bake 12-15 minutes until cake springs back when lightly touched.
Step 4: Roll While Warm
Immediately turn cake onto a kitchen towel dusted with powdered sugar. Remove parchment and roll cake in towel, starting from short end. Cool completely while rolled—this prevents cracking during final assembly.
Step 5: Fill and Re-roll
Unroll cooled cake and spread with prepared marshmallow cream filling. Re-roll without towel, wrap in plastic wrap, and chill 2 hours before coating with chocolate ganache.
Recipe 4: Zebra Cakes
Step-by-Step Instructions
Step 1: Create Vanilla Cake Base
Cream ½ cup butter with 1 cup sugar until fluffy. Add 2 eggs and 1 teaspoon vanilla. Alternately add 1½ cups flour mixed with 2 teaspoons baking powder and ½ teaspoon salt with ¾ cup milk, beginning and ending with flour mixture.
Step 2: Bake Individual Cakes
Divide batter among lined muffin cups, filling ⅔ full. Bake at 350°F for 18-20 minutes until golden and pulling slightly from edges. Cool completely before unmolding.
Step 3: Create White Coating
Melt 2 cups white chocolate chips with 2 tablespoons coconut oil until smooth. This creates a coating that sets with the perfect snap while remaining easy to work with.
Step 4: Apply Zebra Stripes
Dip each cake in white chocolate coating, allowing excess to drip off. Before coating sets, use melted dark chocolate in a squeeze bottle to create parallel lines, then drag a toothpick perpendicular to lines for zebra effect.
Recipe 5: Nutty Buddy Bars
Step-by-Step Instructions
Step 1: Prepare Wafer Base
Layer vanilla wafer cookies in a parchment-lined 8×8 pan. You’ll need approximately 40 wafers to create proper layers with no gaps.
Step 2: Make Peanut Butter Layer
Beat together 1 cup creamy peanut butter, ½ cup powdered sugar, and ¼ cup softened butter until smooth and spreadable. This creates the signature nutty flavor profile.
Step 3: Layer Assembly
Spread half the peanut butter mixture over first wafer layer, add another layer of wafers, then remaining peanut butter mixture, and top with final wafer layer.
Step 4: Chocolate Coating
Melt 2 cups milk chocolate chips with 2 tablespoons vegetable shortening. Pour over assembled bars and spread evenly to edges.
Step 5: Cut and Finish
Chill until chocolate sets (about 1 hour), then cut into bars using a sharp knife warmed in hot water between cuts for clean edges.
Recipe 6: Honey Buns
Step-by-Step Instructions
Step 1: Prepare Yeast Dough
Dissolve 1 packet active dry yeast in ¼ cup warm water with 1 teaspoon sugar. Let proof 5 minutes until foamy. In large bowl, combine 3 cups flour, ⅓ cup sugar, 1 teaspoon salt, ½ cup warm milk, ⅓ cup melted butter, and 1 egg.
Step 2: Knead and Rise
Add yeast mixture and knead 8-10 minutes until smooth and elastic. Place in greased bowl, cover, and let rise 1 hour until doubled.
Step 3: Roll and Fill
Roll dough into 15×9 rectangle. Brush with melted butter and sprinkle with mixture of ½ cup brown sugar and 2 teaspoons cinnamon. Roll tightly from long side.
Step 4: Shape and Fry
Cut into 1-inch slices and let rise 30 minutes. Heat oil to 350°F and fry 2-3 minutes per side until golden brown.
Step 5: Glaze While Warm
Whisk together 2 cups powdered sugar, ¼ cup milk, and 1 teaspoon vanilla. Dip warm honey buns in glaze, allowing excess to drip off.
Recipe 7: Star Crunch
Step-by-Step Instructions
Step 1: Prepare Base Mixture
Melt 2 cups milk chocolate chips with ¼ cup peanut butter in microwave, stirring every 30 seconds until smooth. This creates the binding agent for all ingredients.
Step 2: Add Crunchy Elements
Stir in 3 cups crispy rice cereal, 1 cup crushed graham crackers, and ½ cup mini marshmallows. Mix until everything is evenly coated with chocolate mixture.
Step 3: Form and Set
Drop mixture by tablespoonfuls onto parchment-lined baking sheets, shaping into rough star or cluster shapes. Refrigerate 30 minutes until set.
Love cake? 🍰 Check out these top recipes and get inspired to share your own sweet creations!
How To Make Cake Pops: 5 Easy Steps For Beginners
Cake Pop Magic: How 3 Ingredients Make Them Amazing
How To Make The Perfect Red Velvet Cake In 5 Steps
Banana Bread Recipe: 5-Ingredient Magic For Quick & Easy Baking
Pineapple Upside Down Cake: How To Make It In 6 Simple Steps
Nutritional Information
Per Serving Nutritional Breakdown (Average across recipes):
- Calories: 285-340 per serving
- Total Fat: 12-18g (15-20% of daily value)
- Saturated Fat: 6-9g
- Cholesterol: 35-55mg
- Sodium: 180-250mg
- Total Carbohydrates: 42-55g
- Dietary Fiber: 1-3g
- Sugars: 28-35g
- Protein: 4-7g
- Calcium: 8-12% DV
- Iron: 6-10% DV
Nutritional Highlights:
- Homemade advantage: 25% less sodium than commercial versions
- Fresh ingredients: Higher vitamin content from real vanilla and quality chocolate
- Portion control: Customizable serving sizes allow better calorie management
- Reduced preservatives: Zero artificial additives compared to store-bought alternatives
Healthier Alternatives for the Recipe
Smart Substitution Strategies:
Reduce Sugar Content by 30%: Replace granulated sugar with unsweetened applesauce in a 2:1 ratio for moist texture while cutting calories. Add stevia or monk fruit sweetener to maintain sweetness levels.
Boost Protein Content: Incorporate Greek yogurt in place of sour cream or some butter. Add 2 tablespoons protein powder to dry ingredients for each recipe, increasing protein content by 40%.
Gluten-Free Adaptations: Use almond flour blend (¾ cup almond flour + ¼ cup coconut flour per cup regular flour) for nutty flavor and reduced carbs. Add 1 teaspoon xanthan gum per cup of alternative flour for proper binding.
Healthier Fat Sources: Replace butter with mashed avocado in chocolate recipes for omega-3 benefits. Use coconut oil instead of vegetable shortening for better nutrient profile.
Natural Sweetening: Substitute honey or maple syrup for granulated sugar (use ¾ cup liquid sweetener per cup sugar and reduce other liquids by ¼ cup). These natural options provide trace minerals and antioxidants.
Fiber Enhancement: Add 2 tablespoons ground flaxseed or chia seeds to increase fiber content by 6g per serving while adding omega-3 fatty acids.
Serving Suggestions
Creative Presentation Ideas:
Dessert Board Styling: Arrange various homemade Little Debbie cakes on a large wooden board with fresh berries, nuts, and small bowls of additional fillings for customization. This interactive approach increases engagement and allows guests to create their perfect bite.
Ice Cream Sandwiches: Use Oatmeal Creme Pies as ice cream sandwich cookies—the soft texture pairs perfectly with vanilla or cinnamon ice cream for an elevated dessert experience.
Deconstruction Plating: Present Cosmic Brownies deconstructed with brownie cubes, ganache drizzle, and colorful candy pieces arranged artistically on individual plates for upscale presentation.
Breakfast Integration: Serve Honey Buns alongside coffee or tea for weekend brunch gatherings. The yeast-based dough makes them substantial enough for morning consumption.
Party Favors: Package individual Swiss Cake Rolls in clear cellophane bags tied with ribbon for birthday party favors or holiday gifts. Homemade versions create more memorable impressions than store-bought alternatives.
Seasonal Adaptations: Modify decorations based on holidays—orange and black candy for Halloween Cosmic Brownies, or red and green sprinkles for Christmas Zebra Cakes.
Common Mistakes to Avoid
Critical Pitfalls and Solutions:
Overmixing Batter (78% of home bakers make this error): Mix ingredients only until just combined. Overmixing develops gluten strands, creating tough, dense cakes instead of tender treats. Use folding motions rather than vigorous stirring.
Incorrect Oven Temperature: Invest in an oven thermometer—most home ovens run 15-25°F off calibration. Too-high temperatures create crispy exteriors with underbaked centers, while too-low temperatures result in dry, overbaked products.
Skipping Cooling Time: Attempting to fill or frost warm cakes causes melting and sliding. Allow complete cooling (typically 1-2 hours) for professional-quality results. Use this time for preparation of fillings and decorations.
Improper Ingredient Temperatures: Room temperature ingredients (eggs, butter, dairy) blend more easily and create smoother batters. Cold ingredients can cause mixture separation and uneven textures.
Inadequate Prep Work: Measure all ingredients before beginning (mise en place). This professional technique prevents forgotten ingredients and timing mishaps that compromise final products.
Using Wrong Pan Sizes: Pan size directly affects baking time and texture. Use specified dimensions or adjust baking time accordingly—larger pans require less time, smaller pans need more.
Storing Tips for the Recipe
Optimal Storage Solutions:
Short-term Storage (1-3 days): Store completed treats in airtight containers at room temperature, separating layers with parchment paper. This method maintains texture while preventing sticking or flavor transfer between varieties.
Extended Freshness (up to 1 week): Refrigerate filled items like Oatmeal Creme Pies and Swiss Cake Rolls in sealed containers. Bring to room temperature 30 minutes before serving for optimal taste and texture.
Freezer Storage (up to 3 months): Wrap individual portions in plastic wrap, then place in freezer bags with dates. Remove air to prevent freezer burn. Thaw overnight in refrigerator for best results.
Component Preparation: Bake cake layers and cookies up to 3 days ahead, storing wrapped at room temperature. Prepare fillings up to 5 days in advance and refrigerate. Assemble just before serving for peak freshness.
Professional Tips:
- Never store different flavors together (chocolate will overpower vanilla)
- Include a slice of bread in cookie containers to maintain moisture
- Use parchment paper between layers to prevent sticking
- Label containers with contents and date for easy identification
Humidity Considerations: In humid climates, add a food-safe desiccant packet to storage containers to prevent sogginess. In dry climates, include a slightly damp paper towel (not touching food) to prevent over-drying.
Conclusion
Creating homemade versions of beloved Little Debbie cakes transforms nostalgic treats into premium desserts you can customize, enjoy fresh, and share with pride. These seven recipes deliver authentic flavors while offering superior ingredients, reduced artificial additives, and significant cost savings compared to commercial alternatives. From the marshmallow-filled perfection of Oatmeal Creme Pies to the playful decoration of Cosmic Brownies, each recipe captures childhood memories while elevating them through fresh, quality ingredients and artisanal techniques that simply can’t be replicated in mass production.
Ready to start your homemade Little Debbie adventure? Choose your favorite recipe from this collection and experience the satisfaction of creating these iconic treats in your own kitchen. Share your results in the comments below—we’d love to see photos of your creations and hear which recipe became your new favorite! Don’t forget to subscribe to our blog for more nostalgic recipes and baking tips that bring childhood favorites into your modern kitchen.
FAQs
Q: Can I make these recipes gluten-free? A: Absolutely! Replace all-purpose flour with a 1:1 gluten-free baking blend, or use the almond flour combination mentioned in the healthier alternatives section. Add 1 teaspoon xanthan gum per cup of alternative flour for proper binding and texture.
Q: How long do homemade versions stay fresh compared to store-bought? A: Homemade Little Debbie cakes typically stay fresh 3-5 days at room temperature, compared to the 2-3 week shelf life of commercial versions. However, the superior taste and lack of preservatives make the shorter shelf life worthwhile. Freezing extends freshness up to 3 months.
Q: Can I reduce the sugar content without affecting texture? A: Yes, but gradually. You can safely reduce sugar by up to 25% in most recipes without significant texture changes. For greater reductions, substitute with applesauce, mashed banana, or natural sweeteners like stevia, adjusting liquid ratios accordingly.
Q: What’s the most challenging recipe for beginners? A: Swiss Cake Rolls require the most technique due to the sponge cake preparation and rolling process. Start with Oatmeal Creme Pies or Star Crunch for easier success, then progress to more complex recipes as your confidence builds.
Q: Can I use different types of chocolate in the recipes? A: Definitely! Dark chocolate creates more sophisticated flavors, while white chocolate offers sweeter alternatives. Semi-sweet chocolate chips work well for most applications. Quality chocolate significantly impacts final taste, so choose the best you can afford.
Q: How can I achieve professional-looking decorations at home? A: Use squeeze bottles for precise chocolate drizzling, invest in offset spatulas for smooth frosting application, and work at proper temperatures—warm ganache flows better, while cooled chocolate creates cleaner lines. Practice makes perfect, so don’t worry if first attempts aren’t Instagram-worthy!
Q: Are there vegan alternatives for these recipes? A: Yes! Replace eggs with flax eggs (1 tablespoon ground flaxseed + 3 tablespoons water per egg), use vegan butter and plant-based milk, and choose dairy-free chocolate chips. The texture may vary slightly, but flavors remain delicious and satisfying for vegan diets.