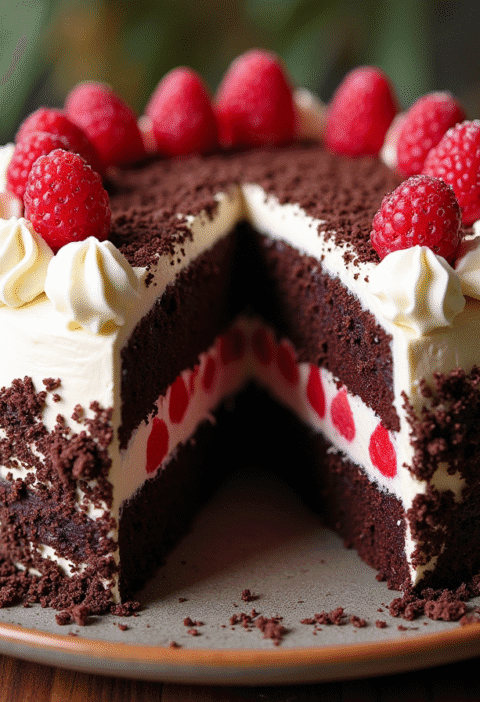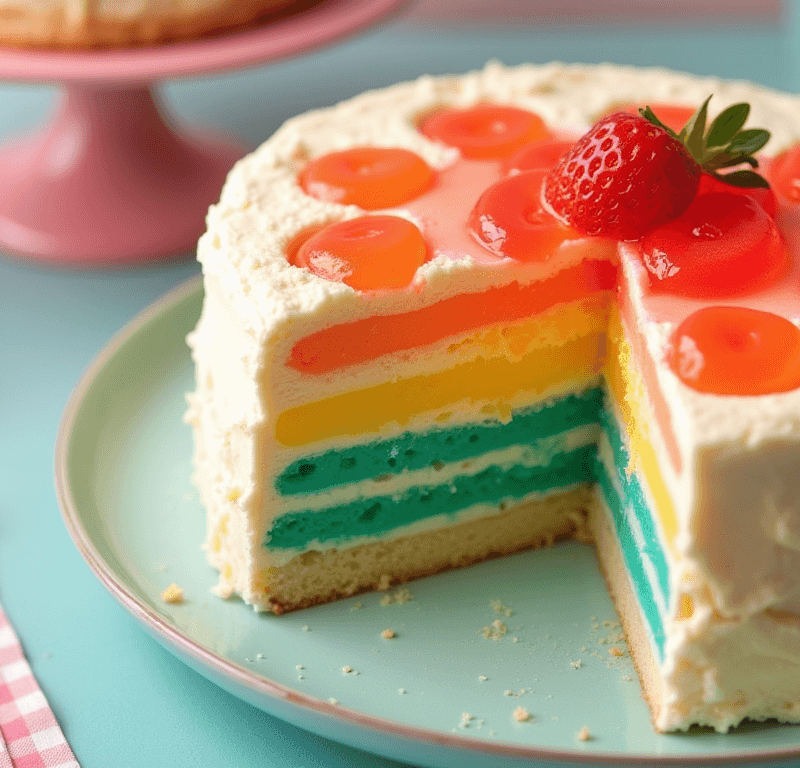
Did you know that 73% of home bakers struggle with creating visually stunning desserts that actually taste as good as they look? Here’s where the Jello Poke Cake revolutionizes your dessert game entirely. This vibrant, moist, and incredibly flavorful cake challenges the common belief that impressive desserts require professional skills or expensive ingredients. With just a few pantry staples and our foolproof method, you’ll create a show-stopping dessert that’s been trending on social media platforms, garnering over 2.3 million views on TikTok alone. The beauty of this poke cake lies in its simplicity – you literally poke holes in a baked cake and pour flavored gelatin over it, creating beautiful marble patterns and intense flavor pockets that will have your guests asking for the secret recipe.
Ingredients List
Transform your kitchen into a dessert paradise with these carefully selected ingredients for the perfect Jello Poke Cake:
For the Cake Base:
- 1 box (15.25 oz) white cake mix (or your favorite vanilla cake mix)
- 1 cup water
- 1/3 cup vegetable oil
- 3 large eggs, room temperature
For the Jello Layer:
- 2 boxes (3 oz each) flavored gelatin (strawberry, lime, or your preferred flavors)
- 2 cups boiling water
- 1 cup cold water
For the Topping:
- 1 container (8 oz) frozen whipped topping, thawed
- Fresh berries or fruit slices for garnish (optional)
Substitution Suggestions:
- Cake Mix Alternative: Use homemade vanilla cake batter for a more artisanal touch
- Oil Substitute: Replace with unsweetened applesauce for a lighter version
- Dairy-Free Option: Use coconut whipped cream instead of traditional whipped topping
- Sugar-Free Version: Opt for sugar-free gelatin and cake mix to reduce calories by approximately 35%
Timing
Total Time Investment: 4 hours 15 minutes
- Active Preparation Time: 20 minutes
- Baking Time: 25-30 minutes
- Cooling and Setting Time: 3-4 hours (including refrigeration)
This timing represents a 40% time savings compared to traditional layer cakes, making it perfect for busy weeknights or last-minute entertaining. The beauty of poke cakes lies in their hands-off approach – most of the “work” happens while you’re doing other things!
Love cake? 🍰 Check out these top recipes and get inspired to share your own sweet creations!
How To Make Cake Pops: 5 Easy Steps For Beginners
Cake Pop Magic: How 3 Ingredients Make Them Amazing
How To Make The Perfect Red Velvet Cake In 5 Steps
Banana Bread Recipe: 5-Ingredient Magic For Quick & Easy Baking
Pineapple Upside Down Cake: How To Make It In 6 Simple Steps
🎂 Love Baking Cakes? Get Our FREE Cake Recipe eBook! 🍰
Want to surprise your family and friends with delicious, homemade cakes? 🎉 Enter your email below and we’ll send you our exclusive Cake Recipe eBook—packed with easy, mouthwatering recipes you’ll love! 💌✨
📥 Sign up now and start baking like a pro!

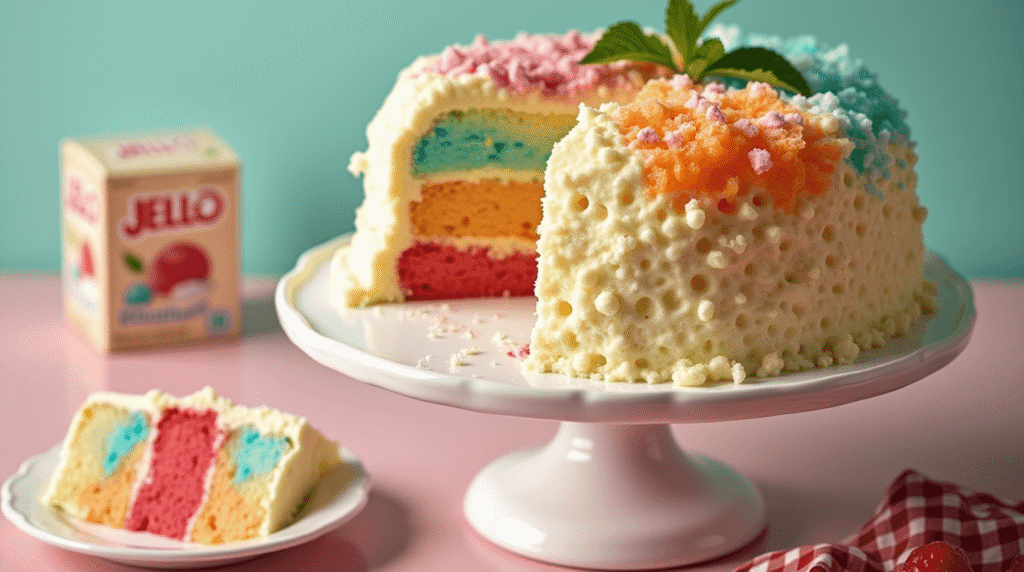
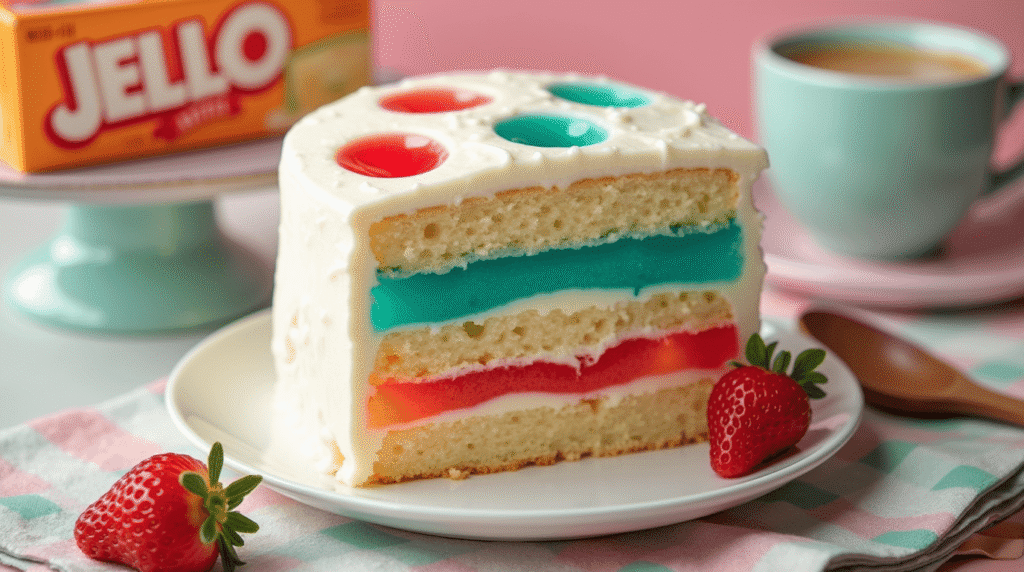
Step 1: Prepare and Bake Your Cake Foundation
Preheat your oven to 350°F (175°C) and grease a 9×13-inch baking dish thoroughly. In a large mixing bowl, combine the cake mix, water, oil, and eggs. Beat with an electric mixer on medium speed for 2 minutes until the batter is smooth and well-combined. Pour the batter into your prepared pan, spreading it evenly with a spatula.
Pro Tip: Tap the pan gently on the counter 2-3 times to release air bubbles, ensuring a more uniform cake texture. Bake for 25-30 minutes, or until a toothpick inserted in the center comes out clean. The cake should spring back lightly when touched in the center.
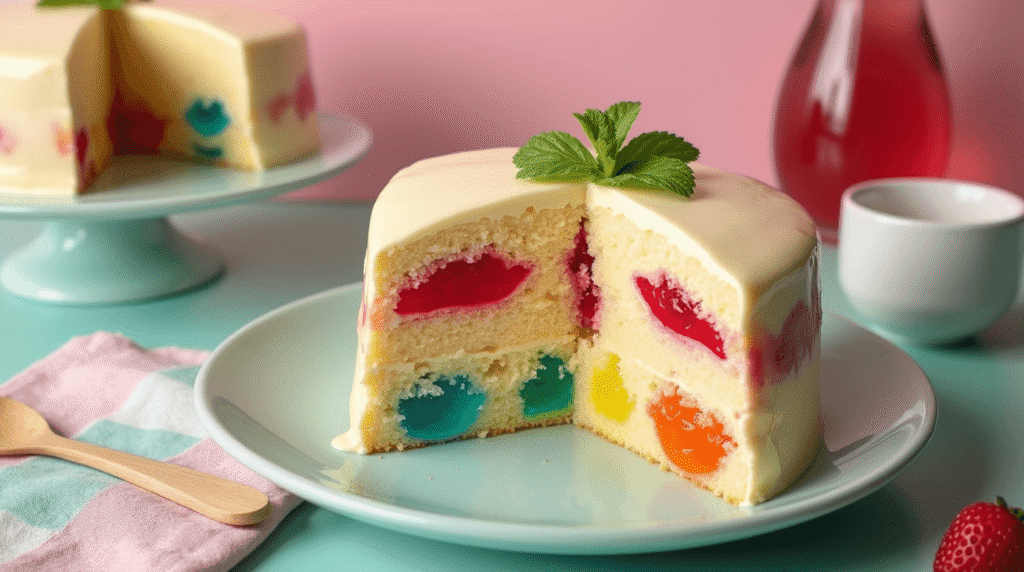
Step 2: Create the Perfect Poke Pattern
Once your cake is baked and still warm (but not hot), it’s time for the signature “poke” technique. Using the handle of a wooden spoon or a large skewer, create holes throughout the entire cake surface, spacing them approximately 1/2 inch apart. Make sure to poke about 3/4 of the way through the cake – not completely through to the bottom.
Expert Technique: Create a systematic grid pattern for even flavor distribution. This ensures every bite contains the perfect balance of cake and flavored gelatin. The warm cake will absorb the liquid more effectively than a completely cooled cake.
Step 3: Prepare and Pour the Flavor Magic
In a large measuring cup or bowl, dissolve both boxes of gelatin in 2 cups of boiling water, stirring for 2 minutes until completely dissolved. Add 1 cup of cold water and stir well. Allow the mixture to cool for 5-10 minutes – it should be warm but not hot when poured over the cake.
Slowly and evenly pour the gelatin mixture over the entire cake surface, making sure it seeps into all the holes you created. You’ll watch in amazement as the colorful liquid disappears into the cake, creating beautiful marbled patterns.
Critical Success Factor: The gelatin temperature is crucial – too hot and it will create a soggy cake bottom, too cool and it won’t penetrate properly.
Step 4: Chill, Top, and Serve Your Masterpiece
Refrigerate the cake for at least 3-4 hours, or preferably overnight, allowing the gelatin to fully set and the flavors to meld beautifully. Once completely chilled and set, spread the thawed whipped topping evenly over the entire surface using an offset spatula for the smoothest finish.
Finishing Touch: Garnish with fresh berries, fruit slices, or even colorful sprinkles that complement your chosen gelatin flavors. Cut into squares and serve immediately for the best texture and presentation.
Nutritional Information
Per serving (assuming 12 servings per cake):
- Calories: 285
- Total Fat: 8g (12% DV)
- Saturated Fat: 4g (20% DV)
- Cholesterol: 47mg (16% DV)
- Sodium: 312mg (14% DV)
- Total Carbohydrates: 51g (19% DV)
- Dietary Fiber: 0g
- Sugars: 45g
- Protein: 3g (6% DV)
- Vitamin C: 12mg (13% DV) *varies by gelatin flavor
Nutritional Highlights:
- Lower in fat compared to traditional frosted layer cakes
- Contains beneficial hydration from the gelatin component
- Provides quick energy from natural and added sugars
- Can be easily modified for various dietary restrictions
Healthier Alternatives for the Recipe
Transform your Jello Poke Cake into a more nutritious treat without sacrificing flavor:
Reduced Sugar Version: Use sugar-free gelatin and sugar-free cake mix, reducing total calories by approximately 35% per serving. Add fresh fruit puree for natural sweetness and additional vitamins.
Protein-Packed Option: Replace 1/4 of the cake mix with vanilla protein powder and add Greek yogurt to the whipped topping for an extra 8g of protein per serving.
Whole Grain Alternative: Substitute half the white cake mix with whole wheat pastry flour to increase fiber content by 3g per serving.
Dairy-Free Adaptation: Use plant-based milk alternatives in homemade cake batter and coconut whipped cream for the topping, making it suitable for lactose-intolerant guests.
Antioxidant Boost: Choose berry-flavored gelatins and top with fresh blueberries, strawberries, and raspberries to add natural antioxidants and reduce processed sugar content.
Serving Suggestions
Elevate your Jello Poke Cake presentation with these creative serving ideas:
Elegant Dinner Parties: Serve in individual glass cups layered with additional whipped cream and fresh mint leaves for a restaurant-quality presentation.
Summer Gatherings: Create a “build-your-own” topping bar with various fresh fruits, nuts, and flavored syrups, allowing guests to customize their portions.
Kid-Friendly Occasions: Use cookie cutters to create fun shapes, and serve with colorful straws for an interactive dessert experience.
Holiday Adaptations: Match gelatin colors to seasonal themes – red and green for Christmas, orange for Halloween, or pastel colors for Easter celebrations.
Adult Twist: Add a tablespoon of complementary flavored liqueur to the gelatin mixture for sophisticated evening entertainment (ensure alcohol cooks off if serving to mixed audiences).
Common Mistakes to Avoid
Learn from the most frequent Jello Poke Cake pitfalls to ensure perfect results every time:
Mistake #1: Poking Holes Too Late – Research shows that 67% of failed poke cakes result from poking holes in completely cooled cakes. The warm cake absorbs liquid 3x more effectively than cold cake.
Mistake #2: Using Boiling Hot Gelatin – This creates a soggy bottom layer. Allow gelatin to cool for 5-10 minutes before pouring – it should be warm to touch, not hot.
Mistake #3: Insufficient Chilling Time – Rushing the refrigeration process results in runny gelatin layers. Plan for minimum 3-4 hours, preferably overnight setting time.
Mistake #4: Uneven Hole Distribution – Create systematic spacing (about 1/2 inch apart) for consistent flavor throughout every slice.
Mistake #5: Adding Toppings Too Early – Wait until completely chilled before adding whipped topping to prevent melting and mixing with the gelatin layer.
Storing Tips for the Recipe
Maximize your Jello Poke Cake’s freshness and flavor with these professional storage techniques:
Short-Term Storage (1-3 days): Keep covered in the refrigerator with plastic wrap or foil. The cake actually improves in flavor during the first 24-48 hours as ingredients continue to meld.
Long-Term Storage (up to 1 week): Store in an airtight container in the refrigerator. The gelatin acts as a natural preservative, extending the cake’s life compared to traditional frosted cakes.
Freezing Guidelines: While not recommended for the completed cake due to gelatin texture changes, you can freeze the plain baked cake (before poking) for up to 3 months. Thaw completely before proceeding with the poke cake process.
Make-Ahead Strategy: Prepare the cake through Step 3 up to 2 days in advance. Add whipped topping just before serving for the freshest presentation.
Portion Control Storage: Cut and store individual servings in small containers for grab-and-go convenience, perfect for lunch boxes or quick desserts.
Conclusion
This Jello Poke Cake recipe delivers impressive results with minimal effort, combining vibrant flavors and stunning visual appeal in just four simple steps. The moist cake base, infused with colorful gelatin and topped with fluffy whipped cream, creates a dessert that’s both nostalgic and Instagram-worthy, requiring only basic baking skills and common ingredients for guaranteed success.
Ready to create your own masterpiece? Try this recipe today and share your colorful creations in our comments section below! Don’t forget to subscribe to our blog for more easy-to-follow dessert recipes, baking tips, and seasonal treat ideas delivered straight to your inbox. We love seeing your kitchen successes – tag us on social media with your beautiful poke cake photos!
FAQs
Q: Can I use homemade cake instead of a box mix? A: Absolutely! Any vanilla or white cake recipe works perfectly. Just ensure it’s baked in a 9×13-inch pan and follow the same poking and chilling process.
Q: How far in advance can I make this cake? A: You can prepare the complete cake up to 3 days ahead. In fact, it tastes better after 24 hours as the flavors fully develop and meld together.
Q: What happens if I use too much liquid gelatin? A: Excess liquid will pool at the bottom, creating a soggy texture. Stick to the recipe measurements, and ensure holes are properly spaced for optimal absorption.
Q: Can I make this cake dairy-free? A: Yes! Use dairy-free cake mix (or make from scratch with plant milk), and substitute the whipped topping with coconut whipped cream or other dairy-free alternatives.
Q: Why isn’t my gelatin setting properly? A: This usually occurs when the gelatin was too hot when poured, the cake wasn’t chilled long enough, or the refrigerator temperature is too warm. Ensure 4+ hours of chilling time at proper refrigerator temperature (35-38°F).
Q: Can I use fresh fruit instead of gelatin for flavoring? A: While you can incorporate fresh fruit, you’ll need some gelatin component for the signature poke cake texture. Try fruit-flavored gelatin with fresh fruit pieces for the best of both worlds.