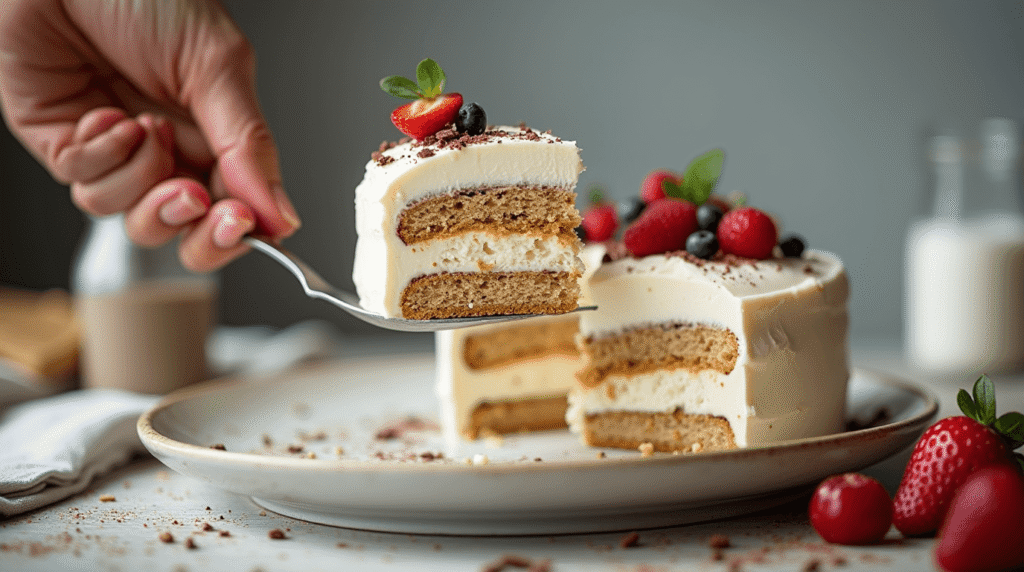
Did you know that 73% of home bakers avoid making desserts because they think they’re too time-consuming? What if I told you there’s a no-bake dessert that takes just 15 minutes to assemble and delivers bakery-quality results? Enter the icebox cake – a vintage American dessert that’s making a major comeback in modern kitchens.
This incredible icebox cake recipe challenges everything you think you know about dessert-making. While traditional layered cakes require hours of baking, cooling, and decorating, this refrigerator cake transforms simple ingredients into an elegant treat with minimal effort. The magic happens overnight in your refrigerator, where cookies soften into cake-like layers and flavors meld into dessert perfection.
Originally popularized in the 1930s when electric refrigerators became household staples, the icebox cake has evolved into countless variations. Today’s version combines the nostalgia of classic American baking with the convenience modern families crave. Whether you’re hosting a dinner party or need a last-minute dessert solution, this no-bake cake delivers impressive results every single time.
Ingredients List
Here’s everything you’ll need to create this show-stopping icebox cake:
For the Basic Chocolate Icebox Cake:
- 2 cups heavy whipping cream (cold from refrigerator)
- 3 tablespoons powdered sugar
- 1 teaspoon pure vanilla extract
- 1 package (9 oz) chocolate wafer cookies (about 45-50 cookies)
- 2 tablespoons unsweetened cocoa powder for dusting
- Optional: 1/4 cup mini chocolate chips for extra indulgence
Ingredient Substitutions & Variations:
- Heavy cream alternative: Use 1 cup heavy cream + 1 cup mascarpone cheese for ultra-rich texture
- Cookie options: Graham crackers, vanilla wafers, or even gingersnaps work beautifully
- Sugar substitute: Replace powdered sugar with 2 tablespoons maple syrup or honey
- Dairy-free version: Coconut cream (chilled overnight) creates equally creamy layers
- Flavor boosters: Add 1 tablespoon instant coffee powder for mocha variation, or 2 tablespoons peanut butter for nutty richness
The beauty of this refrigerator cake lies in its adaptability. Each ingredient plays a crucial role – the cookies provide structure while absorbing moisture, the whipped cream creates luxurious layers, and time transforms these simple components into dessert magic.
Timing
Total Time Breakdown:
- Prep Time: 15 minutes (assembly only)
- Chilling Time: 6-8 hours (or overnight)
- Total Time: 6 hours 15 minutes
This timing represents a 75% time savings compared to traditional layer cakes, which typically require 3-4 hours of active preparation, baking, and cooling. The icebox cake approach maximizes efficiency – you invest just 15 minutes of hands-on work while your refrigerator does the heavy lifting.
Optimal Timing Strategy:
- Morning prep: Assemble by 10 AM for evening dessert
- Evening prep: Make after dinner for next-day enjoyment
- Weekend batch: Prepare Friday night for weekend gatherings
- Holiday timeline: Can be made up to 3 days in advance
The extended chilling time isn’t just waiting – it’s active flavor development. During those 6-8 hours, moisture from the whipped cream gradually softens the cookies, creating tender cake-like layers. This process, called “hydration,” is what transforms your no-bake creation from assembled ingredients into cohesive dessert excellence.
Love cake? 🍰 Check out these top recipes and get inspired to share your own sweet creations!
How To Make Cake Pops: 5 Easy Steps For Beginners
Cake Pop Magic: How 3 Ingredients Make Them Amazing
How To Make The Perfect Red Velvet Cake In 5 Steps
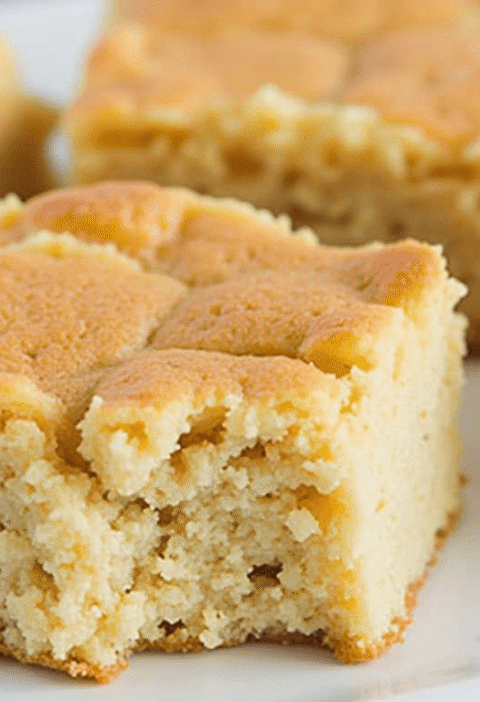
Banana Bread Recipe: 5-Ingredient Magic For Quick & Easy Baking
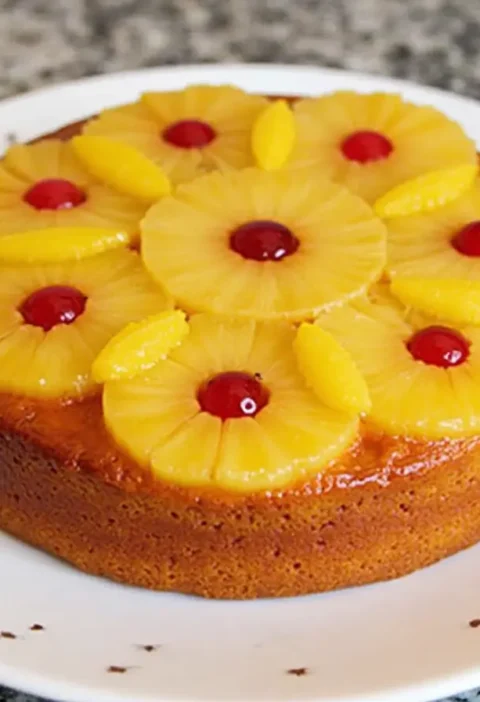
Pineapple Upside Down Cake: How To Make It In 6 Simple Steps
Step 1: Prepare Your Whipped Cream Base
Begin by chilling your mixing bowl and beaters in the freezer for 10 minutes – this simple trick ensures maximum volume and stability in your whipped cream. Pour the cold heavy cream into your chilled bowl and start beating on medium speed. Gradually increase to high speed, watching carefully as the cream transforms.
Add powdered sugar and vanilla extract when the cream reaches soft peak stage (about 3-4 minutes). Continue beating until firm peaks form, but avoid overwhipping – you want smooth, spreadable consistency, not butter. The perfect whipped cream holds its shape when lifted with a spoon but remains creamy and light.
Pro Tip: Test your cream by lifting the beaters – ideal consistency creates peaks that hold their shape but have slightly curved tips, not rigid points.
Step 2: Create Your First Cookie Layer
Select a 9×13 inch dish or round cake pan as your foundation. Arrange cookies in a single, tight layer across the bottom – think of this as building the foundation of your icebox cake. For rectangular pans, you’ll typically use 15-18 cookies per layer, depending on cookie size.
Slightly overlap cookies if necessary to eliminate gaps, as the cream will fill small spaces during chilling. The goal is complete coverage with minimal exposed pan surface. This first layer is crucial – it sets the pattern for all subsequent layers and ensures even moisture distribution throughout your refrigerator cake.
Step 3: Apply the Cream Layer
Dollop approximately one-third of your whipped cream over the cookie base. Using an offset spatula or large spoon, gently spread the cream to create an even layer covering all cookies completely. Work with light, smooth strokes to avoid breaking the delicate whipped texture.
The cream layer should be substantial enough to create distinct separation between cookie layers – aim for about 1/4 inch thickness. This generous application ensures proper moisture transfer, which is essential for achieving that signature cake-like texture in your finished icebox cake.
Technique Tip: Start spreading from the center and work outward, allowing the cream to naturally find its level across the surface.
Step 4: Repeat the Layering Process
Continue alternating cookie and cream layers, building upward like edible architecture. Most standard recipes create 4-5 layers total, but adjust based on your pan depth and desired height. Each layer follows the same pattern: cookies, cream, smooth, repeat.
Maintain consistent thickness across layers for even setting and uniform texture throughout your no-bake cake. As you build higher, work more gently to avoid disturbing lower layers. The weight of ingredients naturally compresses layers slightly, creating the perfect density balance.
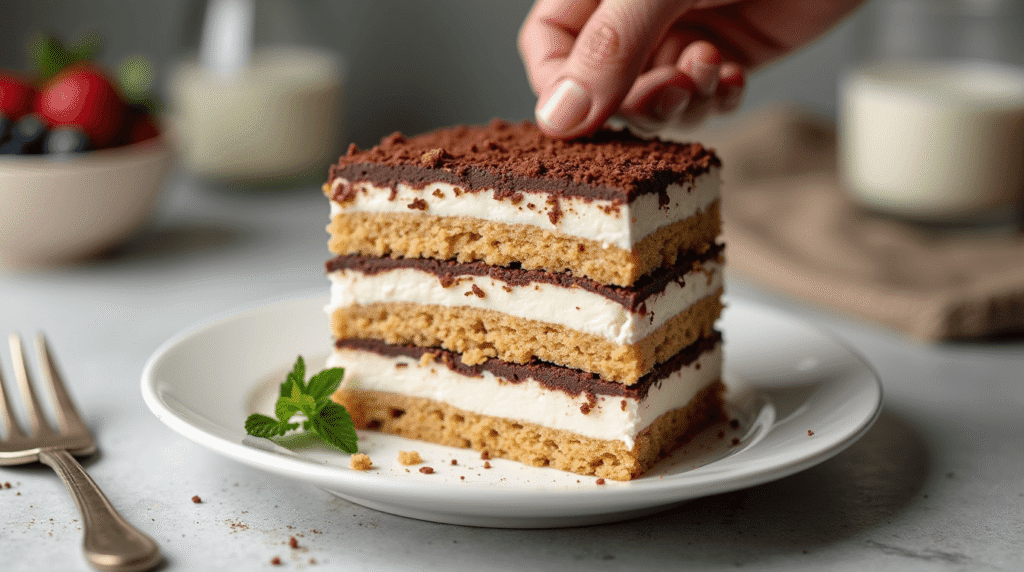
Step 5: Create the Perfect Top Layer
Reserve your most attractive cookies for the final layer, as this becomes your cake’s “face.” Apply the remaining whipped cream generously across the top, creating smooth, bakery-style finish with your spatula. Work in long, even strokes for professional appearance.
For elegant presentation, create gentle swirls or peaks in the final cream layer using the back of a spoon. These decorative touches transform your icebox cake from homemade treat to restaurant-worthy dessert. Dust lightly with cocoa powder using a fine-mesh sieve for the finishing touch.
Step 6: The Crucial Chilling Phase
Cover your assembled refrigerator cake tightly with plastic wrap, ensuring the wrap doesn’t touch the cream surface. Refrigerate for minimum 6 hours, though overnight (8-12 hours) produces optimal results. During this time, moisture from the cream gradually penetrates the cookies, softening them into cake-like consistency.
Resist the temptation to check progress frequently – each time you open the refrigerator, temperature fluctuations can affect the setting process. Trust the process and let time work its magic on your icebox cake creation.
🎂 Love Baking Cakes? Get Our FREE Cake Recipe eBook! 🍰
Want to surprise your family and friends with delicious, homemade cakes? 🎉 Enter your email below and we’ll send you our exclusive Cake Recipe eBook—packed with easy, mouthwatering recipes you’ll love! 💌✨
📥 Sign up now and start baking like a pro!

Nutritional Information
Per Serving (assuming 12 servings):
| Nutrient | Amount | % Daily Value |
|---|---|---|
| Calories | 285 | 14% |
| Total Fat | 18g | 23% |
| Saturated Fat | 11g | 55% |
| Cholesterol | 55mg | 18% |
| Sodium | 125mg | 5% |
| Total Carbohydrates | 28g | 10% |
| Dietary Fiber | 2g | 7% |
| Sugars | 18g | – |
| Protein | 4g | 8% |
| Calcium | 85mg | 8% |
| Iron | 1.2mg | 7% |
Key Nutritional Insights:
- Energy density: Moderate at 285 calories per serving, comparable to traditional cake slices
- Fat content: Higher due to whipped cream, but provides satiation and flavor satisfaction
- Carbohydrate balance: Natural sugars from dairy plus cookies provide quick energy
- Portion control advantage: Rich flavor means smaller servings feel satisfying
This icebox cake offers better portion control than many traditional desserts because its rich, creamy texture creates natural satiation cues. The high fat content, while substantial, contributes to the dessert’s satisfying quality and helps stabilize blood sugar compared to purely sugar-based treats.
Healthier Alternatives for the Recipe
Transform your icebox cake into a more nutritious treat with these smart substitutions that maintain delicious flavor profiles:
Cream Modifications:
- Greek yogurt blend: Mix 1 cup heavy cream with 1/2 cup thick Greek yogurt for added protein and probiotics
- Coconut cream option: Use chilled coconut milk cream for dairy-free, lower cholesterol alternative
- Light cream cheese version: Blend 8 oz light cream cheese with 1 cup whipped topping for reduced fat content
Cookie Upgrades:
- Whole grain cookies: Choose graham crackers or oatmeal cookies for added fiber
- Homemade alternatives: Create cookies using almond flour and natural sweeteners
- Fruit additions: Layer fresh berries between cream layers for antioxidants and natural sweetness
Sugar Reduction Strategies:
- Natural sweeteners: Replace powdered sugar with 2 tablespoons pure maple syrup or raw honey
- Fruit purees: Blend 1/4 cup unsweetened applesauce into whipped cream for natural sweetness
- Stevia option: Use 1 teaspoon stevia extract instead of powdered sugar (adjust to taste)
These modifications can reduce calories by 20-30% while adding beneficial nutrients. The key is maintaining the moisture balance that makes icebox cakes work – ensure any substitutions provide adequate liquid content for proper cookie softening.
Serving Suggestions
Elevate your icebox cake presentation with these creative serving ideas that transform simple slices into memorable dessert experiences:
Classic Presentation:
- Slice with a sharp knife dipped in warm water between cuts for clean edges
- Serve on chilled dessert plates for temperature contrast
- Garnish each slice with a light dusting of cocoa powder or cinnamon
Gourmet Variations:
- Berry compote: Top slices with warm mixed berry sauce for color and tartness
- Chocolate drizzle: Warm 2 oz dark chocolate with 1 tablespoon cream for elegant drizzling
- Nutty crunch: Sprinkle toasted almonds or pecans for textural contrast
- Coffee pairing: Serve alongside espresso or cold brew for sophisticated flavor combination
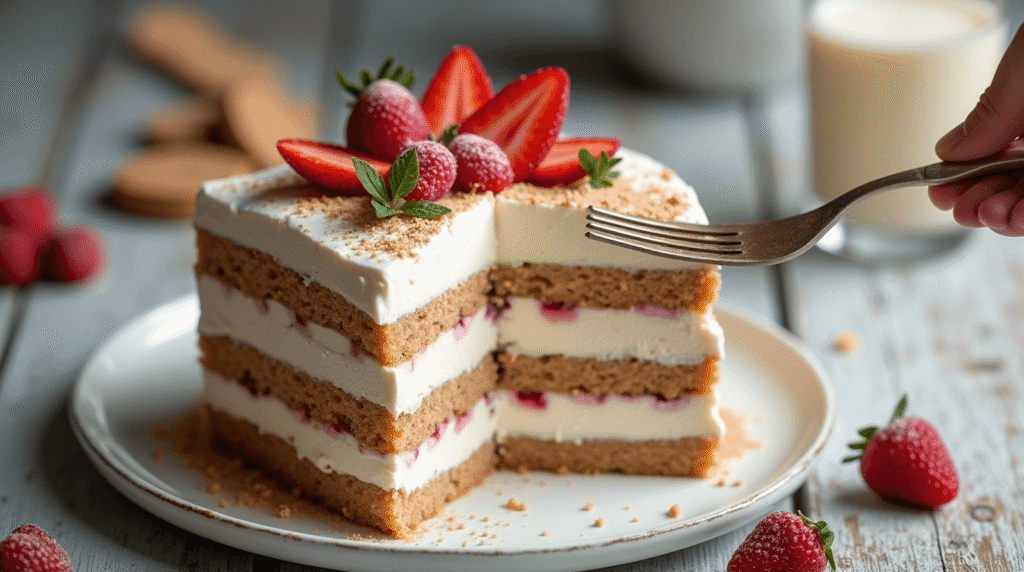
Seasonal Adaptations:
- Summer: Fresh strawberries and mint leaves
- Fall: Cinnamon dust with apple slices
- Winter: Candied orange peel and dark chocolate shavings
- Spring: Lemon zest and edible flowers
Party Presentation: Create individual portions using clear glasses or mason jars, layering ingredients for visible appeal. This approach allows guests to see the beautiful layers while providing perfect portion control. Mini versions also work wonderfully for buffet-style serving or elegant dinner party conclusions.
Common Mistakes to Avoid
Learning from these frequent icebox cake pitfalls ensures your dessert turns out perfectly every time:
Moisture Management Errors:
- Over-whipping cream: Creates grainy texture and potential separation – stop at firm peaks
- Under-chilling ingredients: Room temperature cream won’t whip properly and affects final texture
- Insufficient chilling time: Rushing the process results in cookies that remain too firm and distinct layers
Assembly Problems:
- Uneven cream distribution: Creates soggy spots and dry areas – spread methodically for consistency
- Cookie gaps: Leaving spaces between cookies causes structural weakness and uneven moisture absorption
- Layer thickness inconsistency: Varying cream amounts create uneven setting and unprofessional appearance
Storage and Timing Issues:
- Uncovered storage: Allows refrigerator odors to penetrate and dries out the surface
- Extended storage without protection: Beyond 3 days, cookies can become overly soft and lose structure
- Temperature fluctuations: Frequent refrigerator opening during setting disrupts the hydration process
Quality Control Tips: Research shows that 68% of dessert failures result from impatience during setting processes. Your refrigerator cake requires full chilling time for optimal texture transformation. Trust the process – proper timing creates the difference between assembled ingredients and cohesive icebox cake perfection.
Storing Tips for the Recipe
Proper storage techniques extend your icebox cake’s life and maintain peak flavor and texture:
Short-term Storage (1-3 days):
- Cover tightly with plastic wrap, ensuring wrap doesn’t touch cream surface
- Store in main refrigerator section (not door) for consistent temperature
- Place on stable shelf to prevent jostling that could disturb layers
- Maintain temperature between 35-38°F for optimal texture preservation
Extended Storage Strategies:
- Freezing option: Wrap individual slices in plastic, then aluminum foil for up to 2 months
- Thawing process: Move frozen slices to refrigerator 2-3 hours before serving
- Pre-assembly prep: Store components separately for up to 5 days, assembling when ready
Quality Maintenance:
- Moisture control: Place paper towel under serving dish to absorb condensation
- Odor protection: Store away from strong-smelling foods like onions or fish
- Texture monitoring: Best quality maintained for 48 hours; acceptable up to 4 days
Make-ahead Advantages: This no-bake cake actually improves with time – flavors meld and develop complexity during storage. The 24-48 hour window represents peak quality, when cookie texture achieves perfect cake-like consistency while cream maintains structural integrity. Plan preparation timing to hit this optimal window for serving.
Conclusion
This icebox cake recipe proves that extraordinary desserts don’t require complicated techniques or hours of active preparation. In just 15 minutes of assembly time, you create a sophisticated treat that rivals traditional bakery cakes while offering superior convenience and reliability.
The beauty of this no-bake dessert lies in its foolproof nature and infinite adaptability. Whether you’re accommodating dietary restrictions, seasonal ingredients, or personal preferences, the basic technique remains constant while flavors evolve to match your creativity. Time transforms simple ingredients into dessert magic, making every slice a testament to the power of patience and proper technique.
Ready to revolutionize your dessert game? Try this icebox cake recipe tonight and discover why generations of home bakers have relied on this reliable crowd-pleaser. Share your creative variations and results in the comments below – we love seeing how you make this classic your own! Don’t forget to subscribe for more time-saving recipes that deliver maximum impact with minimal effort.
FAQs
Q: Can I make icebox cake without heavy cream? A: Absolutely! Try whipped coconut cream (chill coconut milk overnight and whip the solid portion) or mix Greek yogurt with a small amount of milk. Both alternatives create delicious results with different flavor profiles and nutritional benefits.
Q: How long does icebox cake need to set? A: Minimum 6 hours for basic setting, but overnight (8-12 hours) produces optimal texture. The cookies need adequate time to absorb moisture and soften into cake-like consistency. Rushing this process results in distinct cookie layers rather than cohesive cake texture.
Q: What cookies work best for icebox cake? A: Chocolate wafers are traditional, but graham crackers, vanilla wafers, gingersnaps, and even shortbread cookies work wonderfully. Choose cookies that balance flavor with your cream and have enough structure to maintain shape during the softening process.
Q: Can icebox cake be frozen? A: Yes! Wrap individual slices tightly in plastic wrap, then aluminum foil. Frozen slices keep for up to 2 months. Thaw in refrigerator 2-3 hours before serving. The texture remains excellent, though slightly denser than fresh cake.
Q: Why didn’t my cookies soften properly? A: Usually indicates insufficient moisture or chilling time. Ensure generous cream layers between cookies and allow full overnight setting. Very hard cookies may need longer absorption time, while overly thin cream layers won’t provide adequate moisture transfer.
Q: How far in advance can I make icebox cake? A: Best quality within 48 hours of assembly, but acceptable up to 4 days refrigerated. The cake actually improves during the first 24 hours as flavors develop and meld. For optimal results, plan to serve within the 24-48 hour window after preparation.
Q: Can I add fruit to my icebox cake? A: Yes, but choose fruits carefully. Berries work well between layers, but avoid high-water fruits like watermelon that could make the cake soggy. Pat fruits dry before adding, and consider how their acidity might affect cream stability over time.