Introduction
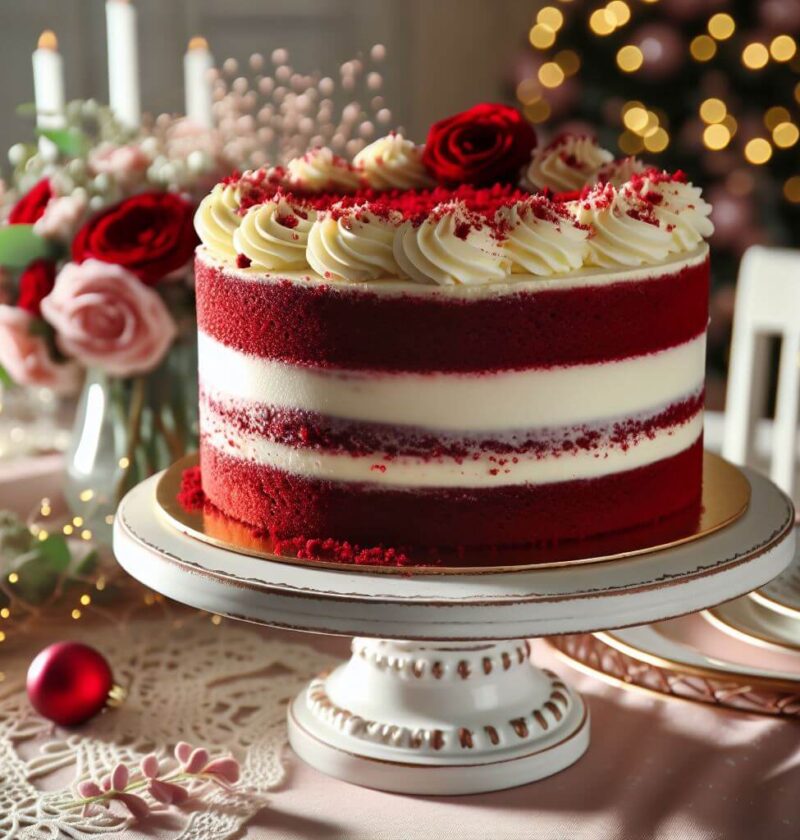
There’s something magical about Red Velvet Cake. Its deep crimson color, soft and fluffy texture, and delicate balance between cocoa and vanilla flavors make it a favorite for any occasion. Whether you’re celebrating a birthday, a holiday, or simply treating yourself, mastering the art of baking a perfect Red Velvet Cake will make you the star of the kitchen.
If you’ve ever wondered how to achieve that bakery-quality cake at home, you’re in the right place. This guide will walk you through five simple yet crucial steps to creating the ultimate Red Velvet Cake, ensuring a moist, flavorful, and visually stunning dessert every time.
Let’s dive into the process and make your dream cake a reality!
Step 1: Gather the Essential Ingredients
Why the Right Ingredients Matter
A perfect Red Velvet Cake depends on the quality and combination of ingredients. Each element plays a vital role in texture, taste, and color. Using fresh, high-quality ingredients will ensure your cake turns out as soft, flavorful, and vibrant as possible.
Ingredients List (Table Format)
| Ingredient | Quantity |
|---|---|
| All-purpose flour | 2 ½ cups |
| Cocoa powder | 2 tbsp |
| Baking soda | 1 tsp |
| Salt | ½ tsp |
| Unsalted butter | ½ cup |
| Sugar | 1 ¾ cups |
| Eggs | 2 large |
| Buttermilk | 1 cup |
| White vinegar | 1 tsp |
| Vanilla extract | 2 tsp |
| Red food coloring | 2 tbsp |
Why Buttermilk and Vinegar?
- Buttermilk gives the cake its signature tenderness by reacting with the baking soda.
- Vinegar enhances the red color and balances flavors for a tangy-sweet taste.
Step 2: Preparing the Batter
Mixing the Dry Ingredients
- Sift together the flour, cocoa powder, baking soda, and salt into a large bowl.
- Whisk well to ensure even distribution of ingredients and avoid clumping.
Creaming the Butter and Sugar
- In a separate mixing bowl, beat room-temperature butter and sugar together until light and fluffy.
- Add eggs one at a time, beating well after each addition to ensure proper incorporation.
Combining the Wet and Dry Ingredients
- Slowly add the dry ingredients to the wet mixture, alternating with buttermilk.
- Mix gently to maintain the airiness of the batter—avoid overmixing.
- Stir in vanilla extract and red food coloring until the batter is evenly colored.
- Finally, add vinegar and give the batter one last gentle mix.
Step 3: Baking to Perfection
Preheating and Preparing the Pans
- Set your oven to 350°F (175°C).
- Grease and flour two 9-inch round cake pans to prevent sticking.
Baking the Cake
- Evenly divide the batter between the two pans.
- Bake for 30–35 minutes or until a toothpick inserted in the center comes out clean.
- Let the cakes cool in the pans for 10 minutes before transferring them to a wire rack.
- Allow the cakes to cool completely before frosting.
Step 4: Making the Cream Cheese Frosting
Why Cream Cheese Frosting?
The slightly tangy and rich cream cheese frosting perfectly complements the sweet, cocoa-infused cake, balancing flavors and enhancing texture.
Ingredients for Frosting (Table Format)
| Ingredient | Quantity |
|---|---|
| Cream cheese | 8 oz (1 block) |
| Unsalted butter | ½ cup |
| Powdered sugar | 3–4 cups |
| Vanilla extract | 1 tsp |
Frosting Technique
- Beat cream cheese and butter together until smooth and creamy.
- Gradually add powdered sugar while mixing on low speed.
- Mix in vanilla extract for extra depth of flavor.
- Continue beating until the frosting is fluffy and spreadable.
Step 5: Decorating and Serving
Assembling the Cake
- Place one cake layer on a plate and spread an even layer of frosting on top.
- Stack the second layer and cover the top and sides with the remaining frosting.
- Use a spatula for a smooth finish or create decorative swirls for a professional touch.
Final Touches
- Sprinkle red velvet cake crumbs on top for a classic look.
- Add white chocolate shavings or fresh berries for extra elegance.
- Refrigerate for 30 minutes before serving to set the frosting.
Serving Tips
- Best served slightly chilled.
- Pair with hot coffee or tea for a delightful experience.
Conclusion
Baking a perfect Red Velvet Cake doesn’t have to be intimidating. By following these five easy steps, you can achieve a rich, velvety texture and decadent taste every time. Now, it’s your turn to bring this classic cake to life! Try it out, experiment with variations, and don’t forget to share your experience in the comments. Happy baking!
FAQ: Your Red Velvet Cake Questions Answered
Why is my cake not red enough?
- Use a high-quality gel-based food coloring instead of liquid for a deeper color.
Can I make this cake ahead of time?
- Yes, store it in an airtight container in the fridge for up to 3 days.
What can I substitute for buttermilk?
- Mix 1 cup of milk with 1 tbsp of vinegar or lemon juice and let it sit for 10 minutes.
Why is my cake dry?
- Overmixing the batter or overbaking can lead to a dry cake. Stick to the recommended times.
Can I freeze Red Velvet Cake?
- Yes! Wrap unfrosted cake layers tightly in plastic wrap and freeze for up to 2 months.
This guide ensures you bake an authentic, flavorful, and moist Red Velvet Cake with ease. Whether you’re a beginner or an experienced baker, these steps will guarantee delicious success every time!

![Struggling with messy layers? Master flawless [Chocolate Eclair Cake] with these 7 pro tips for bakery-worthy results every time. Try them now!](https://cakevibe.com/wp-content/uploads/2025/07/create_a_stunning_hyper-realistic_food_photography_image_of_a_chocolate_eclair_cake_with_perfect_vi_ngxojiynxxxk20i6xlw1_0-1-480x702.png)
