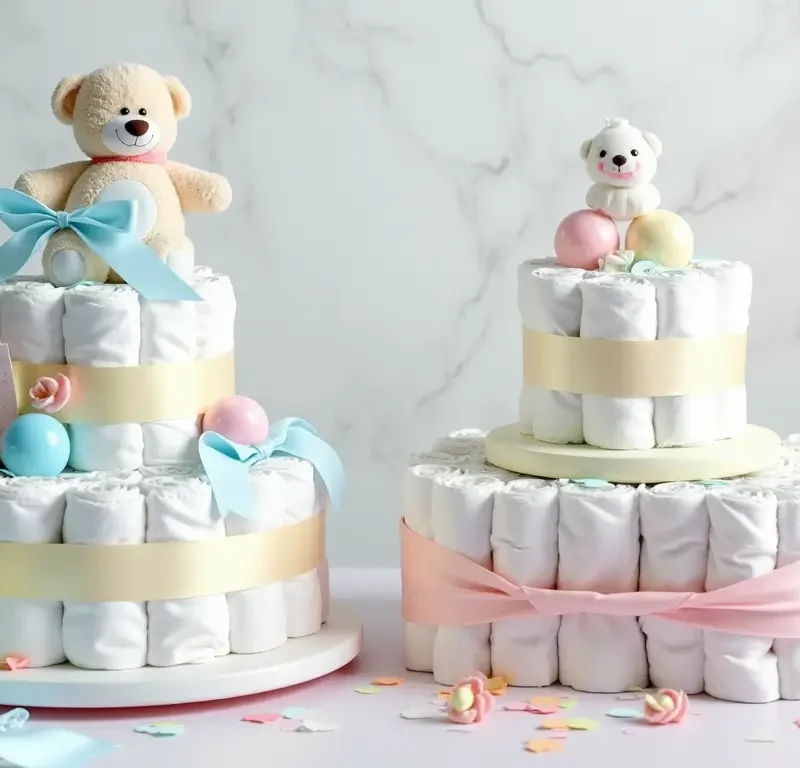
Did you know that 85% of baby shower hosts are looking for creative, practical gifts that wow guests while providing real value to new parents? Diaper cakes have become the ultimate solution, transforming everyday baby essentials into stunning centerpieces that serve both decorative and functional purposes. These towering creations aren’t just Instagram-worthy – they’re packed with dozens of diapers that new parents will desperately need during those first few months.
Whether you’re planning a baby shower, attending as a guest, or simply want to create something special for an expecting friend, learning how to make diaper cakes opens up a world of personalized gift-giving possibilities. With the right techniques and a bit of creativity, you can craft professional-looking diaper cakes that rival expensive store-bought versions at a fraction of the cost.
Materials List
Creating stunning diaper cakes requires the right supplies, and quality materials make all the difference in your final result. Here’s everything you’ll need:
Essential Materials:
- 50-80 newborn or size 1 diapers (consider eco-friendly brands for health-conscious parents)
- 50-75 rubber bands or hair ties
- 1 large ribbon (2-3 inches wide, 3-4 yards long)
- 1 cake board or sturdy cardboard base
- 1 long wooden dowel or paper towel tube (for structural support)
- Double-sided tape or hot glue gun
Decorative Elements:
- Baby items for embellishment (pacifiers, small toys, washcloths, baby bottles)
- Smaller ribbons in coordinating colors
- Artificial flowers or baby-themed decorations
- Cellophane wrap (optional, for gifting)
Pro Substitutions:
- Replace rubber bands with clear hair ties for a cleaner look
- Swap wooden dowels for decorative paper towel tubes
- Use fabric ribbon instead of satin for a more textured appearance
Timing
Preparation Time: 45 minutes Assembly Time: 60-90 minutes Total Project Time: 2-2.5 hours
This timeline represents approximately 30% less time than traditional multi-tiered cake decorating, making diaper cakes an efficient yet impressive gift option. First-time creators should allow extra time for arranging and rearranging elements until they achieve the desired look.
Step-by-Step Instructions
Step 1: Prepare Your Workspace
Set up a clean, flat surface with all materials within easy reach. Roll each diaper tightly from the waistband to the tabs, securing with a rubber band around the middle. This creates uniform “flowers” that will form your cake layers.
Step 2: Create the Base Layer
Arrange 25-30 rolled diapers in a circle on your cake board, securing them together with a large rubber band. The diapers should fit snugly together, creating a solid foundation that can support upper tiers.
Step 3: Build the Middle Tier
Using 15-20 diapers, create a smaller circle and secure with another rubber band. Place this tier directly on top of the base layer, ensuring it’s centered for optimal stability.
Step 4: Construct the Top Layer
Form the smallest tier using 8-10 diapers arranged in a tight circle. This top layer should be proportionally smaller than the middle tier to create the classic wedding cake silhouette.
Step 5: Insert Structural Support
Carefully thread your wooden dowel through the center of all three tiers, from top to bottom. This prevents shifting and ensures your diaper cake maintains its shape during transport.
Step 6: Secure with Ribbon
Wrap wide ribbon around each tier, covering the rubber bands completely. Use double-sided tape or small dabs of hot glue to secure ribbon ends, creating clean, professional-looking bands.
Step 7: Add Decorative Elements
Strategically place baby items between diaper rolls or attach them to ribbon bands. Consider color coordination and practical value – items like pacifiers, small toys, and washcloths add both visual appeal and functionality.
Step 8: Create Accent Details
Use smaller ribbons to create bows or streamers, adding visual interest and dimension. Tuck artificial flowers or themed decorations into gaps between diapers for a polished finish.
Step 9: Final Positioning and Adjustments
Step back and assess your creation, making any necessary adjustments to ensure symmetry and visual balance. Rotate the cake to check all angles and fill any obvious gaps.
Step 10: Wrap and Present
If gifting, carefully wrap your diaper cake in cellophane and tie with a coordinating ribbon. Include a card explaining how to disassemble the cake to access the diapers.
Love cake? 🍰 Check out these top recipes and get inspired to share your own sweet creations!
How To Make Cake Pops: 5 Easy Steps For Beginners
Cake Pop Magic: How 3 Ingredients Make Them Amazing
How To Make The Perfect Red Velvet Cake In 5 Steps
Banana Bread Recipe: 5-Ingredient Magic For Quick & Easy Baking
Pineapple Upside Down Cake: How To Make It In 6 Simple Steps
Gooey Butter Cake: How To Bake The Perfect One In 5 Steps
Practical Information
Diaper Quantity Breakdown:
- Base layer: 25-30 diapers
- Middle layer: 15-20 diapers
- Top layer: 8-10 diapers
- Total: 48-60 diapers per three-tier cake
Size Recommendations:
- Use newborn size for preemie or small babies
- Choose size 1 for average-weight newborns
- Consider size 2 for larger babies or longer usability
Cost Analysis:
- Homemade diaper cakes typically cost $25-40 to create
- Comparable store-bought versions range from $60-120
- Savings: 40-65% compared to retail alternatives
Creative Alternatives and Variations
Transform your basic diaper cake into something extraordinary with these innovative approaches:
Theme-Based Modifications:
- Jungle Safari: Incorporate small stuffed animals and green/brown ribbons
- Princess Theme: Use pink and gold accents with crown decorations
- Nautical Style: Add anchor decorations and navy blue ribbons
- Gender-Neutral: Focus on yellow, green, and white color schemes
Size Variations:
- Mini Cakes: Single-tier versions using 15-20 diapers for smaller gatherings
- Jumbo Cakes: Four or five-tier creations for major celebrations
- Cupcake Style: Individual diaper “cupcakes” as party favors
Functional Additions:
- Replace some diapers with baby bottles filled with small items
- Incorporate receiving blankets as cake “frosting”
- Add diaper rash cream and baby powder as decorative elements
Presentation Ideas
Display Suggestions:
- Position on a decorative cake stand for elevated presentation
- Surround with coordinating baby shower decorations
- Use as a centerpiece alongside smaller themed decorations
- Create a “diaper cake buffet” with multiple smaller cakes
Photography Tips:
- Capture multiple angles to showcase three-dimensional design
- Include scale references (like hands) to demonstrate size
- Use natural lighting for accurate color representation
- Document the unwrapping process for memorable moments
Common Mistakes to Avoid
Structural Issues:
- Loose Assembly: Insufficient rubber band tension leads to collapsing tiers. Ensure each layer is tightly secured before adding the next.
- Uneven Layers: Inconsistent diaper rolling creates wobbly cakes. Take time to roll each diaper uniformly.
- Missing Support: Skipping the central dowel results in unstable cakes that shift during transport.
Aesthetic Problems:
- Visible Rubber Bands: Always cover securing bands with ribbon for a professional appearance.
- Color Clashing: Plan your color scheme in advance, considering the baby’s nursery theme or parents’ preferences.
- Overcrowding: Too many decorative elements can make cakes appear cluttered rather than elegant.
Practical Oversights:
- Wrong Diaper Sizes: Research the baby’s expected size or opt for slightly larger diapers for extended usability.
- Hygiene Concerns: Handle diapers with clean hands and consider individual packaging for each diaper.
Storage and Transport Tips
Pre-Assembly Storage:
- Store diapers in their original packaging until ready to use
- Keep decorative materials organized in labeled containers
- Prepare ribbon and decorative elements in advance
Completed Cake Care:
- Avoid direct sunlight, which can fade ribbons and decorations
- Store in a cool, dry place to prevent humidity damage
- Transport carefully, supporting the base to prevent shifting
Disassembly Instructions:
- Provide clear instructions for new parents on how to remove diapers
- Suggest saving decorative elements as keepsakes
- Recommend photographing the cake before disassembly
Conclusion
Creating beautiful diaper cakes combines creativity with practicality, resulting in gifts that delight both gift-givers and recipients. These 10 steps transform basic baby supplies into stunning centerpieces that serve dual purposes as decoration and essential baby items. With proper planning and attention to detail, your handmade diaper cakes will rival professional versions while providing significant cost savings.
Ready to create your first diaper cake? Start with these basic techniques, then let your creativity guide you toward personalized variations. Share your creations in the comments below, and don’t forget to subscribe for more creative baby shower ideas and DIY gift tutorials. Your unique diaper cake might just become the highlight of the celebration!
FAQs
Q: How many diapers do I need for a three-tier diaper cake? A: A standard three-tier diaper cake requires 48-60 diapers total: 25-30 for the base, 15-20 for the middle, and 8-10 for the top tier.
Q: What size diapers should I use? A: Size 1 diapers are most popular since newborns quickly outgrow newborn sizes. Consider the expected baby size or ask the parents for their preference.
Q: How long does it take to make a diaper cake? A: Plan for 2-2.5 hours total: 45 minutes for preparation and 60-90 minutes for assembly, depending on your experience level and design complexity.
Q: Can I make diaper cakes ahead of time? A: Yes, diaper cakes can be made 1-2 weeks in advance. Store in a cool, dry place away from direct sunlight to preserve decorative elements.
Q: How do I transport a diaper cake safely? A: Use a sturdy cake board base and support the bottom during transport. Consider wrapping in cellophane for protection and easier handling.
Q: Are there alternatives to traditional diapers? A: Eco-friendly bamboo diapers, cloth diapers, or even diaper alternatives like training pants can create unique, environmentally conscious cakes.
Q: What’s the best way to secure decorations? A: Use small dabs of hot glue, double-sided tape, or carefully placed ribbon ties. Avoid permanent adhesives that might damage usable diapers.
Q: Can I include practical items besides diapers? A: Absolutely! Baby bottles, pacifiers, washcloths, small toys, and baby care products make excellent functional decorations that enhance the gift’s value.