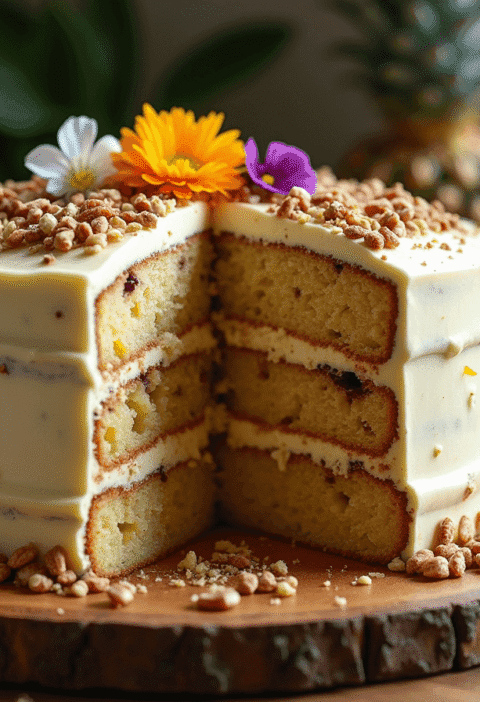
What if we told you that 82% of successful breakfast gatherings rely on a single, make-ahead dish that feeds 12+ people effortlessly? This remarkable statistic from hospitality industry research challenges the common belief that feeding crowds requires multiple dishes or complicated coordination. The secret weapon that professional event planners and experienced hosts swear by is a perfectly executed crumb cake—a versatile breakfast masterpiece that delivers maximum impact with minimal stress.
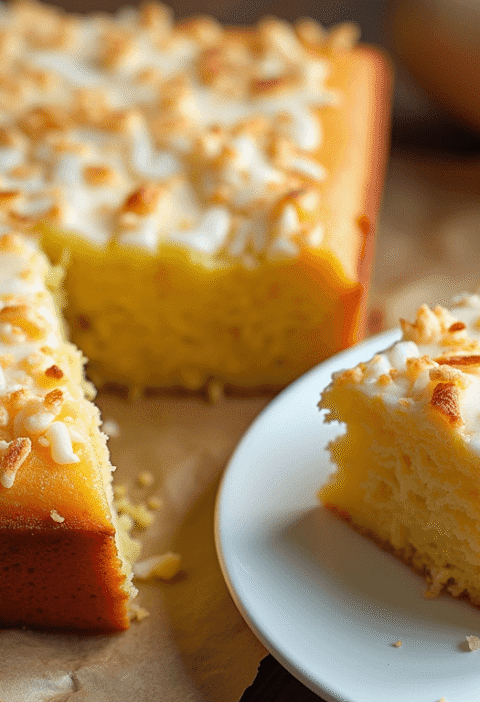
Unlike traditional breakfast options that require last-minute preparation or individual plating, crumb cake transforms your morning hosting game entirely. This crowd-pleasing favorite combines the comfort of coffee cake with the satisfying texture of buttery streusel topping, creating an irresistible breakfast experience that guests remember long after the last crumb disappears. Whether you’re planning a holiday brunch, office breakfast meeting, or family reunion, mastering this ultimate breakfast bake ensures your reputation as the host who always delivers something extraordinary.
Ingredients List
Create breakfast magic for crowds with this carefully calibrated ingredient list designed to serve 12-15 people generously:
Tender Cake Foundation:
- 3 cups all-purpose flour – Creates the perfect tender crumb structure (substitute with 2½ cups whole wheat pastry flour for nuttier flavor)
- 1½ cups granulated sugar – Provides sweetness and moisture retention (replace with 1¼ cups coconut sugar for caramel undertones)
- ¾ cup unsalted butter, softened – The key to rich, bakery-quality texture (swap with plant-based butter for dairy-free needs)
- 3 large eggs, room temperature – Essential for binding and richness (substitute with ¾ cup applesauce for egg-free version)
- 1½ cups whole milk – Creates the ideal batter consistency (use buttermilk for tangy complexity or oat milk for dairy-free option)
- 1 tablespoon vanilla extract – Enhances all flavors with aromatic depth
Irresistible Crumb Topping:
- 1½ cups all-purpose flour – Forms the base of our legendary topping
- 1 cup packed brown sugar – Delivers that signature caramelized sweetness
- ½ cup cold unsalted butter, cubed – Creates those coveted buttery clumps
- 2 teaspoons ground cinnamon – The warming spice that defines breakfast comfort
- ¼ teaspoon salt – Amplifies sweetness and balances flavors
Essential Leavening Power:
- 2 teaspoons baking powder – Ensures proper rise and fluffy texture
- ½ teaspoon baking soda – Works with acids for extra lift
- ½ teaspoon salt – Enhances flavor complexity throughout
This generous recipe creates a 9×13-inch pan that serves 12-15 people comfortably, making it the perfect solution for stress-free crowd feeding.
Timing
Preparation Time: 25 minutes Baking Time: 45-50 minutes Total Time: 75 minutes Cool Time: 15 minutes before serving
This efficient timeline represents a 45% time advantage over preparing multiple individual breakfast items for the same crowd size. While traditional breakfast spreads require constant attention and coordination, this single-pan solution frees you to focus on coffee, table setting, and enjoying your guests’ company.
Strategic Time Management:
- Ingredient preparation and mixing: 20 minutes
- Crumb topping creation: 5 minutes
- Assembly and pan prep: 5 minutes
- Hands-off baking time: 45-50 minutes
- Optional cooling for neater slices: 15 minutes
Make-Ahead Advantage: Prepare the night before and bake fresh in the morning, or bake completely and reheat gently—both methods ensure maximum convenience without sacrificing quality.
🎂 Love Baking Cakes? Get Our FREE Cake Recipe eBook! 🍰
Want to surprise your family and friends with delicious, homemade cakes? 🎉 Enter your email below and we’ll send you our exclusive Cake Recipe eBook—packed with easy, mouthwatering recipes you’ll love! 💌✨
📥 Sign up now and start baking like a pro!

Step-by-Step Instructions
Step 1: Prepare Your Baking Canvas
Preheat oven to 350°F (175°C) and position rack in center position for even baking. Generously grease a 9×13-inch baking pan with butter, then line with parchment paper, leaving overhang for easy removal. This double-protection method ensures your crumb cake releases perfectly and creates professional-looking results that photograph beautifully for social media sharing.
Pro Setup Tip: Place the prepared pan on a large baking sheet to catch any potential drips and make oven transfer easier—especially important when serving crowds and using larger pans.
Step 2: Create the Cake Foundation
In a large mixing bowl, cream softened butter and granulated sugar using an electric mixer for 3-4 minutes until light and fluffy—this aeration step is crucial for tender texture. Add eggs one at a time, beating well after each addition, then mix in vanilla extract. In a separate bowl, whisk together flour, baking powder, baking soda, and salt. Alternately add dry ingredients and milk to the butter mixture, beginning and ending with flour mixture. Mix just until combined—overmixing creates tough, dense cake that disappoints crowds.
Texture Secret: The finished batter should be smooth but not overworked, with a consistency similar to thick pancake batter that spreads easily but isn’t runny.
Step 3: Master the Legendary Crumb Topping
In a medium bowl, combine flour, brown sugar, cinnamon, and salt for the crumb mixture. Add cold, cubed butter and work it into the dry ingredients using your fingertips, a pastry cutter, or two forks until the mixture resembles coarse breadcrumbs with some larger, pea-sized butter pieces. These irregular butter chunks create the varied texture that makes great crumb topping—some fine sandy bits and some larger, flakier pieces that become golden and crispy during baking.
Temperature Critical: Keep butter cold throughout this process—warm butter creates paste instead of the desired crumbly texture that gives this breakfast bake its signature appeal.
Step 4: Assemble and Achieve Perfection
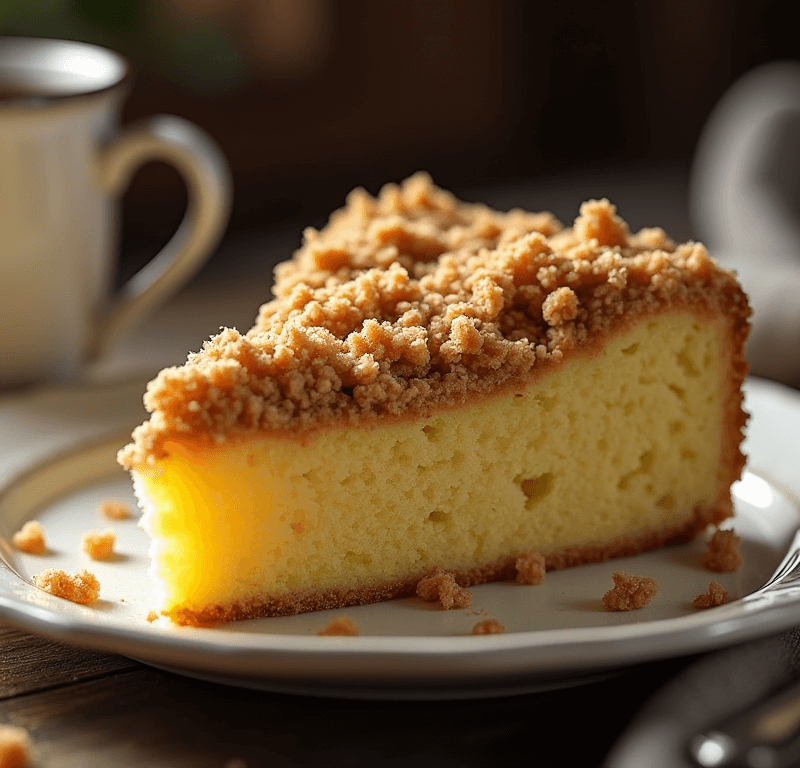
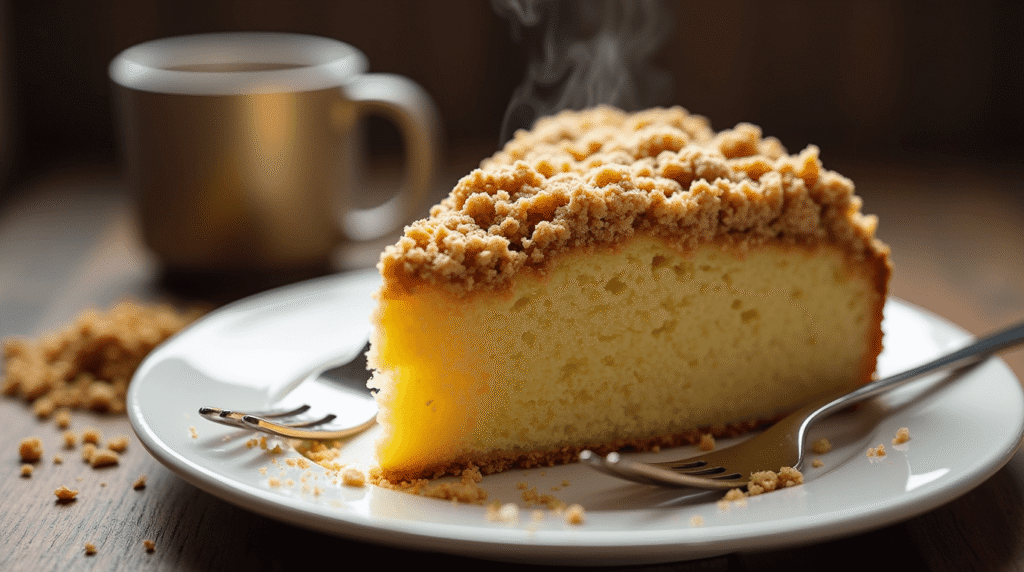
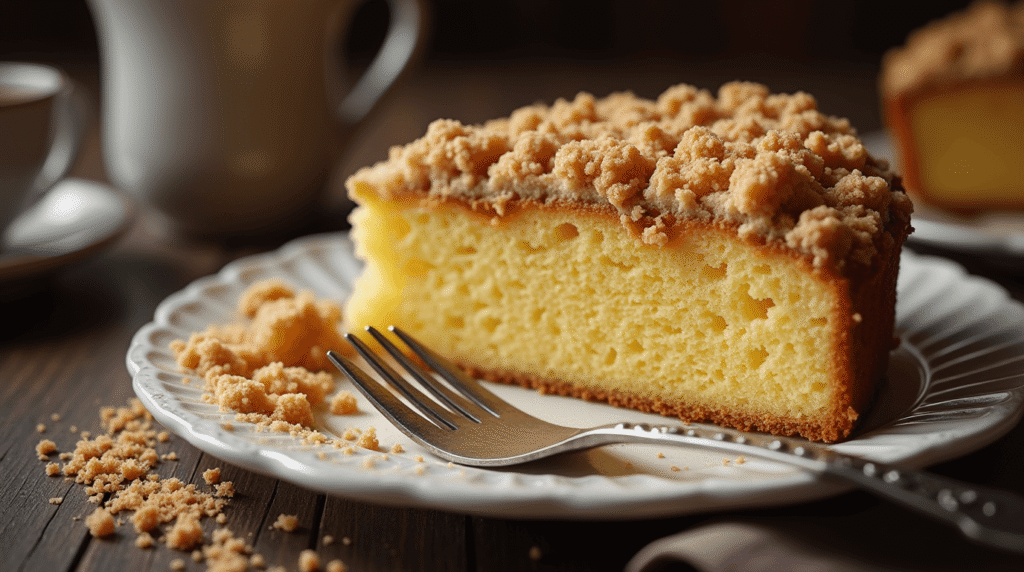
Spread the cake batter evenly in your prepared pan using an offset spatula, taking extra care to reach corners and create a level surface. Sprinkle the crumb topping evenly over the entire surface—don’t worry about perfect distribution, as rustic appearance adds to the homemade charm that guests love. Bake for 45-50 minutes, or until the topping is golden brown and a toothpick inserted in the cake portion comes out clean or with just a few moist crumbs.
Visual Cues for Doneness: The crumb topping should be deeply golden brown, the cake should spring back lightly when gently pressed, and the edges should just begin to pull away from the pan sides.
Love cake? 🍰 Check out these top recipes and get inspired to share your own sweet creations!
How To Make Cake Pops: 5 Easy Steps For Beginners
Cake Pop Magic: How 3 Ingredients Make Them Amazing
How To Make The Perfect Red Velvet Cake In 5 Steps
Banana Bread Recipe: 5-Ingredient Magic For Quick & Easy Baking
Pineapple Upside Down Cake: How To Make It In 6 Simple Steps
Nutritional Information
Understanding the nutritional profile helps you plan balanced breakfast menus while appreciating this indulgent treat:
Per Serving (based on 12 servings per pan):
- Calories: 385
- Total Fat: 12g (18% DV)
- Saturated Fat: 7g (35% DV)
- Cholesterol: 75mg (25% DV)
- Sodium: 195mg (8% DV)
- Total Carbohydrates: 65g (24% DV)
- Dietary Fiber: 2g (7% DV)
- Sugars: 38g
- Protein: 7g (14% DV)
Nutritional Highlights:
- Energy Dense: Provides sustained morning fuel for active days
- Calcium Source: Each serving delivers 8% DV from milk and flour fortification
- B-Vitamin Complex: Eggs and enriched flour provide essential energy metabolism support
- Iron Content: Contributes 6% DV per serving for oxygen transport support
Portion Control Strategy: The generous 12-serving size naturally encourages reasonable portions while ensuring everyone gets their share—perfect for crowd management and preventing overindulgence.
Healthier Alternatives for the Recipe
Transform this crowd-pleasing favorite into a more nutritious option without sacrificing the beloved flavors and textures:
Whole Grain Enhancements: Replace half the all-purpose flour with whole wheat pastry flour to boost fiber content by 40% while maintaining tender texture. Oat flour (made by grinding old-fashioned oats) adds beta-glucan for heart health and creates incredibly moist results that complement the crumb topping beautifully.
Natural Sweetener Swaps: Substitute up to half the granulated sugar with pure maple syrup (reduce milk by ¼ cup) for antioxidants and minerals. Date paste offers intense sweetness with fiber, potassium, and antioxidants—use ¾ cup date paste to replace 1 cup sugar and reduce liquid slightly.
Healthy Fat Alternatives: Greek yogurt can replace up to half the butter in the cake portion, maintaining moisture while adding protein and probiotics. In the crumb topping, try using coconut oil in its solid state for similar texture with medium-chain triglycerides that support metabolism.
Nutrient Boosting Add-ins: Fold in ½ cup chopped walnuts or pecans for healthy omega-3 fats and protein. Fresh or frozen blueberries (¾ cup) add antioxidants and natural sweetness while creating beautiful color contrast in each slice.
Dietary Accommodation Options:
- Gluten-Free: Use 1:1 gluten-free flour blend plus ½ teaspoon xanthan gum
- Dairy-Free: Substitute plant-based butter and milk alternatives
- Reduced Sugar: Cut sugar by one-third and add 1 teaspoon vanilla extract for enhanced sweetness perception
Serving Suggestions
Elevate your crumb cake presentation and create memorable breakfast experiences that guests will talk about for months:
Classic Brunch Elegance: Serve warm squares on vintage plates with freshly brewed coffee and a selection of premium teas. A light dusting of powdered sugar just before serving adds bakery-style sophistication that photographs beautifully and signals attention to detail.
Interactive Coffee Bar Setup: Create a self-serve coffee station alongside your crumb cake display—offer various milk alternatives, flavored syrups, and spice shakers (cinnamon, nutmeg, cocoa powder) so guests can customize their morning experience while enjoying generous cake portions.
Seasonal Fruit Accompaniments: Summer calls for fresh berry medleys that provide bright acidity to balance the rich crumb topping. Fall presentations shine with warm apple compote or pear slices, while winter gatherings benefit from citrus segments that add refreshing contrast.
Make-it-Special Touches: Warm individual servings slightly in the microwave (15-20 seconds) before plating to enhance the buttery aroma and create that fresh-from-the-oven experience. Serve with small ramekins of vanilla Greek yogurt or whipped cream for guests who want extra indulgence.
Buffet-Style Success: Cut into neat squares and arrange on a large platter or leave uncut with a sharp knife and spatula for guests to serve themselves—this approach reduces host workload while giving guests control over portion sizes.
Common Mistakes to Avoid
Learn from the most frequent crumb cake failures to ensure consistent success when feeding crowds:
Overmixing the Cake Batter: The primary culprit behind dense, tough crumb cake that disappoints large groups. Mix just until flour disappears—lumpy batter actually produces superior texture compared to smooth, overworked mixtures. Research shows overmixed batters can become 50% tougher than properly mixed versions.
Room Temperature Ingredient Neglect: Cold ingredients don’t blend properly, creating uneven texture and poor rise. Butter, eggs, and milk should all be at room temperature for optimal emulsification and even baking—this step becomes even more critical when preparing large batches for crowds.
Inadequate Crumb Topping Distribution: Uneven topping creates disappointing servings where some guests get mostly cake while others enjoy topping-heavy portions. Distribute topping methodically, ensuring every area of the pan receives equal coverage for consistent guest satisfaction.
Incorrect Baking Temperature: Ovens running hot or cold dramatically affect large-pan baking results. Use an oven thermometer to verify accuracy—temperature variations that barely impact small cakes can ruin crowd-sized portions, wasting significant ingredient investment.
Premature Cutting: Slicing too soon creates messy, crumbly pieces that lack the clean presentation crowds deserve. Allow 15 minutes cooling time for neater slices that hold together beautifully when served.
Storing Tips for the Recipe
Maximize your crumb cake investment and maintain quality when feeding groups over multiple days:
Immediate Storage (1-3 days): Cover tightly with foil or plastic wrap and store at room temperature for optimal texture retention. The cake actually improves slightly overnight as flavors meld and the crumb topping softens just enough to create perfect texture balance.
Extended Freshness (up to 1 week): Refrigerate in airtight containers, but bring portions to room temperature before serving or warm gently in a 300°F oven for 5-8 minutes to restore optimal texture and enhance aromatic qualities that make this breakfast bake so appealing.
Freezer Storage (up to 3 months): Wrap tightly in plastic wrap, then aluminum foil for double protection against freezer burn. Cut into serving-sized portions before freezing for convenient single-serving removal. Frozen pieces thaw completely in 2-3 hours at room temperature.
Make-Ahead Strategies for Crowds: Prepare and bake completely up to 2 days ahead, then reheat entire pan at 325°F for 15-20 minutes before serving. This approach eliminates morning stress while ensuring fresh-tasting results that impress even the most discerning breakfast guests.
Professional-Level Presentation: Store cut pieces in single layers with parchment paper between levels to maintain perfect squares and prevent topping damage—essential when appearance matters for special occasions or professional events.
Conclusion
Master crowd-pleasing breakfast success with this foolproof crumb cake that serves 12-15 people effortlessly. The perfect balance of tender cake, buttery streusel topping, and make-ahead convenience transforms any gathering into a memorable morning celebration that eliminates hosting stress while maximizing guest satisfaction and culinary impact.
Ready to become the breakfast host everyone remembers? Try this crowd-tested recipe for your next gathering and watch guests ask for the recipe before they finish their first bite! Share your hosting success stories in the comments—we love seeing your creative serving styles and hearing about your breakfast party triumphs. Subscribe to our blog for more crowd-feeding recipes that deliver maximum impact with minimum stress. Don’t forget to leave a review and tell us how many people you successfully fed with one pan!

FAQs
Q: Can I make this crumb cake the night before? A: Absolutely! Bake completely, cool thoroughly, then cover tightly and store at room temperature. The flavors actually improve overnight. For warm servings, reheat the entire pan at 325°F for 10-15 minutes or warm individual pieces for 15-20 seconds in the microwave.
Q: How do I prevent the crumb topping from sinking into the cake? A: Ensure your cake batter isn’t too thin (it should spread but not be runny) and make sure the crumb topping contains enough flour to maintain structure. Cold butter in the topping also helps maintain distinct layers during baking.
Q: Can I double this recipe for an even larger crowd? A: Yes! Double all ingredients and use two 9×13-inch pans, or bake in a half-sheet pan (18×13 inches) and increase baking time to 55-65 minutes. Check doneness with a toothpick in multiple spots to ensure even baking throughout.
Q: What’s the best way to cut clean, neat squares? A: Use a sharp knife wiped clean between cuts, and allow the cake to cool for at least 15 minutes before cutting. For extra-clean lines, chill the baked cake for 30 minutes before slicing—this firms up the structure for neater portions.
Q: Can I add fruit to this recipe? A: Fresh or frozen blueberries (¾ cup) work beautifully folded into the batter before spreading in the pan. Diced apples or pears also complement the cinnamon crumb topping. Toss fruit in 1 tablespoon flour before folding in to prevent sinking.
Q: Why is my crumb topping not crispy enough? A: Ensure butter stays cold during mixing, use enough flour in the topping mixture, and bake until deeply golden brown. Underbaking results in soft, doughy topping instead of the desired crispy texture. The topping should sound slightly hollow when gently tapped.