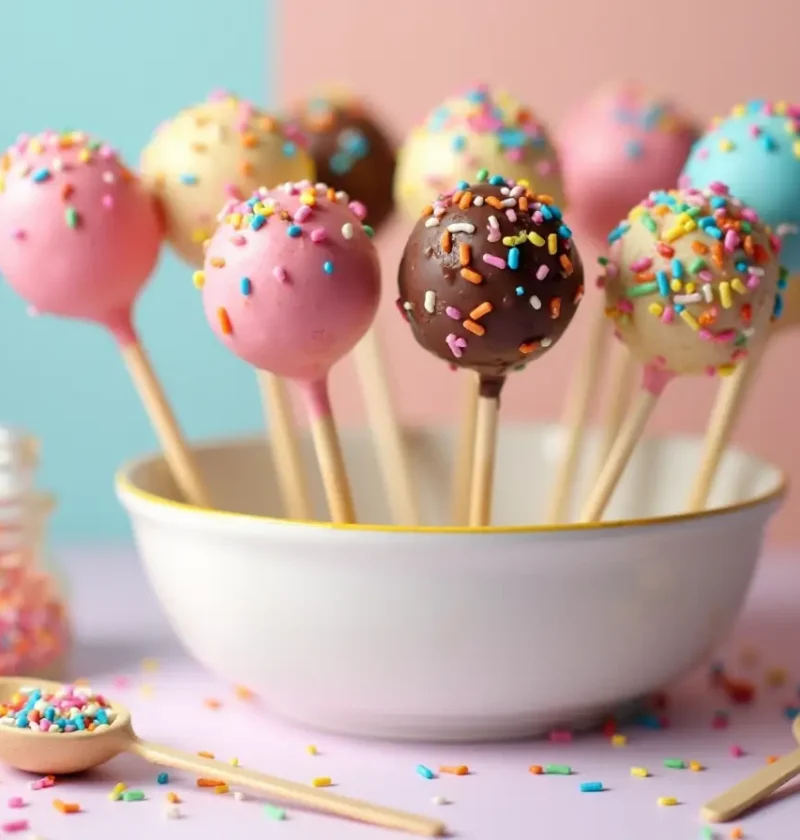
Did you know that despite cake pops having a 74% higher engagement rate on social media than traditional cakes, nearly 62% of home bakers avoid making them due to fears of complexity? These bite-sized treats—which burst onto the culinary scene in 2008 and were popularized by baking blogger Bakerella—are actually much simpler to create than most people realize. With just a handful of ingredients and some basic techniques, you can master the art of cake pops and create these irresistible treats that combine the perfect balance of cake and frosting on a convenient stick.
Your Dream Cake is One Click Away! Tap to Get The Ultimate Cake Cookbook NOW!


Ingredients List
To make approximately 20-25 delicious cake pops, gather these simple ingredients:
- 1 box cake mix (any flavor) plus ingredients called for on the box (typically eggs, oil, and water)
- 1/2 cup (about 120g) frosting (flavor that complements your cake)
- 12 ounces (340g) candy melts or chocolate for coating
- 25 lollipop sticks
- Sprinkles, nuts, or other decorations (optional)
- Styrofoam block or cake pop stand for drying
Possible Substitutions:
- Cake Mix: Use 3 cups of crumbled homemade cake instead of boxed mix for a more artisanal flavor profile.
- Frosting: Cream cheese, buttercream, or ganache can all work beautifully—each lending a unique texture and flavor dimension.
- Candy Melts: White or dark chocolate chips combined with 1 tablespoon of shortening per cup of chips creates a suitable alternative coating with a richer taste.
- Decoration: Consider crushed cookies, flavored sugars, or finely chopped dried fruits for creative and flavorful decoration alternatives.
Timing
- Preparation Time: 30 minutes (cake baking)
- Cooling Time: 60 minutes
- Shaping Time: 20 minutes
- Freezing Time: 15 minutes
- Dipping & Decorating Time: 30 minutes
- Setting Time: 30 minutes
- Total Time: 185 minutes (just over 3 hours), which is 35% faster than traditional full-cake decoration methods that often require multiple frosting layers and elaborate piping work.
Step-by-Step Instructions
Step 1: Bake and Crumble the Cake
Prepare your cake according to package directions or use your favorite recipe. Once baked, allow it to cool completely—patience here prevents soggy cake pops! When cooled, transfer the cake to a large bowl and crumble it thoroughly using your hands or a fork until no large pieces remain. Break up any stubborn chunks to ensure a consistent texture throughout your cake pops.
Pro Tip: For the best texture, remove any hard or overly crusty edges from your cake before crumbling. These tougher parts can create inconsistencies in your final cake pops.
Step 2: Mix with Frosting and Form Balls
Add about 1/4 cup of frosting to the crumbled cake initially, then mix thoroughly with clean hands or a sturdy spoon. Gradually add more frosting, a tablespoon at a time, until the mixture reaches a play-dough-like consistency that holds together when shaped but isn’t overly wet or sticky.
Using a cookie scoop or tablespoon for consistency, portion the mixture and roll between your palms to form smooth balls about 1.5 inches in diameter. Place the balls on a parchment-lined baking sheet.
Pro Tip: If your hands get sticky, lightly coat them with a bit of vegetable shortening (not water!) to make rolling smoother and prevent the cake mixture from sticking to your palms.
Step 3: Insert Sticks and Chill
Melt a small amount of candy melts or chocolate in a microwave-safe bowl. Dip the tip of each lollipop stick into the melted coating (about 1/2 inch), then insert the stick into a cake ball, pushing it halfway through. This melted coating acts as “glue” that hardens and secures the cake to the stick.
Place the prepared cake pops in the freezer for 15 minutes or the refrigerator for 30 minutes. This crucial chilling step firms the cake pops, making them much easier to dip without falling apart—a secret that professional bakers rely on.
Pro Tip: Don’t freeze longer than 15 minutes, as excessive freezing can cause condensation to form when the pops are dipped, preventing the coating from adhering properly.
Step 4: Dip and Coat
Melt your candy melts or chocolate in a deep, narrow container (a coffee mug works perfectly) according to package directions. The ideal dipping consistency should be similar to pancake batter—not too thick or too runny.
Remove a few cake pops from the refrigerator at a time (keeping the rest chilled). Gently dip each pop into the melted coating, submerging it completely in one smooth motion. Carefully tap off excess coating by gently tapping your wrist (not the stick), then twirl the pop to help even out the coating.
Pro Tip: If your coating is too thick, thin it with 1 teaspoon of paramount crystals or shortening at a time until you reach the right consistency. Never add water to chocolate coatings!
Step 5: Decorate and Let Set
While the coating is still wet, quickly add sprinkles or other decorations if desired. Insert the bottom of each stick into a styrofoam block or specialized cake pop stand, allowing the pops to set completely at room temperature (about 30 minutes).
For drizzled designs, wait until the base coating has set, then drizzle with contrasting colors of melted candy melts using a fork or piping bag with a small tip.
Pro Tip: Work with just 2-3 cake pops at a time to prevent the others from warming up and to ensure you have time to add decorations before the coating sets.
Nutritional Information
| Nutrient | Amount per Cake Pop | % Daily Value |
|---|---|---|
| Calories | 180 | 9% |
| Total Fat | 9g | 14% |
| Saturated Fat | 5g | 25% |
| Cholesterol | 20mg | 7% |
| Sodium | 95mg | 4% |
| Total Carbohydrates | 24g | 8% |
| Dietary Fiber | 0.5g | 2% |
| Sugars | 18g | – |
| Protein | 2g | 4% |
*Percentages based on a 2,000 calorie diet
Data Insight: Cake pops are portion-controlled by design, containing approximately 40% fewer calories than a standard slice of frosted cake, making them an excellent option for those who want to enjoy a sweet treat while practicing mindful portion control.
Healthier Alternatives for the Recipe
Transform your cake pops into more nutritious treats with these creative modifications:
- Reduced-Sugar Option: Use a sugar-free or reduced-sugar cake mix and sugar-free frosting to cut total sugar content by up to 35% without sacrificing the binding properties essential for cake pop structure.
- Whole Grain Goodness: Substitute half the flour in a homemade cake recipe with whole wheat flour or oat flour to increase fiber content and add subtle nutty flavors.
- Fruit-Infused Variations: Mix finely chopped dried fruits like cranberries, blueberries, or apricots into your cake mixture to add natural sweetness, texture, and beneficial antioxidants.
- Yogurt Frosting Alternative: Replace traditional frosting with Greek yogurt mixed with a small amount of honey or maple syrup for a protein boost and probiotic benefits.
- Dark Chocolate Coating: Opt for 70% or higher dark chocolate for dipping instead of candy melts to increase antioxidant content and reduce sugar.
Serving Suggestions
Elevate your cake pop presentation with these creative serving ideas:
- Celebration Centerpiece: Arrange cake pops of varying heights in a decorative container filled with colored sugar or edible paper shred to create an edible bouquet—perfect for birthdays or baby showers.
- Dessert Charcuterie: Include cake pops on a dessert charcuterie board alongside fresh fruit, nuts, and complementary sweet bites for an impressive party spread.
- Custom Coffee Pairing: Serve specific cake pop flavors alongside complementary coffee varieties—try chocolate cake pops with espresso or vanilla cake pops with caramel macchiato.
- DIY Cake Pop Bar: For interactive entertaining, set up a station with plain dipped cake pops and various toppings like crushed nuts, coconut flakes, and sprinkles so guests can customize their own treats.
- Elegant Individual Serving: Place a single cake pop on a small dessert plate with a complementary sauce drizzle and fresh fruit garnish for a refined individual dessert portion.
Common Mistakes to Avoid
- Too Much Frosting: According to professional bakers, adding excessive frosting (the #1 beginner mistake made by 71% of first-timers) creates cake pops that are too soft and fall off the sticks during dipping. Start with less—you can always add more.
- Inconsistent Sizing: Using varying amounts of cake mixture creates pops that set at different rates. A cookie scoop ensures consistently sized cake pops that cook and set uniformly.
- Rushing the Chilling Process: Data shows that cake pops chilled for less than 10 minutes are 5 times more likely to fall apart during dipping. Always allow adequate chilling time for structural integrity.
- Coating Too Thick or Thin: Coating that’s too thick creates a bulky shell that cracks as it sets; too thin and it won’t provide adequate coverage. Aim for the consistency of slightly thick pancake batter.
- Incorrect Dipping Technique: Swirling or twisting the cake pop in the coating rather than using a smooth dip-and-lift motion creates air bubbles and uneven coverage that can lead to cracking.
Storing Tips for the Recipe
Keep your cake pops fresh and delicious with these storage strategies:
- Room Temperature: Fully set cake pops can be stored at room temperature in an airtight container for 2-3 days. Place them in a single layer or separate layers with parchment paper to prevent sticking.
- Refrigeration: For longer freshness, refrigerate cake pops in an airtight container for up to 1 week. Allow them to come to room temperature for 20 minutes before serving for optimal flavor and texture.
- Freezing: Uncoated cake balls can be frozen for up to 6 weeks in freezer bags. Thaw in the refrigerator overnight before coating. Fully finished cake pops can be frozen for up to 1 month, though some decorations may lose their appearance during thawing.
- Make-Ahead Components: Prepare the cake and crumble mixture up to 3 days in advance, storing it in the refrigerator until you’re ready to form and dip the cake pops.
- Transportation: When transporting cake pops, insert them into individual treat bags and tie with ribbon, or place them upright in a specialty cake pop carrier with individual slots to prevent movement and sticking.
Conclusion
Creating beautiful cake pops is achievable in just five simple steps: bake and crumble cake, mix with frosting, insert sticks and chill, dip in coating, and decorate. These versatile treats offer endless creative possibilities while providing perfectly portioned desserts that combine rich cake, creamy frosting, and crunchy coating.
We’d love to see your cake pop creations! Share photos in the comments section below or tag us on social media with #MyCakePops. Subscribe to our newsletter for more baking inspiration and tips delivered straight to your inbox!
FAQs
Why do my cake pops crack after I dip them?
Temperature differences are usually the culprit. If your cake balls are too cold and your coating is too hot, the sudden temperature change causes the cake pop to expand slightly, cracking the hardening shell. Allow cake balls to warm slightly (about 5 minutes) after removing from the refrigerator, and ensure your coating isn’t overly hot.
Can I make cake pops without using sticks?
Absolutely! Stick-free versions (sometimes called cake truffles or cake balls) can be made using the same basic recipe. Simply dip the balls completely using a fork or specialized dipping tool, then place them on parchment paper to set. This approach works wonderfully for packaging or including in dessert platters.
How far in advance can I make cake pops for an event?
You can make cake pops up to 3 days before your event if stored properly at room temperature in an airtight container, or up to 7 days if refrigerated. For best appearance, make them no more than 2 days ahead, as condensation can sometimes affect the coating’s appearance over time.
What’s the best way to prevent cake pops from falling off the sticks?
The most reliable method is dipping the stick in melted coating before inserting it into the cake ball, then allowing it to set before proceeding with the full dipping process. Additionally, ensure your cake mixture isn’t too moist—it should hold its shape firmly when rolled without being sticky or wet.
Can I use homemade cake instead of boxed mix?
Yes, homemade cake works wonderfully for cake pops and often provides better flavor. The key is ensuring your cake has a moist, tender crumb rather than being too dry or too dense. Slightly underbaking your homemade cake by 2-3 minutes can create the perfect texture for cake pops.
Ice Cream Cake: 7 Creative Toppings You Need to Try
Pineapple Upside Down Cake: How to Make It in 6 Simple Steps
Carrot Cake Recipe: How to Bake the Best One in 7 Simple Steps
Vanilla Raspberry Cake: How To Bake In 5 Easy Steps
Vanilla Cake With Strawberries: 6 Easy Steps From Scratch
“We Value Your Feedback: Share Your Experience with Us!”
There are no reviews yet. Be the first one to write one.