Introduction
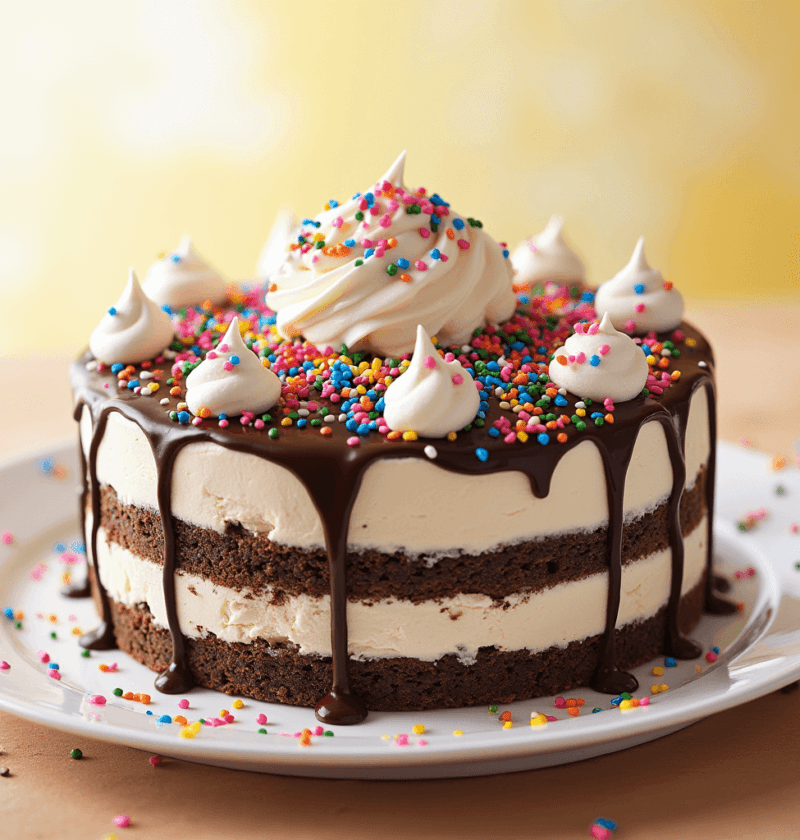
Imagine biting into a dessert that’s creamy, crunchy, and bursting with flavor—all in one slice. That’s the magic of a Carvel Ice Cream Cake! Whether it’s a birthday, holiday, or just a Tuesday night treat, this iconic dessert has been making celebrations sweeter since 1934, when founder Tom Carvel accidentally created the first ice cream cake after his truck broke down. (Talk about a happy accident!)
What makes this recipe a must-try? It’s ridiculously simple, requires zero baking, and lets you unleash your inner artist with endless toppings. Plus, it’s a fraction of the cost of store-bought versions! Think of it as the cooler cousin of our popular No-Churn Vanilla Ice Cream—equally dreamy but with layers of chocolate crunchies and whipped topping that’ll have your family begging for seconds. Ready to make memories (and messes)? Let’s dive in!
What is a Carvel Ice Cream Cake?
Is it a cake? Is it ice cream? Is it a magical hybrid invented by dessert wizards? The answer: all of the above! Named after the legendary Carvel brand, this treat swaps spongy layers for velvety ice cream, crispy chocolate “crunchies,” and a cloud-like whipped topping. Why “Carvel”? Rumor has it Tom Carvel’s gravelly voice (and genius marketing) made the name stick—but we like to think it’s because you’ll “carve-el” your way to everyone’s heart with each bite. After all, the way to someone’s heart is through their stomach… and possibly a second slice. Ready to become the MVP of dessert night? Let’s get layering!
Why You’ll Love This Carvel Ice Cream Cake
- Customizable Joy: Swap flavors, add sprinkles, or go wild with sauces—this cake is your canvas.
- Budget-Friendly: At half the cost of store-bought, you’ll save cash for more toppings (or wine).
- Texture Heaven: Creamy ice cream, crackly crunchies, and fluffy topping = a party in your mouth.
Love our Oreo Icebox Cake? This recipe takes the same ease but adds a nostalgic twist. Grab a spoon, and let’s make magic!
How to Make Carvel Ice Cream Cake
Quick Overview
No oven, no stress! This 30-minute prep recipe layers ice cream, chocolate crunchies, and whipped topping, then freezes into a decadent, family-friendly masterpiece.
Key Ingredients
- 1.5 quarts vanilla ice cream (softened)
- 1.5 quarts chocolate ice cream (or any flavor!)
- 1 cup chocolate crunchies (crush Oreos or use pre-made)
- 1 tub (8 oz) whipped topping (thawed)
- Toppings: Hot fudge, sprinkles, caramel, or fresh fruit

Step-by-Step Instructions
Step 1: Build the Base
Line a 9” springform pan with plastic wrap. Spread softened vanilla ice cream into an even layer. Freeze 1 hour.
Step 2: Add the Crunch
Sprinkle chocolate crunchies over the vanilla layer. Soften chocolate ice cream, spread over crunchies, and freeze another hour.
Step 3: Frost & Decorate
Smear whipped topping over the cake. Drizzle with hot fudge, add sprinkles, or go rogue with crushed candy bars.
Step 4: Freeze & Feast
Freeze 4+ hours. Dip a knife in hot water to slice cleanly. Serve with a side of “You made this?!” reactions.

What to Serve With Carvel Ice Cream Cake
- Drinks: Coffee, milkshakes, or sparkling cider for kids.
- Sides: Fresh berries, brownie bites, or mini cupcakes.
- Vibe: A playlist of 90s hits (because nostalgia tastes better with Backstreet Boys).
Top Tips for Perfecting Your Cake
- Prevent Melting: Work quickly and keep layers chilled.
- Crunchy Hack: Mix crushed Oreos with fudge sauce for extra-gooey crunchies.
- Diet-Friendly? Use dairy-free ice cream and coconut whipped topping.
Storing and Reheating Tips
- Freeze: Wrap in plastic + foil. Keeps for 2 weeks.
- Serve: Let sit 5-10 minutes before slicing for creamier texture.
- No Reheating Needed (unless you’re into ice cream soup… no judgment).
Ready to make your dessert dreams come true? Tag us in your Carvel creations—we’ll cheer you on between bites! 🎉🍰
Pumpkin Cake: How to Bake in 3 Steps (Beginner’s Guide)
Cinnamon Apple Cake: How to Bake the Perfect Fall Dessert
“We Value Your Feedback: Share Your Experience with Us!”
A Delicious Success!
I was a bit nervous about customizing my Carvel Ice Cream Cake, but this 4-step guide made it a breeze. The cake looked beautiful and tasted even better. The tips for adding unique toppings were especially helpful. This recipe is a keeper for sure!
Easy and Fun!
This guide made customizing my Carvel Ice Cream Cake so simple and fun. I loved how I could add my favorite flavors and decorations. The cake turned out amazing, and my friends were impressed. Definitely trying this again for future parties!
A Delicious Success
I was a bit nervous about customizing my Carvel Ice Cream Cake, but this 4-step guide made it a breeze. The cake looked beautiful and tasted even better. The tips for adding unique toppings were especially helpful. This recipe is a keeper for sure!

