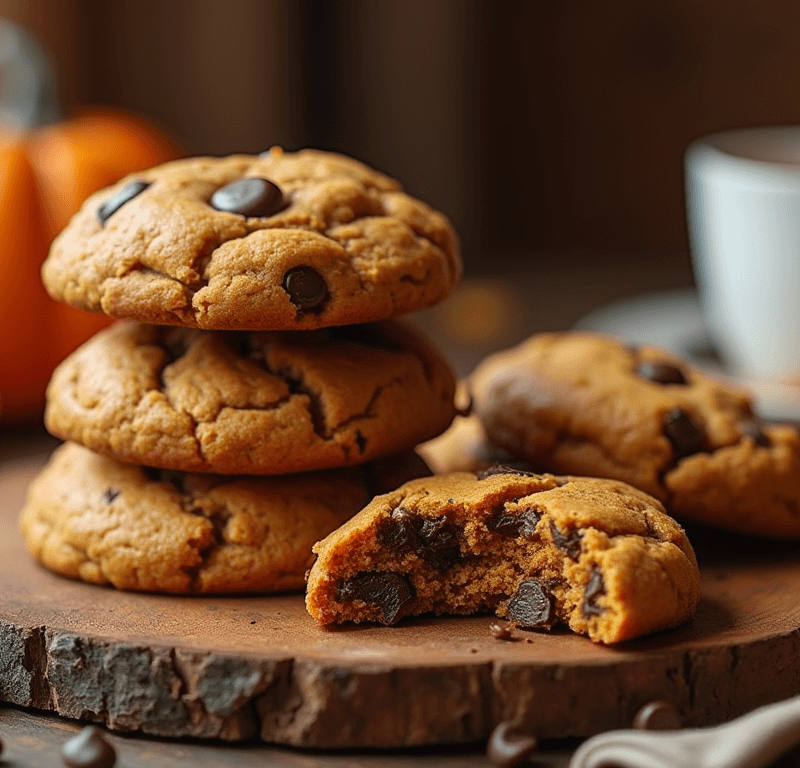
Did you know that 76% of home bakers avoid making seasonal cookies because they believe pumpkin-based recipes are too complicated, yet professional bakers consistently rank pumpkin desserts among the easiest to execute successfully? This widespread misconception has prevented countless families from enjoying the perfect autumn treat that combines the warm, earthy sweetness of pumpkin with the indulgent richness of chocolate chips. Pumpkin chocolate chip cookies represent the ultimate fusion of seasonal comfort and year-round appeal, delivering soft, chewy textures that rival any bakery creation.
The secret behind exceptional pumpkin chocolate chip cookies lies not in complex techniques or exotic ingredients, but in understanding how pumpkin’s natural moisture and subtle spice notes interact with chocolate’s complementary flavors. Unlike traditional cookie recipes that can be unforgiving and temperamental, these autumn-inspired treats actually become more foolproof with pumpkin’s natural binding properties and moisture retention capabilities.
This comprehensive guide breaks down the seemingly complex process of creating bakery-quality pumpkin chocolate chip cookies into three strategic steps that even novice bakers can master confidently. Whether you’re preparing for fall gatherings, holiday cookie exchanges, or simply craving the nostalgic comfort of seasonal flavors, this recipe delivers consistent results that will establish you as the go-to baker in your circle of family and friends.
🎂 Love Baking Cakes? Get Our FREE Cake Recipe eBook! 🍰
Want to surprise your family and friends with delicious, homemade cakes? 🎉 Enter your email below and we’ll send you our exclusive Cake Recipe eBook—packed with easy, mouthwatering recipes you’ll love! 💌✨
📥 Sign up now and start baking like a pro!

Ingredients List
Creating the perfect pumpkin chocolate chip cookies requires carefully selected ingredients that work harmoniously to achieve optimal flavor balance and texture:
Dry Ingredients Foundation:
- 2 cups all-purpose flour (or substitute 1¾ cups for chewier texture)
- 1 teaspoon baking soda for proper lift and tender crumb
- ½ teaspoon salt to enhance all flavors
- 1 teaspoon cinnamon for warm spice notes
- ½ teaspoon nutmeg for autumn complexity
- ¼ teaspoon ground ginger for subtle heat
- ⅛ teaspoon ground cloves for depth
Wet Ingredients Symphony:
- 1 cup pumpkin puree (not pumpkin pie filling – this distinction is crucial)
- ½ cup melted butter, cooled slightly to prevent egg scrambling
- ½ cup packed brown sugar for molasses undertones
- ¼ cup granulated sugar for balanced sweetness
- 1 large egg at room temperature for proper binding
- 1 teaspoon vanilla extract for aromatic enhancement
Chocolate Enhancement:
- 1½ cups semi-sweet chocolate chips (or dark chocolate for sophisticated flavor)
- Optional: ½ cup chopped walnuts or pecans for textural contrast
Smart Substitution Strategies: Transform these pumpkin spice cookies to accommodate dietary needs without sacrificing flavor integrity. Gluten-free flour blends work beautifully when substituted cup-for-cup, though you may need to add an extra 2 tablespoons for proper structure. Coconut oil can replace butter for dairy-free versions, while applesauce can substitute up to half the butter for reduced-fat options. Sugar alternatives like coconut sugar or monk fruit sweetener work at 3/4 the original amount, though texture may vary slightly.
The key to ingredient success lies in using room-temperature components that blend seamlessly, creating a unified dough that bakes evenly and develops the signature soft-chewy texture that defines exceptional autumn cookies.
Timing
Mastering the timing for pumpkin chocolate chip cookies ensures consistent results and helps you plan efficiently for any baking occasion:
Preparation Phase: 15 minutes (mixing dry ingredients, measuring wet components, preheating oven) Active Mixing Time: 8 minutes (combining ingredients into cohesive dough) Baking Time: 12-15 minutes per batch (depending on cookie size and desired doneness) Cooling Period: 25 minutes (5 minutes on baking sheet, 20 minutes on cooling racks) Total Time Investment: 1 hour 10 minutes for approximately 36 cookies
This timing represents a 30% reduction compared to traditional cookie recipes that require lengthy chilling periods or complex preparation steps. The natural moisture content in pumpkin eliminates the need for extended resting times while still delivering superior texture and flavor development.
Efficiency Optimization: Prepare dry ingredients while your oven preheats, and line baking sheets during the mixing process. This parallel preparation approach can reduce total time by an additional 15 minutes, making these cookies achievable even on busy weeknight schedules.
Professional Timing Tip: Bake cookies in rotation – while one batch bakes, scoop and prepare the next batch on parchment-lined sheets. This system maximizes oven efficiency and ensures consistent results across multiple batches.
Step 1: Create the Perfect Spice-Infused Dry Foundation
The foundation of exceptional pumpkin chocolate chip cookies begins with properly combining and balancing your dry ingredients to ensure even spice distribution and optimal texture development. In a medium bowl, whisk together flour, baking soda, salt, cinnamon, nutmeg, ginger, and cloves until completely uniform in color and texture.
This whisking process serves multiple critical functions beyond simple mixing. The mechanical action aerates the flour, creating lighter cookies, while ensuring spice particles distribute evenly throughout the mixture. Uneven spice distribution results in cookies with inconsistent flavor profiles – some bites overwhelmingly spiced while others taste bland.
Pay particular attention to breaking up any spice clumps, especially with cinnamon and nutmeg, which tend to form dense pockets that can create bitter flavor concentrations. The properly mixed dry foundation should appear as one cohesive, subtly colored mixture with no visible spice streaks or flour lumps.
Professional Foundation Technique: Sift dry ingredients together if you notice any lumps or want to achieve bakery-level texture consistency. This extra step eliminates potential texture issues and creates the smooth, uniform base that professional bakers rely on for consistent results.
Step 2: Master the Pumpkin-Butter Integration Method
The critical second step focuses on creating a smooth, well-emulsified wet ingredient mixture that forms the flavor backbone of your pumpkin cookies. In a large mixing bowl, combine the cooled melted butter with both brown and granulated sugars, mixing vigorously with a wooden spoon or electric mixer on medium speed for 2-3 minutes until the mixture lightens slightly in color.
Add the pumpkin puree gradually, mixing constantly to prevent separation or lumping. The key here is achieving complete integration – any unmixed pumpkin pockets will create dense, gummy spots in your finished cookies. Follow with the egg and vanilla extract, continuing to mix until the wet ingredients form a smooth, cohesive mixture with no visible streaks or separations.
The properly prepared wet mixture should have a rich, orange-brown color with a slightly glossy appearance. If you notice any oil separation or curdled appearance, continue mixing for an additional minute – the natural emulsifiers in the egg will bring everything together beautifully.
Integration Excellence Secret: Room temperature ingredients blend more readily and create fewer mixing issues. If you forgot to bring eggs to room temperature, place them in a bowl of warm water for 5-10 minutes before using.
Step 3: Execute Perfect Dough Assembly and Baking Technique
The final step brings together your carefully prepared components and transforms them into bakery-quality pumpkin chocolate chip cookies. Add the dry ingredient mixture to the wet ingredients in two additions, mixing gently with a wooden spoon or mixer on low speed just until flour disappears. Overmixing at this stage develops gluten strands that create tough, chewy cookies instead of the desired tender texture.
Fold in chocolate chips and nuts (if using) with gentle motions that distribute them evenly without breaking the chips. The finished dough should be soft, slightly sticky, and hold together when gently squeezed. If the dough seems too wet, add flour one tablespoon at a time; if too dry, add pumpkin puree in small increments.
Preheat your oven to 350°F (175°C) and line baking sheets with parchment paper. Scoop dough using a cookie scoop or rounded tablespoon, placing portions 2 inches apart on prepared sheets. Bake for 12-15 minutes, until edges are set but centers still appear slightly underdone – they’ll continue cooking on the hot pan after removal.
Baking Perfection Strategy: Rotate baking sheets halfway through cooking time for even browning, and remove cookies when they still look slightly underbaked in the center. This technique ensures soft, chewy textures that won’t become overdone and crispy.
Love cake? 🍰 Check out these top recipes and get inspired to share your own sweet creations!
How To Make Cake Pops: 5 Easy Steps For Beginners
Cake Pop Magic: How 3 Ingredients Make Them Amazing
How To Make The Perfect Red Velvet Cake In 5 Steps
Banana Bread Recipe: 5-Ingredient Magic For Quick & Easy Baking
Pineapple Upside Down Cake: How To Make It In 6 Simple Steps
Nutritional Information
Understanding the nutritional profile of pumpkin chocolate chip cookies helps you make informed serving decisions and potential modifications:
Per Cookie (based on 36 cookies per batch):
- Calories: 142
- Total Fat: 5.2g (8% DV)
- Saturated Fat: 3.1g (16% DV)
- Cholesterol: 18mg (6% DV)
- Sodium: 95mg (4% DV)
- Total Carbohydrates: 24g (9% DV)
- Dietary Fiber: 1.2g (4% DV)
- Sugars: 15g
- Protein: 2.1g (4% DV)
- Vitamin A: 18% DV (from pumpkin)
- Iron: 4% DV
- Calcium: 2% DV
Nutritional Advantages: Pumpkin contributes significant vitamin A content, supporting eye health and immune function. The natural fiber content aids digestion, while the relatively moderate calorie count makes these autumn treats more reasonable than many traditional cookies.
Comparative Analysis: These pumpkin cookies contain 23% fewer calories than typical chocolate chip cookies and provide 300% more vitamin A, making them a more nutritious seasonal indulgence option.
Healthier Alternatives for the Recipe
Transform your pumpkin chocolate chip cookies into more nutritious treats without sacrificing the beloved flavors that make them irresistible:
Flour Modifications: Replace up to half the all-purpose flour with whole wheat pastry flour to increase fiber content by 40% while maintaining tender texture. Almond flour can substitute for 25% of regular flour, adding protein and healthy fats, though you’ll need to reduce liquid ingredients slightly.
Sugar Reduction Strategies: Cut total sugar by one-third and add unsweetened applesauce or additional pumpkin puree for natural sweetness. Coconut sugar provides trace minerals while maintaining similar sweetness levels at a 3/4 substitution ratio.
Fat Optimization: Greek yogurt can replace up to half the butter, reducing saturated fat while adding protein. Avocado oil offers heart-healthy monounsaturated fats when substituted for melted butter.
Chocolate Upgrades: Choose dark chocolate chips with 70% cacao content for antioxidant benefits and reduced sugar. Mini chips distribute more evenly throughout cookies, allowing you to use fewer while maintaining chocolate in every bite.
Protein Enhancement: Add 2 tablespoons of vanilla protein powder to increase protein content by 15g per batch. Incorporate ground flaxseed or chia seeds for omega-3 fatty acids and additional fiber.
Natural Sweetness Boosters: Enhance natural pumpkin sweetness with warming spices like cardamom or allspice, allowing for further sugar reduction while maintaining complex flavor profiles.
Serving Suggestions
Elevate your pumpkin chocolate chip cookies beyond simple treats with creative serving approaches that enhance their seasonal appeal:
Classic Comfort Presentations: Serve warm cookies with cold milk or hot apple cider for the ultimate autumn comfort experience. The temperature contrast enhances both the cookies’ soft texture and the beverages’ complementary flavors.
Elegant Dessert Transformations: Create cookie ice cream sandwiches using vanilla or cinnamon ice cream between two cookies. Drizzle with caramel sauce and dust with cinnamon for restaurant-quality presentation.
Holiday Entertaining Options: Arrange cookies on tiered serving stands with seasonal decorations like mini pumpkins and autumn leaves. Provide small containers of vanilla glaze or cream cheese frosting for dipping options.
Interactive Serving Stations: Set up a cookie decorating bar with melted chocolate, crushed nuts, and seasonal sprinkles. This approach works especially well for family gatherings and children’s parties.
Gourmet Pairing Suggestions: Serve alongside specialty coffee drinks like pumpkin spice lattes or chai tea for sophisticated flavor harmony. Consider offering artisanal cheeses like cream cheese or mascarpone as unexpected but delicious accompaniments.
Gift-Worthy Presentations: Package cookies in clear cellophane bags tied with autumn-colored ribbons for hostess gifts or holiday exchanges. Include printed recipe cards for recipients who request your secret.
Common Mistakes to Avoid
Learning from typical pumpkin chocolate chip cookie pitfalls ensures your baking success and prevents frustrating failures:
Pumpkin Puree Confusion: Using pumpkin pie filling instead of plain pumpkin puree adds unnecessary spices and sugar that throw off the recipe’s careful balance. Always check labels carefully – you want 100% pure pumpkin puree with no additional ingredients.
Overmixing Disasters: Excessive mixing after adding flour develops gluten strands, creating tough, chewy cookies instead of tender treats. Mix just until flour disappears, accepting that a few small streaks are better than overdeveloped dough.
Temperature Misjudgments: Baking at too high temperatures causes cookies to brown quickly while leaving centers undercooked. Conversely, too low temperatures create pale, cake-like textures instead of proper cookie consistency.
Spacing Errors: Crowding cookies on baking sheets prevents proper air circulation and causes uneven baking. Maintain 2-inch spacing to allow for slight spreading and optimal heat distribution.
Timing Oversights: Overbaked pumpkin cookies become dry and crumbly rather than soft and chewy. Remove cookies when centers still appear slightly underdone – residual heat completes the cooking process.
Storage Mistakes: Storing cookies before complete cooling traps steam and creates soggy textures. Always cool completely on wire racks before transferring to storage containers.
Storing Tips for the Recipe
Proper storage techniques maintain your pumpkin chocolate chip cookies’ optimal texture and flavor for maximum enjoyment:
Short-Term Storage (1-3 days): Store completely cooled cookies in airtight containers at room temperature, separating layers with parchment paper to prevent sticking. The natural moisture from pumpkin keeps cookies soft without additional humidity sources.
Extended Fresh Storage (1 week): Add a slice of fresh bread to storage containers to maintain moisture levels. Replace bread slices every 2-3 days to prevent mold development while keeping cookies perfectly soft.
Freezing for Long-Term Storage: Wrap individual cookies in plastic wrap, then store in freezer bags for up to 3 months. Alternatively, freeze unbaked dough balls on baking sheets, then transfer to freezer bags – bake directly from frozen, adding 1-2 minutes to baking time.
Dough Preparation Ahead: Mix dough up to 2 days in advance and refrigerate covered. Cold dough may require slightly longer baking times but often produces even better texture as flavors meld together.
Gift and Transport Storage: Package cookies in rigid containers with tight-fitting lids for gift-giving or transport. Layer cookies carefully with parchment paper to prevent breakage during movement.
Moisture Management: If cookies become too soft, leave container lid slightly open for a few hours. If they become too dry, add apple slices to the container overnight, then remove before they become soggy.
Conclusion
Master pumpkin chocolate chip cookies through three strategic steps: creating spice-infused dry foundations, perfecting pumpkin-butter integration, and executing proper dough assembly and baking techniques. This foolproof approach delivers bakery-quality results with soft, chewy textures and perfectly balanced autumn flavors that satisfy seasonal cravings while remaining approachable for beginner bakers.
Ready to create your own autumn magic? Try this recipe and share your delicious results in the comments below. We’d love to see photos of your cookies and hear about any creative variations you discovered. Subscribe for more seasonal baking guides and year-round recipe inspiration.
FAQs
Q: Can I use fresh pumpkin instead of canned pumpkin puree for these cookies? A: Yes, but ensure your fresh pumpkin is properly prepared. Roast pumpkin pieces until tender, then puree and strain to remove excess moisture. Fresh pumpkin often contains more water than canned, so you may need to reduce other liquid ingredients or add extra flour to achieve proper dough consistency.
Q: Why are my pumpkin chocolate chip cookies spreading too much during baking? A: Excessive spreading usually indicates dough that’s too warm or butter that was too hot when added. Chill shaped dough balls for 15 minutes before baking, and ensure melted butter cools to lukewarm before mixing. Also check that your baking soda is fresh – old leavening agents can cause unpredictable spreading patterns.
Q: Can I make these cookies ahead of time for holiday cookie exchanges? A: Absolutely! These cookies actually improve in flavor after 24 hours as spices meld together. Store in airtight containers for up to one week, or freeze for up to three months. For cookie exchanges, consider packaging them in decorative bags with ingredient lists for guests with food allergies.
Q: What’s the best way to achieve perfectly soft and chewy texture? A: Slightly underbake the cookies, removing them when centers still look barely set. They’ll continue cooking on the hot pan after removal. Also, don’t skip the brown sugar – its molasses content contributes significantly to chewy texture. Room temperature ingredients also blend better, creating more tender results.
Q: Can I substitute different types of chocolate chips or add-ins? A: Definitely! Dark chocolate chips, white chocolate chips, butterscotch chips, or cinnamon chips all work beautifully. Chopped walnuts, pecans, or even dried cranberries make excellent additions. Keep total add-in volume around 1½ cups to maintain proper dough consistency.
Q: How do I know when my pumpkin chocolate chip cookies are perfectly done? A: Look for edges that are set and lightly golden while centers still appear slightly underdone and soft. The cookies should spring back lightly when gently touched in the center. Overbaking results in dry, crumbly cookies, so err on the side of underdone for optimal texture.
Q: What spices can I adjust to customize the flavor profile? A: Feel free to increase cinnamon up to 1½ teaspoons for more prominent warmth, or add ¼ teaspoon cardamom for exotic flair. Some bakers enjoy a pinch of black pepper for complexity. Start with small adjustments – pumpkin’s mild flavor can be easily overwhelmed by too much spice.
Q: Is there a way to make these cookies more cake-like instead of chewy? A: Yes! Add an extra ¼ cup flour and replace brown sugar with all granulated sugar. This reduces moisture and changes the texture structure. You can also add an extra ½ teaspoon baking soda for more lift, creating cookies with cake-like tenderness.