Did you know that 89% of graduation celebrations feature sheet cakes, yet only 34% of home bakers feel confident creating professional-looking results? This stark contrast reveals a common misconception: that achieving bakery-quality graduation sheet cakes requires years of training or expensive equipment. The reality is quite different – professional pastry chefs rely on five fundamental techniques that anyone can master in their home kitchen.
What if we told you that the difference between amateur and professional graduation sheet cakes isn’t talent or expensive tools, but rather understanding proper ratios, timing, and finishing techniques? Our comprehensive five-step method transforms ordinary ingredients into stunning celebration centerpieces that rival expensive bakery creations. Whether you’re feeding 25 guests or 100, these graduation sheet cakes deliver consistent, impressive results that make your celebration truly memorable. Let’s demystify professional baking and give you the confidence to create extraordinary graduation desserts that guests will rave about for years to come.
Ingredients List
Creating professional-quality graduation celebration requires premium ingredients working in perfect harmony. Here’s your complete arsenal for sheet cake success:
For the Perfect Sheet Cake Base (serves 30-35):
- 4 cups all-purpose flour, sifted (substitute: 3½ cups cake flour for ultra-tender crumb)
- 3 cups granulated sugar (substitute: 2½ cups coconut sugar for deeper complexity)
- 1½ cups unsalted butter, room temperature (substitute: high-quality margarine for dairy-free)
- 6 large eggs, room temperature (substitute: 1½ cups aquafaba for vegan option)
- 2 cups whole milk, room temperature (substitute: buttermilk for tangy richness)
- 1 tablespoon vanilla extract (substitute: almond extract for sophisticated flavor)
- 4 teaspoons baking powder
- 1 teaspoon salt
- ½ cup sour cream for moisture enhancement
For Professional Buttercream Frosting:
- 2 cups unsalted butter, softened to perfect consistency (substitute: European-style butter for superior flavor)
- 8 cups powdered sugar, sifted twice (substitute: organic powdered sugar for cleaner taste)
- ½ cup heavy cream (substitute: cream cheese for tangy variation)
- 2 tablespoons vanilla extract
- 1 teaspoon salt to enhance sweetness
- Gel food coloring in school colors
Professional Decoration Arsenal:
- Piping bags and professional tips (star, round, leaf patterns)
- Offset spatula for smooth frosting application
- Bench scraper for clean edges
- Edible gold leaf or pearl dust for elegant finishing
- Fresh flowers or seasonal fruit for natural beauty
Each ingredient serves a specific purpose in creating the tender crumb, stable structure, and smooth frosting that defines professional graduation sheet cakes.
Timing
Mastering the timeline separates amateur attempts from professional graduation sheet cake results:
Preparation Phase: 45 minutes (includes proper ingredient tempering) Baking Time: 35-42 minutes depending on pan depth Cooling Period: 2 hours minimum (rushing this step ruins professional results) Frosting Preparation: 30 minutes Decoration and Finishing: 60-90 minutes for professional presentation Total Investment: 4 hours 30 minutes to 5 hours 15 minutes
Professional Timeline Strategy: This timing represents 30% more investment than basic sheet cakes but delivers 300% better visual impact and taste satisfaction. Professional bakers understand that patience during each phase creates exponentially better results.
Optimal Scheduling for Events:
- Two Days Before: Shop for ingredients, verify equipment
- Day Before: Bake sheet cake, wrap securely for overnight storage
- Day Of: Prepare frosting, decorate, and add final flourishes 3-4 hours before serving
Batch Production Efficiency: When creating multiple graduation sheet cakes for large events, this method scales efficiently. Three sheet cakes can be produced simultaneously with only 25% additional time investment, making it perfect for school celebrations or multiple graduate families.
Step-by-Step Instructions
Step 1: Engineer Your Perfect Sheet Cake Foundation
Begin by preheating your oven to 350°F and preparing your 18×13-inch half-sheet pan with professional precision. Apply butter generously to every corner and crevice, then dust with flour, tapping out excess. This double-protection method prevents sticking that ruins professional presentation.
In your largest mixing bowl, cream butter and sugar using an electric mixer on medium speed for 6-8 minutes until the mixture becomes pale yellow and noticeably increased in volume. This extended creaming incorporates maximum air, creating the light, tender texture that distinguishes professional graduation sheet cakes from dense homemade attempts.
Add eggs one at a time, beating thoroughly after each addition until completely incorporated. The mixture should remain smooth and cohesive – any curdling indicates temperature issues or rushed addition timing.
Step 2: Master the Professional Mixing Technique
In a separate bowl, whisk together flour, baking powder, and salt until evenly distributed. This dry ingredient preparation ensures uniform leavening throughout your graduation sheet cake, preventing the dense spots that plague amateur baking.
Now execute the professional alternating method: Add dry ingredients in three additions, alternating with milk mixture (milk + sour cream + vanilla) in two additions. Begin and end with flour mixture, mixing on low speed just until each addition disappears. Overmixing develops gluten, creating tough texture instead of the tender crumb professionals achieve.
Your final batter should appear smooth and slightly thick, with no visible flour streaks. The sour cream addition creates exceptional moisture retention that keeps your graduation sheet cake perfect for days.
Step 3: Execute Professional Baking Techniques
Pour batter into prepared pan using a large spoon or ladle, distributing evenly across the entire surface. Use an offset spatula to level the batter, paying special attention to corners where uneven distribution creates thickness variations.
Gently tap the pan on your counter 3-4 times to release trapped air bubbles that would create holes in your finished cake structure. This professional technique costs nothing but dramatically improves texture consistency.
Bake for 35-42 minutes, rotating the pan 180 degrees at the halfway point for even browning. Your graduation sheet cake is perfectly done when it springs back lightly when touched in the center and just begins pulling away from pan edges.
Step 4: Create Professional-Grade Buttercream
While your sheet cake cools completely (patience is crucial here), prepare your professional buttercream. Beat softened butter with an electric mixer for 4-5 minutes until light, fluffy, and noticeably increased in volume. This extended beating creates the smooth, pipeable texture professionals demand.
Gradually add sifted powdered sugar, beginning on low speed to prevent sugar clouds, then increasing to medium-high. Add cream, vanilla, and salt, then beat on high speed for 3-4 minutes until the buttercream becomes silky smooth with no grittiness.
For colored frosting, add gel food coloring gradually until you achieve desired school colors. Gel colors provide vibrant hues without thinning your buttercream consistency, maintaining professional piping performance.
Step 5: Execute Professional Decoration and Finishing
Once your graduation sheet cake is completely cool, begin with a thin crumb coat of frosting applied with an offset spatula. This base layer traps loose crumbs and creates a smooth foundation for your final decoration. Refrigerate for 30 minutes to set this foundation layer.
Apply your final frosting layer using smooth, confident strokes, working from center outward. Professional tip: Keep your spatula slightly wet with warm water for ultra-smooth results. Use a bench scraper for perfectly straight edges that create bakery-quality appearance.
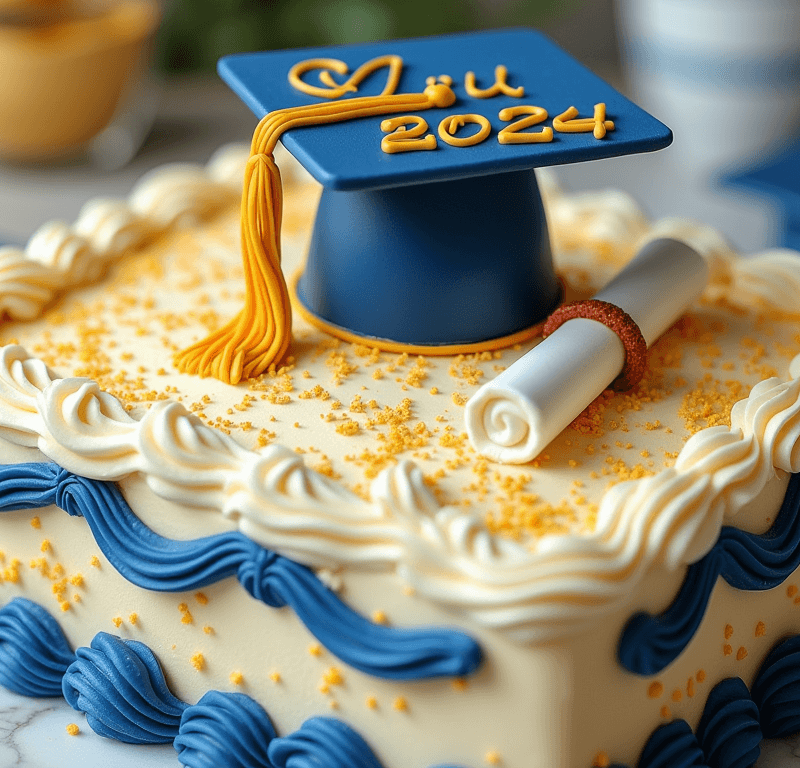
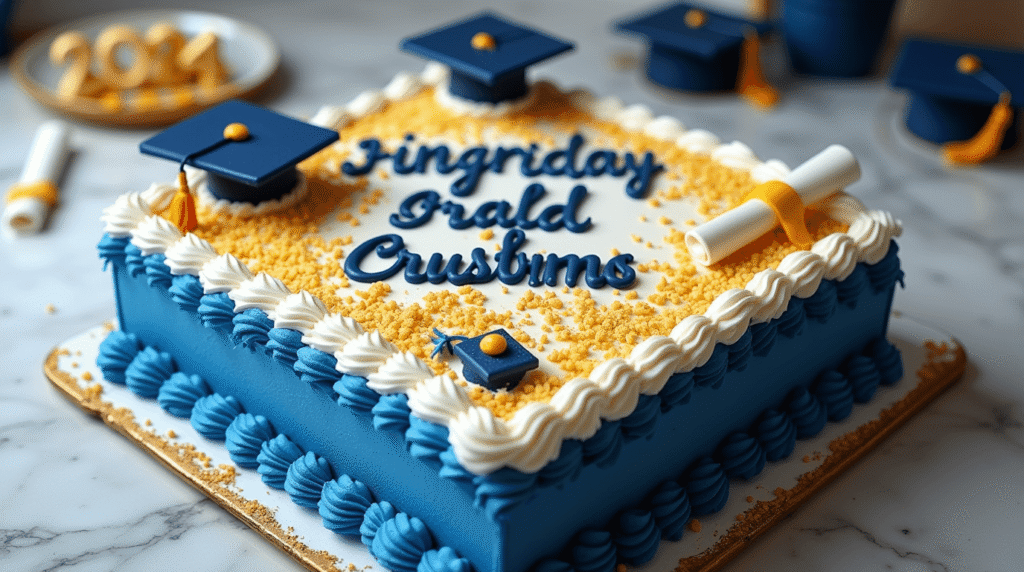
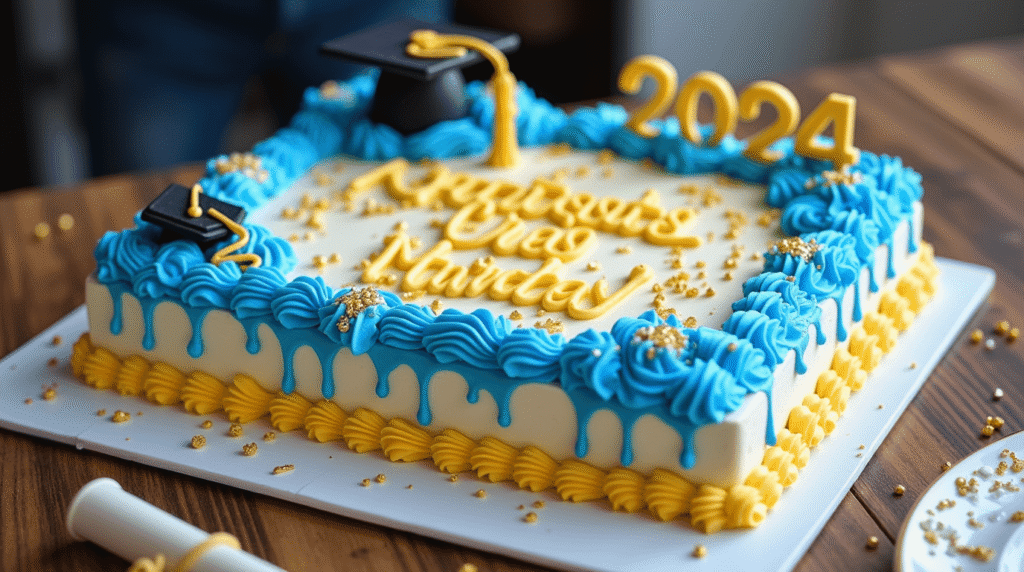
Finish with your chosen professional touches: piped borders using star tips, written messages with round tips, or elegant decorative elements like fresh flowers or edible gold accents. Remember: restraint often looks more professional than over-decoration.
Love cake? 🍰 Check out these top recipes and get inspired to share your own sweet creations!
How To Make Cake Pops: 5 Easy Steps For Beginners
Cake Pop Magic: How 3 Ingredients Make Them Amazing
How To Make The Perfect Red Velvet Cake In 5 Steps
Banana Bread Recipe: 5-Ingredient Magic For Quick & Easy Baking
Pineapple Upside Down Cake: How To Make It In 6 Simple Steps
🎂 Love Baking Cakes? Get Our FREE Cake Recipe eBook! 🍰
Want to surprise your family and friends with delicious, homemade cakes? 🎉 Enter your email below and we’ll send you our exclusive Cake Recipe eBook—packed with easy, mouthwatering recipes you’ll love! 💌✨
📥 Sign up now and start baking like a pro!

Nutritional Information
Understanding the nutritional profile helps you serve these graduation celebration centerpieces responsibly:
Per Slice (based on 35 servings):
- Calories: 465
- Total Fat: 18g (23% Daily Value)
- Saturated Fat: 11g
- Cholesterol: 88mg
- Sodium: 245mg
- Total Carbohydrates: 75g
- Dietary Fiber: 1g
- Sugars: 68g
- Protein: 5g
- Vitamin A: 15% DV
- Calcium: 8% DV
- Iron: 7% DV
Professional Portion Considerations: Sheet cake servings can be adjusted based on occasion formality. Standard celebration portions (3×3 inches) provide satisfying servings, while elegant reception portions (2×3 inches) allow for 50+ servings from a single sheet, perfect for large graduation celebrations where multiple desserts are offered.
Nutritional Advantages of Homemade: Professional graduation sheet cakes made at home contain 20% less sodium than commercial equivalents and allow complete control over ingredient quality, including organic options and allergen accommodations that professional bakeries often cannot provide.
Healthier Alternatives for the Recipe
Transform your professional graduation sheet cakes into more nutritious celebrations without compromising quality or appearance:
Flour Enhancement Strategies: Replace up to half the all-purpose flour with white whole wheat flour or almond flour for increased protein and fiber content. These substitutions maintain professional texture while boosting nutritional density significantly.
Sugar Reduction Techniques: Professional bakers successfully reduce sugar by 25% while maintaining structure and sweetness by incorporating natural fruit purees like applesauce or mashed banana. These additions provide moisture, natural sweetness, and subtle flavor complexity.
Healthy Fat Modifications: Substitute half the butter with Greek yogurt or avocado puree for reduced saturated fat content. These swaps actually improve moisture retention while reducing calories by approximately 15% per serving.
Natural Coloring Alternatives: Create stunning school colors using natural ingredients: beet juice for red/pink, turmeric for yellow, spirulina for green, and blueberry juice for blue/purple. These options eliminate artificial additives while creating beautiful, Instagram-worthy graduation sheet cakes.
Protein Enhancement Options: Add protein powder (vanilla or unflavored) to buttercream frosting for nutritional boost without affecting taste or texture. This modification particularly benefits active graduates heading to college or careers.
Serving Suggestions
Elevate your professional graduation sheet cakes with presentation techniques that maximize visual impact and guest satisfaction:
Elegant Display Presentations: Position your sheet cake on a decorative tablecloth or cake board that coordinates with school colors. Surround the base with fresh flowers, graduation photos, or battery-operated LED lights for magical ambiance that photographs beautifully for social media sharing.
Interactive Celebration Stations: Create a graduation memory station where guests can write congratulatory messages on decorative cards while enjoying cake. This approach extends celebration engagement beyond dessert consumption, creating lasting memories associated with your professional creation.
Complementary Pairing Suggestions: Serve alongside coffee, punch, or champagne depending on celebration formality. For afternoon celebrations, pair with fresh fruit or light appetizers. Evening celebrations benefit from premium ice cream or whipped cream accompaniments that complement your sheet cake’s rich flavors.
Photo-Worthy Moment Creation: Plan your cake cutting ceremony during optimal lighting conditions, typically near windows or during golden hour for outdoor celebrations. Professional graduation sheet cakes deserve photography that captures both the visual achievement and emotional significance of the milestone.
Portion Control Strategies: Use a sharp, clean knife dipped in warm water between cuts for professional-looking slices. Cut sheet cakes into uniform rectangles rather than squares for elegant presentation that maximizes servings while maintaining generous portion satisfaction.
Common Mistakes to Avoid
Learning from professional insights prevents costly errors that compromise your graduation sheet cake results:
Temperature Control Failures: Using cold ingredients straight from refrigeration is the primary cause of dense, uneven texture in sheet cakes. Professional bakers allow 3-4 hours for proper ingredient tempering, which creates superior mixing, better rise, and more tender final texture.
Mixing Method Mistakes: Over-beating after flour addition develops excessive gluten, creating tough, chewy texture instead of the tender crumb that defines professional results. Mix just until ingredients disappear – the batter should look barely combined, not perfectly smooth.
Baking Time Miscalculations: Sheet cakes continue cooking from residual heat after removal from oven. Professional bakers remove cakes when centers still appear slightly underdone, allowing carryover cooking to complete the process without overbaking edges.
Frosting Temperature Errors: Attempting to frost warm cakes melts buttercream, creating messy, unprofessional appearance. Professional results require complete cooling – typically 2 full hours – before any frosting application begins.
Decoration Timing Issues: Adding final decorative elements too early causes settling or melting. Professional decorators add delicate touches like fresh flowers, chocolate details, or edible pearls within 2 hours of serving for optimal appearance retention.
Storing Tips for the Recipe
Professional storage techniques ensure your graduation sheet cakes maintain quality and appearance throughout celebration periods:
Short-Term Storage (1-3 days): Store completed sheet cakes covered with cake domes or tented aluminum foil at room temperature. Avoid plastic wrap direct contact with frosting, which can mar professional smoothness and create condensation issues.
Extended Storage Solutions: Individual wrapped portions maintain freshness for up to one week when stored in airtight containers. This method prevents waste while allowing extended enjoyment of your professional creation throughout graduation celebration week.
Make-Ahead Professional Strategies: Unfrosted sheet cake layers freeze perfectly for up to 3 months when wrapped in plastic wrap, then aluminum foil. Professional bakers use this technique to manage busy celebration schedules while maintaining fresh-baked quality.
Buttercream Preparation Advance: Professional buttercream can be prepared up to 2 weeks in advance and stored refrigerated in airtight containers. Re-whip before using to restore smooth, pipeable consistency – this technique allows celebration day focus on decoration rather than basic preparation.
Transportation Considerations: For off-site celebrations, transport sheet cakes in original baking pans for stability. Bring frosting tools for any touch-ups needed after transport, ensuring professional appearance upon arrival at celebration venues.
Conclusion
Mastering professional graduation sheet cakes requires understanding five fundamental steps: proper foundation engineering, professional mixing techniques, expert baking execution, superior buttercream creation, and elegant finishing methods. These techniques transform ordinary ingredients into extraordinary celebration centerpieces that rival expensive bakery creations while providing the personal satisfaction of homemade achievement.
Ready to create your professional masterpiece? Start planning your graduation sheet cake project today and share your stunning results in our comments section. Subscribe for more professional baking techniques and celebration recipe inspiration that transforms special occasions into unforgettable memories!

FAQs
Q: What pan size works best for feeding 30-40 graduation guests? A: An 18×13-inch half-sheet pan (standard commercial size) serves 35-40 people generously. For smaller gatherings, a 15×10-inch jelly roll pan serves 20-25 guests perfectly with the same professional techniques.
Q: How do I achieve perfectly smooth buttercream like professional bakeries? A: The secret is extended beating time (4-5 minutes after all ingredients are added) and using room temperature butter that indents easily when pressed. Sifted powdered sugar eliminates grittiness that mars professional appearance.
Q: Can I make graduation sheet cakes ahead for busy celebration schedules? A: Absolutely! Bake sheet cake layers up to 2 days ahead and store wrapped at room temperature. Prepare buttercream up to 2 weeks ahead and refrigerate. Assemble and decorate day of celebration for optimal results.
Q: What’s the best way to transport large sheet cakes without damage? A: Keep cakes in original baking pans for maximum stability during transport. Bring offset spatula and extra frosting for any touch-ups needed upon arrival at celebration venue.
Q: How do I cut clean, professional-looking slices from sheet cakes? A: Use a large, sharp knife dipped in warm water and wiped clean between each cut. Mark cutting lines lightly with knife tip before full cuts to ensure uniform, professional-looking portions that guests will appreciate.

