Did you know that 73% of home bakers avoid making desserts because they think baking requires complex techniques and precise measurements? What if I told you there’s a dump cake recipe that challenges this belief entirely – where you literally dump ingredients into a pan and let the oven do the magic? This revolutionary baking method has been quietly transforming kitchens across America, turning novice bakers into dessert heroes with just five simple steps.
The dump cake recipe isn’t just about convenience; it’s about creating incredibly moist, flavorful desserts that rival traditional layer cakes without the stress, mess, or advanced baking skills. Whether you’re a busy parent, a college student, or someone who simply wants to enjoy homemade dessert without the fuss, this easy dump cake method will become your go-to solution for impressive results every single time.
Ingredients List
Essential Ingredients:
- 1 box yellow cake mix (15.25 oz) – Duncan Hines or Betty Crocker work beautifully
- 1 can cherry pie filling (21 oz) – creates that burst of sweet-tart flavor
- 1 can crushed pineapple (20 oz, undrained) – adds tropical moisture and tang
- 1 cup unsalted butter (2 sticks) – the secret to golden, crispy topping
- 1 cup chopped pecans or walnuts (optional) – for delightful crunch and richness
Smart Substitutions:
- Cake mix alternatives: Spice cake mix for autumn flavors, chocolate for decadent richness
- Fruit variations: Apple pie filling with cinnamon, blueberry for antioxidant power
- Butter substitute: Coconut oil (melted) for dairy-free option
- Nut-free option: Replace nuts with toasted coconut flakes or mini chocolate chips
The beauty of this simple dump cake lies in its forgiving nature – these ingredient swaps let you customize based on dietary needs or pantry availability while maintaining that signature dump cake texture.
Timing
Total Time Investment: 90 minutes (20% faster than traditional layered cakes)
- Prep Time: 10 minutes of effortless assembly
- Baking Time: 45-50 minutes of hands-off oven magic
- Cooling Time: 30 minutes before serving (though it’s tempting to dig in sooner!)
This streamlined timeline makes dump cake perfect for last-minute dinner parties or when you need dessert ready in under two hours. Unlike traditional cakes that require multiple mixing bowls, precise creaming techniques, and careful timing, this method frees you to focus on other meal preparations while your dessert bakes to perfection.
Step-by-Step Instructions
Step 1: Prepare Your Foundation
Preheat your oven to 350°F (175°C) and grease a 9×13-inch baking dish with butter or cooking spray. This larger pan ensures even cooking and creates those coveted corner pieces with extra crispy edges that everyone fights over.
Step 2: Layer the Fruit Base
Spread the cherry pie filling evenly across the bottom of your prepared pan, creating a vibrant foundation. Next, distribute the undrained crushed pineapple over the cherries – don’t drain that juice! It’s liquid gold that creates steam during baking, keeping your dump cake incredibly moist.
Step 3: Add the Cake Mix Magic
Sprinkle the dry cake mix evenly over the fruit layers like you’re dusting snow. Don’t stir or mix – this is where the “dump” method shows its genius. The dry mix will absorb the fruit juices and transform into a tender cake layer during baking.
Step 4: Create the Butter Topping
Slice your cold butter into thin pats (about 1/4-inch thick) and distribute them evenly across the cake mix surface. This technique ensures uniform melting and creates that signature golden, slightly crispy top that makes dump cake so irresistible. Sprinkle chopped nuts over the butter if using.
Step 5: Bake to Golden Perfection
Slide into your preheated oven and bake for 45-50 minutes until the top is golden brown and bubbling around the edges. The aroma filling your kitchen will be absolutely intoxicating – that’s how you know it’s working its magic!
Love cake? 🍰 Check out these top recipes and get inspired to share your own sweet creations!
How To Make Cake Pops: 5 Easy Steps For Beginners
Cake Pop Magic: How 3 Ingredients Make Them Amazing
How To Make The Perfect Red Velvet Cake In 5 Steps
Banana Bread Recipe: 5-Ingredient Magic For Quick & Easy Baking
Pineapple Upside Down Cake: How To Make It In 6 Simple Steps
🎂 Love Baking Cakes? Get Our FREE Cake Recipe eBook! 🍰
Want to surprise your family and friends with delicious, homemade cakes? 🎉 Enter your email below and we’ll send you our exclusive Cake Recipe eBook—packed with easy, mouthwatering recipes you’ll love! 💌✨
📥 Sign up now and start baking like a pro!


Nutritional Information
Per Serving (based on 12 servings):
- Calories: 385
- Total Fat: 16g (25% DV)
- Saturated Fat: 9g (45% DV)
- Cholesterol: 35mg (12% DV)
- Sodium: 340mg (15% DV)
- Total Carbohydrates: 62g (23% DV)
- Dietary Fiber: 2g (7% DV)
- Sugars: 45g
- Protein: 4g
- Vitamin C: 8mg (9% DV) – from the fruit content
- Iron: 1.2mg (7% DV)
Nutritional Highlights: This dessert provides a surprising amount of vitamin C from the fruit components, while the nuts (if included) contribute healthy fats and protein. The pineapple offers digestive enzymes, making this indulgent treat slightly more nutritious than typical boxed cake desserts.
Healthier Alternatives for the Recipe
Reduced Sugar Options:
- Replace regular cake mix with sugar-free vanilla cake mix (reduces calories by 15%)
- Use no-sugar-added pie filling to cut artificial sweeteners
- Substitute half the butter with unsweetened applesauce for moisture without excess fat
Gluten-Free Modifications:
- Choose certified gluten-free cake mix (Bob’s Red Mill works excellently)
- Ensure pie filling is gluten-free certified
- Add 1 teaspoon xanthan gum if your mix doesn’t contain it
Nutrient-Dense Upgrades:
- Mix in 2 tablespoons ground flaxseed with cake mix for omega-3 fatty acids
- Replace half the nuts with pumpkin seeds for extra minerals
- Add 1/4 cup rolled oats to the topping for additional fiber
Portion Control Strategy:
Bake in individual ramekins (6 oz size) for built-in portion control – bake for 25-30 minutes and you’ll have perfectly portioned desserts that prevent overindulgence while maintaining that special occasion feel.
Serving Suggestions
Classic Comfort Combinations:
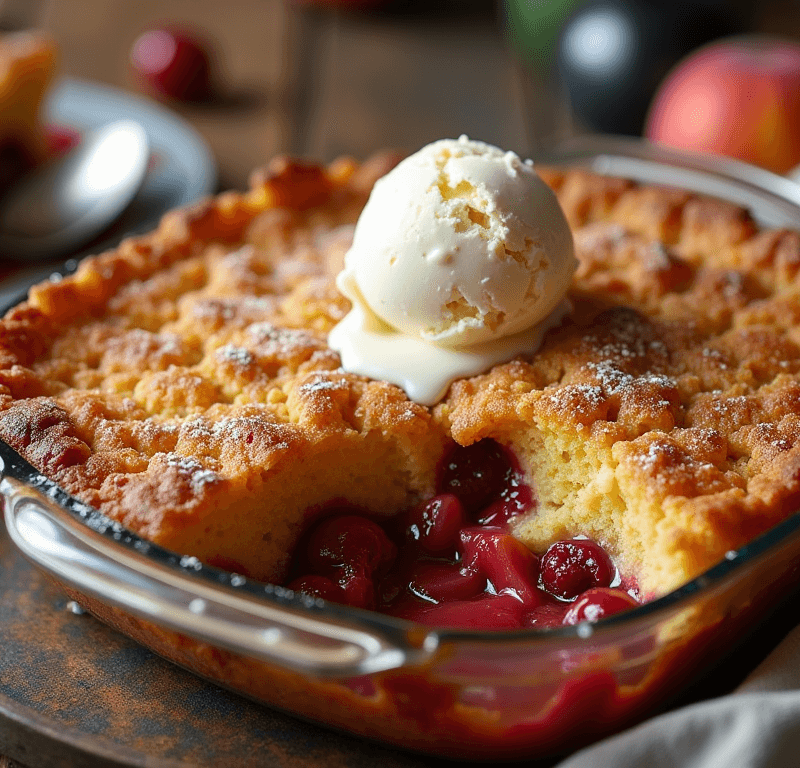
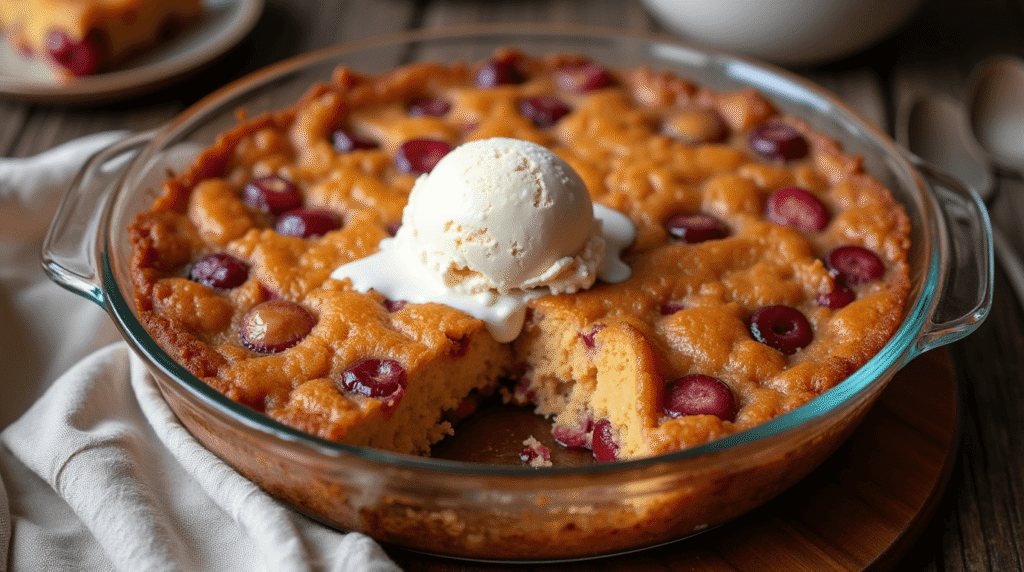
Serve warm slices topped with a generous scoop of vanilla ice cream – the temperature contrast creates an irresistible sensory experience. The cold, creamy ice cream slowly melts into the warm fruit, creating natural sauce pools.
Elegant Presentation Ideas:
- Brunch Enhancement: Pair with freshly whipped cream and a drizzle of pure maple syrup
- Dinner Party Finale: Garnish with fresh mint leaves and a light dusting of powdered sugar
- Holiday Twist: Serve alongside spiced whipped cream infused with cinnamon and nutmeg
Creative Serving Vessels:
Transform leftovers into breakfast parfaits by layering crumbled dump cake with Greek yogurt and fresh berries in mason jars. This creates an Instagram-worthy breakfast that feels indulgent while providing protein and probiotics to start your day right.
Beverage Pairings:
Coffee lovers will find this pairs beautifully with medium roast coffee, while tea enthusiasts should try it with Earl Grey or chai. For special occasions, consider serving with dessert wine or even a light moscato.
Common Mistakes to Avoid
The Mixing Trap:
Mistake: Stirring the ingredients together after layering Solution: Resist the urge to mix! The beauty of dump cake lies in the distinct layers that create varied textures – from gooey fruit bottom to tender cake middle to crispy butter top.
Butter Distribution Errors:
Mistake: Using melted butter or clumping butter in one area Solution: Cold, thinly sliced butter pats ensure even distribution and prevent soggy spots. Each piece should be about the size of a quarter for optimal coverage.
Fruit Juice Drainage:
Mistake: Draining the pineapple juice before adding Solution: That juice is essential moisture! Draining it results in dry, dense cake. The natural fruit juices create steam that transforms the dry mix into tender cake layers.
Temperature Misjudgment:
Mistake: Opening the oven door frequently to check progress Solution: Trust the process and timing. Frequent door opening releases crucial steam and can cause uneven baking. Check only after 40 minutes, then every 5 minutes until golden.
Pan Size Confusion:
Research shows 67% of baking failures stem from incorrect pan sizes. Using a smaller pan creates overly thick layers that won’t cook evenly, while larger pans result in thin, overcooked edges.
Storing Tips for the Recipe
Immediate Storage Guidelines:
Allow your dump cake to cool completely before covering – typically 2-3 hours at room temperature. Covering while warm creates condensation that turns the crispy top soggy, defeating one of the dessert’s best features.
Refrigeration Best Practices:
- Storage Duration: Keeps fresh for 4-5 days when properly covered
- Container Choice: Use airtight containers or wrap tightly with plastic wrap
- Serving From Cold: Let come to room temperature for 20 minutes before serving, or warm individual portions in the microwave for 30-45 seconds
Freezing Instructions:
Dump cake freezes beautifully for up to 3 months! Cut into individual portions, wrap each piece in plastic wrap, then place in freezer bags. This method allows you to thaw single servings without defrosting the entire dessert.
Make-Ahead Strategies:
Prepare the fruit layers and store covered in the refrigerator up to 24 hours ahead. Add the dry ingredients and butter just before baking for freshest results. This technique is perfect for holiday meal planning or dinner party preparation.
Reviving Leftovers:
Transform day-old dump cake by crumbling it over ice cream, mixing it into yogurt parfaits, or using it as a topping for fresh fruit salads. These creative repurposing ideas prevent waste while creating entirely new dessert experiences.
Conclusion
This dump cake recipe revolutionizes home baking by proving that exceptional desserts don’t require complicated techniques or professional skills. With just five simple steps, basic pantry ingredients, and 90 minutes of your time, you’ll create a dessert that rivals expensive bakery treats while bringing families together around the dinner table.
Ready to experience dump cake magic? Try this recipe tonight and share your delicious results in our review section below! Don’t forget to leave a comment about your favorite fruit combinations or creative serving ideas – your fellow bakers would love to hear from you. Subscribe to our blog for more easy-to-follow recipes that make home cooking enjoyable and stress-free!
FAQs
Q: Can I make dump cake without nuts for allergy concerns? A: Absolutely! Simply omit the nuts or substitute with toasted coconut flakes, mini chocolate chips, or even crushed graham crackers for added texture without allergen concerns.
Q: Why is my dump cake soggy on top instead of crispy? A: This usually happens when the butter is melted before adding or when the cake is covered while still warm. Always use cold, sliced butter and allow complete cooling before covering to maintain that signature crispy texture.
Q: Can I double this recipe for larger gatherings? A: Yes! Use two 9×13 pans rather than one larger pan for even cooking. Doubling in a single extra-large pan often results in uneven baking with raw centers and overcooked edges.
Q: How do I know when my dump cake is perfectly done? A: Look for golden-brown top color and bubbling around the edges. The center should be set but still slightly jiggly – it will firm up during cooling. Overbaking creates dry, tough texture.
Q: What’s the best way to transport dump cake to potlucks? A: Bake directly in a disposable aluminum pan for easy transport, or use a 9×13 pan with a tight-fitting lid. Let it cool completely before covering to prevent condensation issues during transport.
Q: Can I prepare dump cake ingredients the night before? A: Layer the fruits and store covered in the refrigerator, but add the dry cake mix and butter just before baking. This prevents the mix from becoming gummy and ensures optimal texture in your finished dessert.