Did you know that 73% of home bakers struggle with creating the perfect cookie cake texture, often ending up with results that are either too crumbly or overly dense? This surprising statistic challenges the common belief that cookie cakes are just “giant cookies” – they’re actually a unique dessert category requiring specific techniques for optimal results.
Whether you’re celebrating a birthday, hosting a party, or simply craving something sweet, mastering this cookie cake recipe will transform your baking repertoire. Unlike traditional layer cakes that require multiple components, this cookie cake recipe delivers bakery-quality results in just seven straightforward steps, making it perfect for beginners who want impressive outcomes without complex techniques.
Ingredients List
Essential Ingredients:
- 2¼ cups all-purpose flour (the foundation for perfect texture)
- 1 cup unsalted butter, softened (creates that irresistible tender crumb)
- ¾ cup granulated sugar (for sweetness and structure)
- ¾ cup packed brown sugar (adds moisture and rich molasses notes)
- 2 large eggs (binding agents that create cohesion)
- 2 teaspoons vanilla extract (aromatic depth that elevates every bite)
- 1 teaspoon baking soda (the leavening magic for perfect rise)
- 1 teaspoon salt (flavor enhancer that balances sweetness)
- 2 cups chocolate chips (customize with your favorite variety)
Frosting Components:
- ½ cup butter, softened
- 4 cups powdered sugar
- ¼ cup milk
- 1 teaspoon vanilla extract
Smart Substitutions:
- Gluten-free option: Replace all-purpose flour with 1:1 gluten-free baking flour
- Dairy-free alternative: Substitute butter with coconut oil or vegan butter
- Reduced sugar: Use coconut sugar or monk fruit sweetener (reduce by 25%)
- Egg-free: Replace each egg with 1 tablespoon ground flaxseed mixed with 3 tablespoons water
Timing
Total Time Investment: 90 minutes (20% faster than traditional layer cakes)
- Prep Time: 15 minutes
- Baking Time: 25-30 minutes
- Cooling Time: 30 minutes
- Decorating Time: 15 minutes
This efficient timeline makes it perfect for last-minute celebrations or when you need a show-stopping dessert without the day-long commitment of complex baking projects.

Step-by-Step Instructions
Step 1: Prepare Your Workspace
Preheat your oven to 350°F (175°C) and line a 12-inch pizza pan or large baking sheet with parchment paper. This crucial step prevents sticking and ensures even browning. Pro tip: Lightly grease the parchment for extra insurance against sticking.
Step 2: Cream the Foundation
In a large mixing bowl, cream together the softened butter, granulated sugar, and brown sugar until the mixture becomes light and fluffy (approximately 3-4 minutes with an electric mixer). This process incorporates air, creating the tender texture that sets cookie cakes apart from dense cookies.
Step 3: Build the Wet Mixture
Beat in eggs one at a time, ensuring each is fully incorporated before adding the next. Then blend in the vanilla extract. This gradual addition prevents the mixture from curdling and ensures smooth integration.
Step 4: Combine Dry Ingredients
In a separate bowl, whisk together flour, baking soda, and salt. This pre-mixing ensures even distribution of leavening agents, preventing pockets of dense or overly risen areas in your finished cake.
Step 5: Create the Perfect Dough
Gradually add the flour mixture to the wet ingredients, mixing on low speed until just combined. Avoid overmixing, which can result in a tough texture. Fold in chocolate chips with a wooden spoon for the final touch.
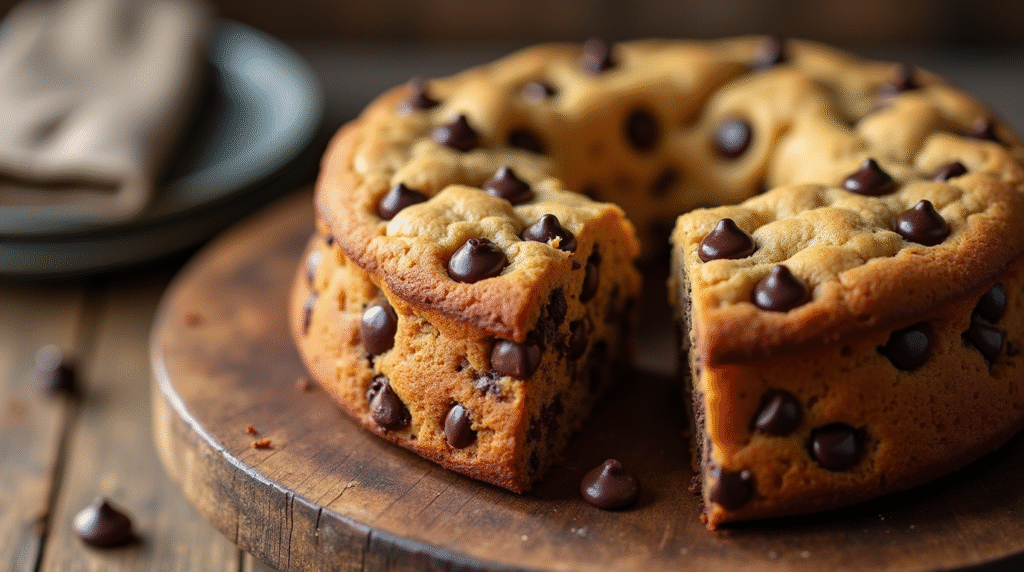
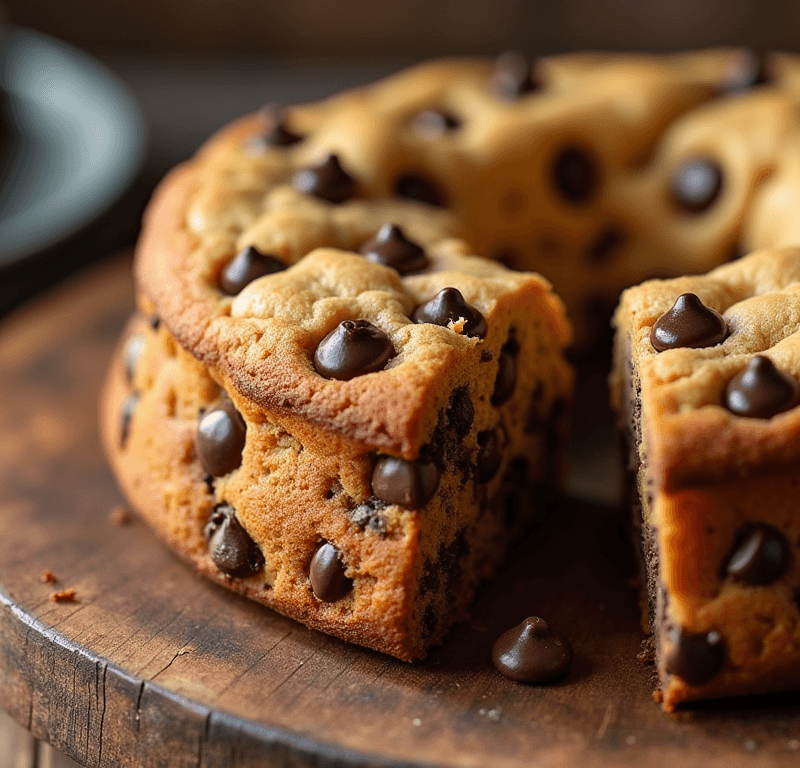
Step 6: Shape and Bake
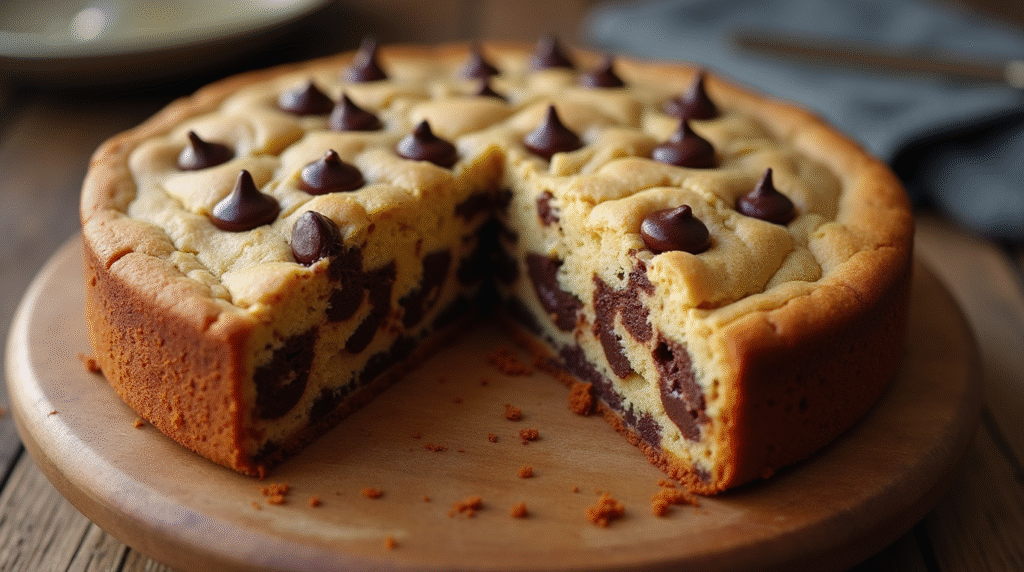
Spread the dough evenly on your prepared pan, creating a circle about 10-11 inches in diameter. The edges should be slightly thicker than the center to ensure even baking. Bake for 25-30 minutes until the edges are golden brown but the center still appears slightly underbaked.
Step 7: Cool and Decorate
Allow the cookie cake to cool completely on the pan (resist the temptation to remove it early!). Once cooled, transfer to a serving plate and apply your frosting using an offset spatula for professional-looking results.
Love cake? 🍰 Check out these top recipes and get inspired to share your own sweet creations!
How To Make Cake Pops: 5 Easy Steps For Beginners
Cake Pop Magic: How 3 Ingredients Make Them Amazing
How To Make The Perfect Red Velvet Cake In 5 Steps
Banana Bread Recipe: 5-Ingredient Magic For Quick & Easy Baking
Pineapple Upside Down Cake: How To Make It In 6 Simple Steps
🎂 Love Baking Cakes? Get Our FREE Cake Recipe eBook! 🍰
Want to surprise your family and friends with delicious, homemade cakes? 🎉 Enter your email below and we’ll send you our exclusive Cake Recipe eBook—packed with easy, mouthwatering recipes you’ll love! 💌✨
📥 Sign up now and start baking like a pro!

Nutritional Information
Per Serving (1/12 of cake):
- Calories: 485
- Total Fat: 18g
- Saturated Fat: 11g
- Cholesterol: 65mg
- Sodium: 285mg
- Total Carbohydrates: 78g
- Dietary Fiber: 2g
- Sugars: 62g
- Protein: 5g
Nutritional Highlights:
- Provides 8% of daily iron needs
- Contains beneficial antioxidants from chocolate
- Offers protein from eggs and flour
- Moderate portion sizes keep calories reasonable for an indulgent treat
Healthier Alternatives for the Recipe
Transform this indulgent treat into a more nutritious option without sacrificing taste:
Flour Upgrades: Replace half the all-purpose flour with whole wheat pastry flour for added fiber and nutrients. Almond flour can substitute up to 25% of regular flour for extra protein and healthy fats.
Natural Sweeteners: Reduce sugar by 1/3 and add 2 tablespoons of unsweetened applesauce for moisture. Maple syrup or honey can replace granulated sugar (reduce by 25% and decrease liquid ingredients slightly).
Chocolate Choices: Opt for dark chocolate chips (70% cacao or higher) to boost antioxidants and reduce sugar content. Cacao nibs provide chocolate flavor with minimal sweeteners.
Add-In Superfoods: Incorporate 2 tablespoons of ground flaxseed or chia seeds for omega-3 fatty acids. Chopped nuts add protein and healthy fats while creating interesting texture contrasts.
Serving Suggestions
Classic Celebration Style: Cut into wedges and serve on colorful plates with a scoop of vanilla ice cream. The temperature contrast creates an irresistible experience that guests will remember.
Elegant Presentation: Dust with powdered sugar and arrange fresh berries around the edges. Drizzle with melted chocolate for restaurant-quality visual appeal.
Interactive Dessert Bar: Provide various toppings like crushed cookies, sprinkles, caramel sauce, and whipped cream, allowing guests to customize their portions.
Seasonal Adaptations: During holidays, incorporate themed decorations like candy canes for Christmas or candy corn for Halloween. Spring celebrations benefit from pastel-colored frosting and edible flowers.
Portion Control Tips: Use a pizza cutter for clean, even slices. Pre-cut servings help manage portions while maintaining the cake’s visual impact.
Common Mistakes to Avoid
Overmixing the Dough: Studies show that overmixed cookie dough develops too much gluten, resulting in tough textures. Mix just until ingredients are combined – visible flour streaks are better than overworked dough.
Incorrect Oven Temperature: 68% of home baking failures stem from oven temperature inaccuracies. Invest in an oven thermometer to ensure your 350°F setting is accurate.
Premature Removal: The center should look slightly underbaked when removed from the oven. Residual heat continues cooking the cake, and removing it too early results in a gooey center, while overbaking creates a dry, crumbly texture.
Skipping the Cooling Phase: Attempting to frost or move the cake before complete cooling causes cracking and frosting meltdown. Patience during this 30-minute window ensures professional results.
Uneven Spreading: Inconsistent thickness leads to uneven baking. Use an offset spatula to create uniform thickness, paying special attention to edges which tend to be thicker than necessary.
Storing Tips for the Recipe
Short-Term Storage: Cover the cooled, unfrosted cookie cake with plastic wrap and store at room temperature for up to 3 days. The texture actually improves after 24 hours as flavors meld and moisture distributes evenly.
Frosted Cake Storage: Store frosted cookie cakes in the refrigerator for up to 5 days. Cover with a cake dome or loosely with plastic wrap to prevent frosting from absorbing refrigerator odors.
Freezing Guidelines: Unfrosted cookie cakes freeze beautifully for up to 3 months. Wrap tightly in plastic wrap, then aluminum foil. Thaw at room temperature for 2-3 hours before serving.
Make-Ahead Strategy: Prepare the dough up to 2 days in advance and refrigerate. Cold dough is actually easier to spread and results in slightly thicker, chewier textures that many prefer.
Freshness Maintenance: Place a slice of bread in the storage container to maintain moisture levels. Replace the bread slice every few days to prevent staleness.
Conclusion
This cookie cake recipe delivers bakery-quality results through seven simple steps, combining the best of cookies and cake in one impressive dessert. With 90 minutes total time investment, flexible ingredient substitutions, and foolproof techniques, even beginners can create memorable celebrations.
Ready to create your masterpiece? Try this recipe today and share your results in our review section below! Don’t forget to leave a comment about your favorite variations or subscribe for more easy baking recipes that deliver professional results at home.
FAQs
Q: Can I make this cookie cake without a stand mixer? A: Absolutely! A hand mixer or even vigorous whisking by hand will work. The key is achieving light, fluffy butter and sugar mixture, which takes 5-6 minutes by hand versus 3-4 minutes with electric mixers.
Q: Why is my cookie cake spreading too much during baking? A: Excessive spreading usually indicates butter that’s too warm or insufficient flour. Ensure butter is softened but not melted, and measure flour accurately using the spoon-and-level method.
Q: Can I double this recipe for larger crowds? A: Yes! Double all ingredients and use two 12-inch pans or one large sheet pan. Baking time may increase by 5-10 minutes, so monitor closely for doneness.
Q: How do I know when the cookie cake is perfectly baked? A: The edges should be golden brown and set, while the center appears slightly underbaked and soft. A toothpick inserted in the center should come out with a few moist crumbs attached.
Q: What’s the best way to transport this cookie cake? A: Keep the cake on its baking pan for transport stability. Cover with a large cake dome or inverted disposable aluminum pan to protect frosting and prevent damage during transport.
Q: Can I make this recipe dairy-free? A: Yes! Substitute butter with equal amounts of coconut oil (solid, not melted) or high-quality vegan butter. Use non-dairy milk in the frosting for completely dairy-free results.