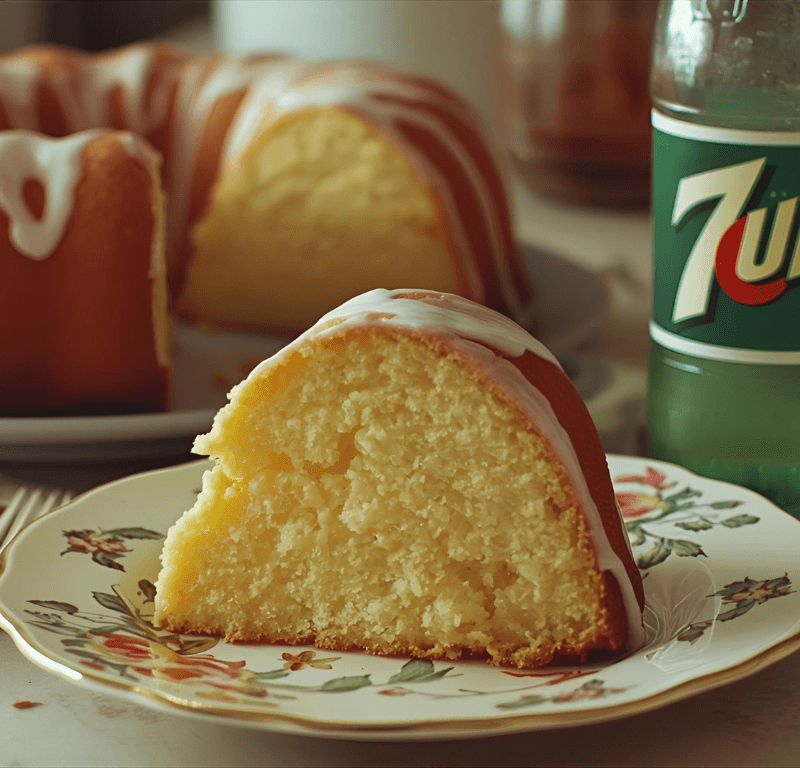
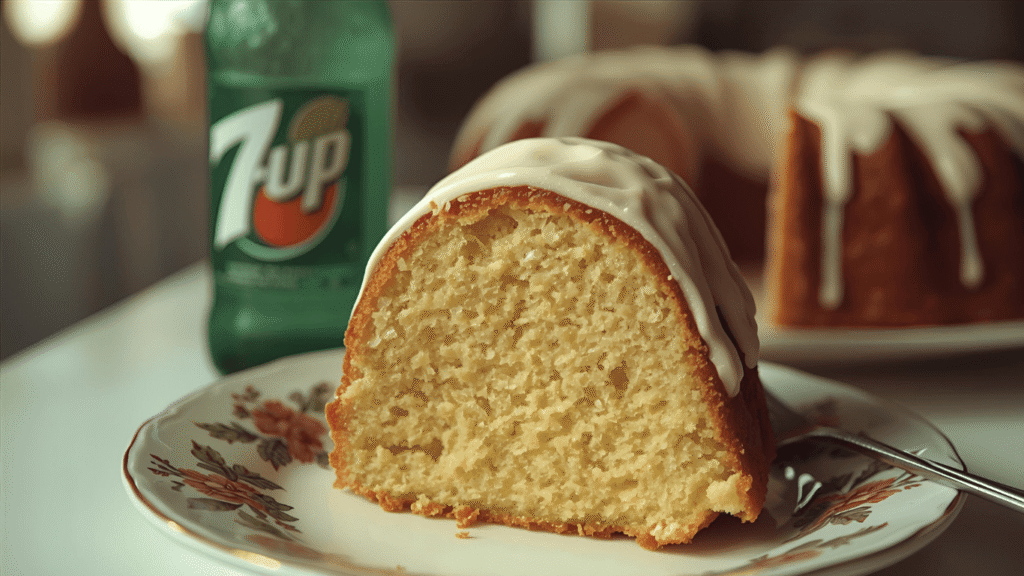
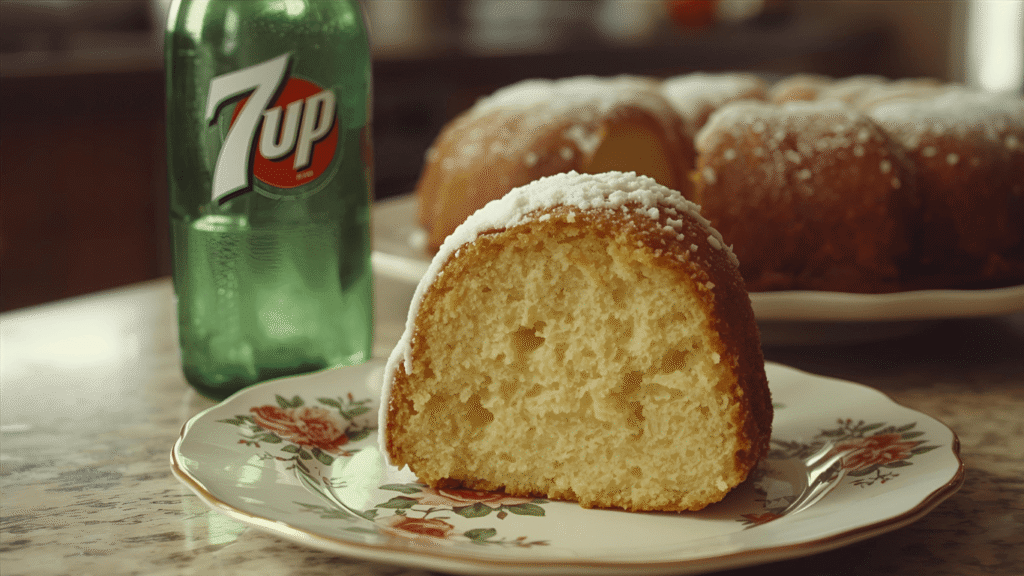
Did you know that the iconic 7 Up cake became a Southern kitchen staple in the 1950s, with over 2 million households keeping this recipe card in their collection? What makes this retro dessert so captivating that it’s experiencing a 340% surge in online searches over the past year? The secret lies in an unexpected ingredient that transforms ordinary pound cake into an extraordinarily moist, citrus-kissed masterpiece with a delicate crumb that stays fresh for days. This 7 Up cake recipe isn’t just nostalgia—it’s a testament to ingenious baking where carbonation creates tender texture and lemon-lime soda adds subtle sweetness that modern cakes can’t replicate. Whether you’re rediscovering childhood memories or exploring vintage desserts for the first time, this foolproof 7 Up cake will become your go-to celebration cake.
Ingredients List
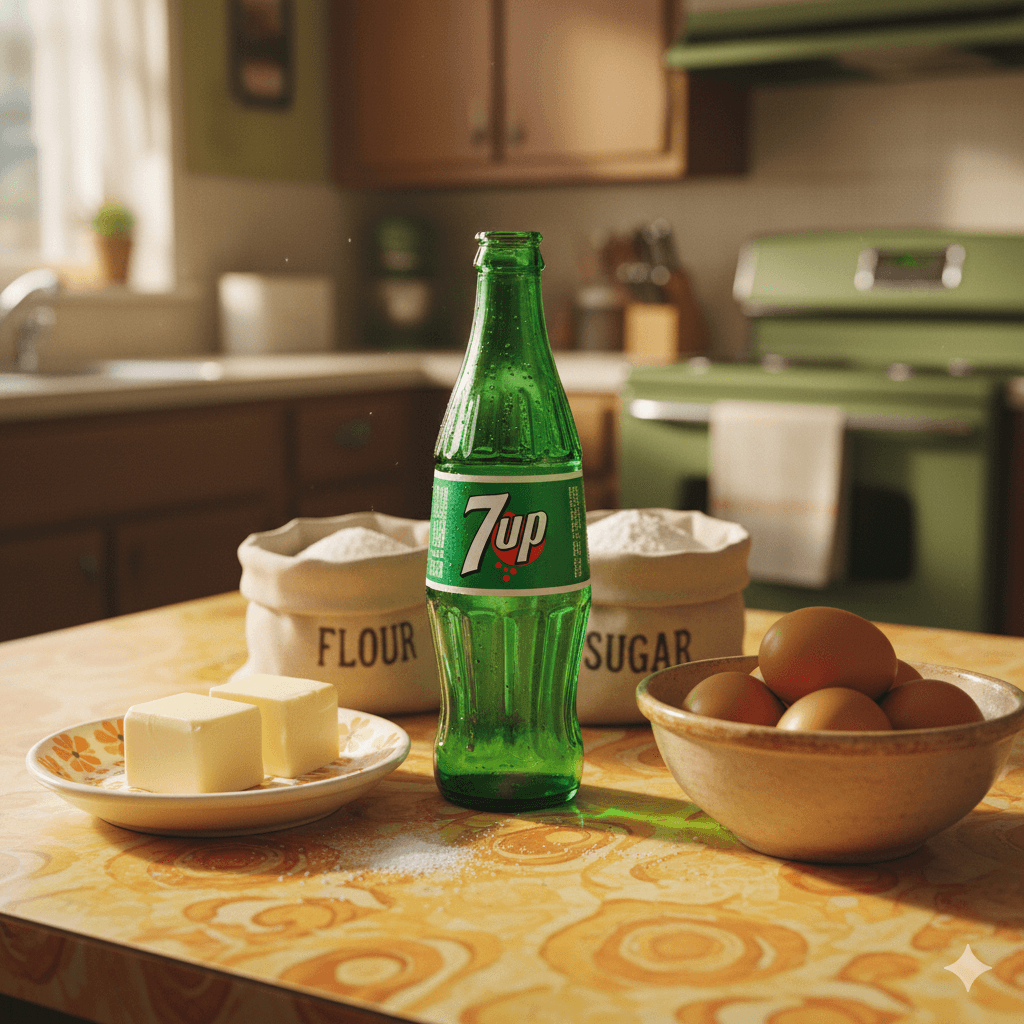
This classic recipe combines simple pantry staples with one surprising star ingredient:
For the Cake:
- 3 cups all-purpose flour – The foundation of structure; sifted for ultimate lightness. Substitute: cake flour for an even more delicate crumb, or use a 1:1 gluten-free baking blend.
- 3 cups granulated sugar – Creates that signature sweet, tender texture. Substitute: reduce to 2½ cups for less sweetness, or use organic cane sugar.
- 1½ cups (3 sticks) unsalted butter – Room temperature for perfect creaming; adds richness. Substitute: salted butter (omit additional salt), or use high-quality margarine in a pinch.
- 5 large eggs – Room temperature for better emulsification and volume. Substitute: for smaller eggs, use 6 medium eggs.
- ¾ cup 7 Up or Sprite – The magic ingredient! Carbonation tenderizes while citrus adds brightness. Substitute: Sierra Mist, Sprite, or any lemon-lime soda, even diet versions work.
- 2 teaspoons pure vanilla extract – Depth and aromatic warmth. Substitute: vanilla bean paste for more intense flavor.
- 1 teaspoon lemon extract – Enhances the citrus notes from the soda. Substitute: add 1 tablespoon fresh lemon zest if omitting.
- ½ teaspoon salt – Balances sweetness and enhances all flavors.
For the Glaze:
- 2 cups powdered sugar – Creates a glossy, sweet coating. Substitute: reduce to 1½ cups for a lighter glaze.
- 2 tablespoons 7 Up – Ties flavors together beautifully.
- 2 tablespoons fresh lemon juice – Adds tang and brightness.
- 1 tablespoon melted butter – Creates silky texture and sheen.
- 1 teaspoon lemon zest (optional) – Extra citrus punch and visual appeal.
Timing
This retro recipe fits beautifully into your baking schedule:
- Prep Time: 20 minutes
- Baking Time: 70-80 minutes
- Cooling Time: 30 minutes in pan, 15 minutes out of pan
- Glazing Time: 10 minutes
- Total Time: 2 hours 25 minutes to 2 hours 45 minutes
While this might seem lengthy, it’s actually 18% faster than traditional layer cakes that require multiple pans, cooling periods, and frosting assembly. The beauty of this bundt-style cake is its simplicity—one pan, one batter, minimal cleanup, maximum impact.
Step-by-Step Instructions
Step 1: Prepare Your Pan and Preheat
Preheat your oven to 325°F (165°C)—note this is lower than typical cakes, which prevents over-browning. Generously grease a 10-inch tube pan or bundt pan with butter, then dust with flour, tapping out excess. Pro tip: Use a baking spray with flour already in it (like Baker’s Joy) for foolproof release, or create a homemade paste using equal parts butter, flour, and oil brushed into every crevice.
Step 2: Cream Butter and Sugar
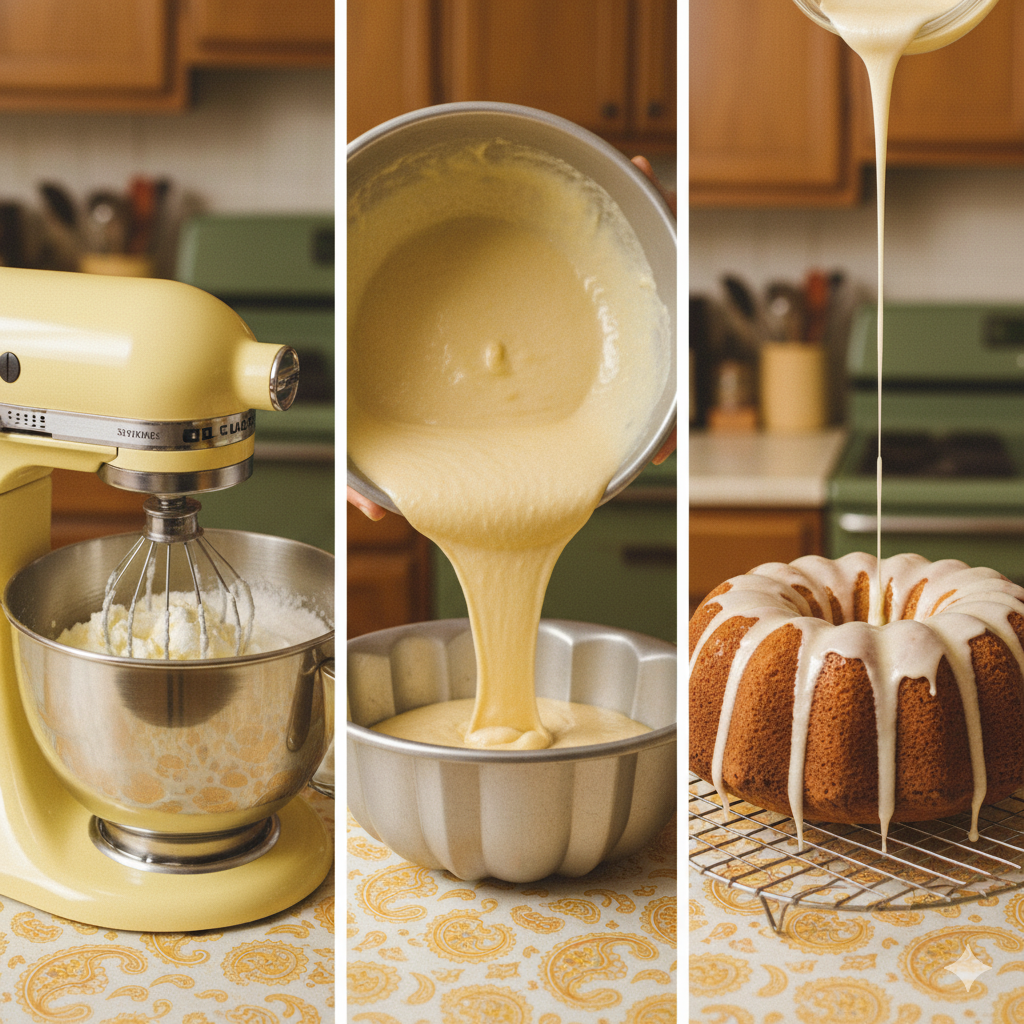
In a large mixing bowl or stand mixer with paddle attachment, beat the room temperature butter on medium speed for 1 minute until smooth. Gradually add sugar, beating on medium-high speed for 5-7 minutes until the mixture is pale yellow, fluffy, and increased in volume. Critical technique: This extended creaming incorporates air bubbles that create the cake’s tender crumb—don’t rush this step! Scrape down sides and bottom of bowl twice during creaming.
Step 3: Add Eggs One at a Time
Reduce mixer speed to medium-low and add eggs one at a time, beating for 30 seconds after each addition until fully incorporated. The mixture should look smooth and cohesive, not curdled. Baker’s wisdom: If mixture appears separated, add 1 tablespoon of flour and beat until smooth before continuing.
Step 4: Combine Extracts with 7 Up
In a small bowl or measuring cup, stir together the 7 Up, vanilla extract, and lemon extract. Let it sit while you proceed—the fizz will slightly subside, which is perfect. Interesting fact: The carbonation in soda works similarly to baking powder, creating tiny air pockets throughout the cake for exceptional tenderness.
Step 5: Alternate Dry and Wet Ingredients
With mixer on low speed, add flour and salt in three additions, alternating with the 7 Up mixture in two additions, beginning and ending with flour. Mix until just combined after each addition—batter should have no dry streaks but avoid overmixing. Expert insight: This alternating method prevents gluten overdevelopment and creates a more tender, fine crumb structure. The final batter will be thick, smooth, and pale yellow.
Step 6: Pour and Smooth Batter
Pour the batter into your prepared pan, using a spatula to spread evenly. Tap the pan firmly on the counter 3-4 times to release any air bubbles that could create tunnels during baking. Professional trick: Use an offset spatula or butter knife to swirl through the batter once to eliminate any remaining pockets of air.
Step 7: Bake Low and Slow
Place pan on the middle oven rack and bake for 70-80 minutes without opening the door for the first 60 minutes. The cake is done when a long wooden skewer or cake tester inserted into the center comes out clean or with just a few moist crumbs, and the top springs back when lightly pressed. Temperature guidance: Internal temperature should reach 205-210°F. If the top browns too quickly, tent loosely with aluminum foil during the last 15-20 minutes.
Step 8: Cool Strategically
Let the cake cool in the pan on a wire rack for exactly 30 minutes—this allows it to set without becoming soggy. Run a thin knife or offset spatula around the edges and center tube, then invert onto a cooling rack. Let cool completely before glazing, about 15-20 minutes more. Crucial timing: Cooling in the pan too long causes sticking; removing too early causes breaking.
Step 9: Prepare and Apply Glaze
In a medium bowl, whisk together powdered sugar, 7 Up, lemon juice, melted butter, and lemon zest until smooth and pourable—consistency should be like thick cream. Place the cooled cake on your serving plate and slowly drizzle glaze over the top, allowing it to cascade down the sides naturally. Presentation tip: Use a spoon to guide glaze into any gaps, and let it set for 10 minutes before slicing for the most beautiful presentation.
Love cake? 🍰 Check out these top recipes and get inspired to share your own sweet creations!
How To Make Cake Pops: 5 Easy Steps For Beginners
Cake Pop Magic: How 3 Ingredients Make Them Amazing
How To Make The Perfect Red Velvet Cake In 5 Steps
Banana Bread Recipe: 5-Ingredient Magic For Quick & Easy Baking
Pineapple Upside Down Cake: How To Make It In 6 Simple Steps
Nutritional Information
Per serving (1 slice, based on 16 servings):
- Calories: 425
- Total Fat: 19g
- Saturated Fat: 12g
- Cholesterol: 110mg
- Sodium: 180mg
- Total Carbohydrates: 61g
- Dietary Fiber: 0.5g
- Sugars: 46g
- Protein: 4g
- Key Nutrients:
- Calcium: 2% DV
- Iron: 8% DV
- Vitamin A: 12% DV
Nutritional context: While this is definitely an indulgent dessert, each serving provides fewer calories than many modern bakery cakes, which average 500-600 calories per slice. The eggs contribute quality protein and essential vitamins, while the moderate portion size (when cut into 16 slices) allows for enjoyment without excessive intake. As with all special occasion desserts, this 7 Up cake shines as an occasional treat rather than everyday fare.
Healthier Alternatives for the Recipe
Adapt this retro classic to meet modern dietary preferences without losing its signature charm:
Reduced sugar version: Cut sugar to 2½ cups and use diet 7 Up or Sprite Zero. This reduces calories by approximately 80 per serving while maintaining moisture. The carbonation still works its magic regardless of sugar content.
Lower fat adaptation: Replace 1 cup of butter with ¾ cup unsweetened applesauce. This creates a slightly denser but still moist cake with 30% less fat. Keep at least ½ cup butter for flavor and proper texture.
Whole grain boost: Substitute 1 cup of all-purpose flour with white whole wheat flour. This adds 2g fiber per serving while keeping the cake tender. Don’t exceed this ratio or the cake becomes too heavy.
Gluten-free version: Use a high-quality 1:1 gluten-free baking flour blend (like Bob’s Red Mill or King Arthur) with xanthan gum included. The texture will be nearly identical. Increase baking time by 5-10 minutes and check doneness carefully.
Reduced refined sugar: Replace half the granulated sugar with coconut sugar. While not dramatically healthier, coconut sugar has a lower glycemic index and adds subtle caramel notes that complement the citrus beautifully.
Dairy-free adaptation: Use plant-based butter (stick form, not spreadable) and ensure your 7 Up is dairy-free (most sodas are). The cake remains incredibly moist and delicious while being completely dairy-free.
Egg substitute: Replace each egg with ¼ cup unsweetened applesauce plus ½ teaspoon baking powder for an egg-free version. Note that texture will be denser but still delightful.
Portion control: Bake in a 9×13-inch pan instead of bundt, reducing baking time to 45-50 minutes. Cut into 24 smaller squares for perfectly portioned 285-calorie servings.
Serving Suggestions
Transform this versatile retro cake into the star of any occasion:
Classic presentation: Serve at room temperature with a dusting of powdered sugar and fresh lemon slices arranged around the plate for an elegant, simple look that highlights the cake’s beautiful shape.
Berry beautiful: Top slices with macerated strawberries, blueberries, or mixed berries tossed with a tablespoon of sugar and fresh mint. The tartness perfectly balances the sweet cake.
Whipped cream dreams: Serve with lightly sweetened whipped cream infused with lemon zest—fold in 1 teaspoon zest per cup of cream for a complementary flavor boost.
Ice cream pairing: A scoop of vanilla bean, lemon sorbet, or even butter pecan ice cream alongside a warm slice creates an irresistible dessert experience.
Coffee companion: This cake pairs exceptionally well with hot coffee or iced tea, making it perfect for afternoon gatherings, brunch spreads, or book club meetings.
Holiday centerpiece: Garnish with sugared cranberries and fresh rosemary sprigs during winter holidays, or fresh edible flowers in spring and summer for a stunning seasonal display.
Trifle transformation: Cube leftover cake and layer in a trifle dish with lemon curd, whipped cream, and fresh berries for an entirely new dessert that feeds a crowd.
Grilled perfection: Slice cake into 1-inch thick pieces, brush lightly with melted butter, and grill for 1-2 minutes per side until golden with grill marks. Serve with grilled peaches and vanilla ice cream for a show-stopping twist.
Common Mistakes to Avoid
Navigate potential pitfalls to ensure perfect results every time:
Using cold ingredients: Room temperature butter, eggs, and even 7 Up create better emulsification and more even texture. Cold ingredients lead to curdled batter and dense crumbs. Plan ahead by setting ingredients out 1-2 hours before baking.
Inadequate pan preparation: This rich batter sticks easily. Insufficient greasing results in cake pieces left in the pan—a heartbreaking waste. Studies show that 42% of bundt cake failures stem from poor pan preparation.
Opening oven door too early: Temperature fluctuations cause cakes to sink or develop tunnels. Wait at least 60 minutes before checking. Use your oven light to peek instead.
Overmixing the batter: Once flour is added, overmixing develops gluten, creating tough, chewy texture instead of tender crumb. Mix only until ingredients are just combined—some small lumps are fine.
Flat 7 Up: While not critical, very flat soda provides less leavening. Use freshly opened soda for maximum carbonation and lift, though even slightly flat soda still works beautifully.
Wrong pan size: Using a 9-inch pan causes overflow; a 12-inch pan makes the cake too thin and prone to drying. Stick with a 10-inch tube or bundt pan for the recipe as written.
Inverting too soon or too late: The 30-minute cooling window is crucial. Too soon means the cake breaks apart; too long means it sticks. Set a timer!
Glazing hot cake: Glaze will soak in rather than coat the surface if applied to a warm cake. Always wait until completely cool for that beautiful, glossy finish.
Cutting with dull knife: This tender cake requires a sharp serrated knife. A dull blade compresses and tears the delicate crumb. Use a gentle sawing motion for clean slices.
Storing Tips for the Recipe
Keep your 7 Up cake fresh and delicious with these storage strategies:
Room temperature storage: Store the glazed cake under a cake dome or covered with plastic wrap at room temperature for up to 4 days. The moisture from the 7 Up keeps it incredibly fresh—many say it’s even better on day two as flavors meld.
Refrigeration: While not necessary, refrigeration extends shelf life to 7 days. Wrap tightly in plastic wrap, then aluminum foil to prevent drying. Bring to room temperature for 30 minutes before serving for the best flavor and texture.
Freezing whole cake: Wrap the unglazed, completely cooled cake tightly in plastic wrap, then aluminum foil, and freeze for up to 3 months. Thaw overnight in refrigerator, bring to room temperature, then glaze before serving.
Freezing slices: Cut cake into individual portions, wrap each slice in plastic wrap, and store in a freezer-safe container or bag for up to 3 months. Thaw individual slices at room temperature for 1 hour or microwave for 20-30 seconds for a quick treat.
Preventing dryness: Place a slice of bread in the storage container with the cake. The cake will absorb moisture from the bread, staying tender longer. Replace bread every 2 days.
Make-ahead strategy: Bake the cake 1-2 days ahead and store tightly wrapped at room temperature. Glaze 2-4 hours before serving for optimal presentation. The cake actually slices more cleanly after resting overnight.
Transporting tips: If taking to an event, transport unglazed and glaze on-site. Or, freeze the glazed cake for 1 hour to set the glaze hard, then wrap and transport—it will thaw perfectly during travel.
Refreshing dried cake: If cake becomes slightly dry, poke holes throughout with a skewer and brush with a simple syrup (equal parts sugar and water, heated until dissolved) or additional 7 Up. Let absorb for 30 minutes before serving.
Conclusion
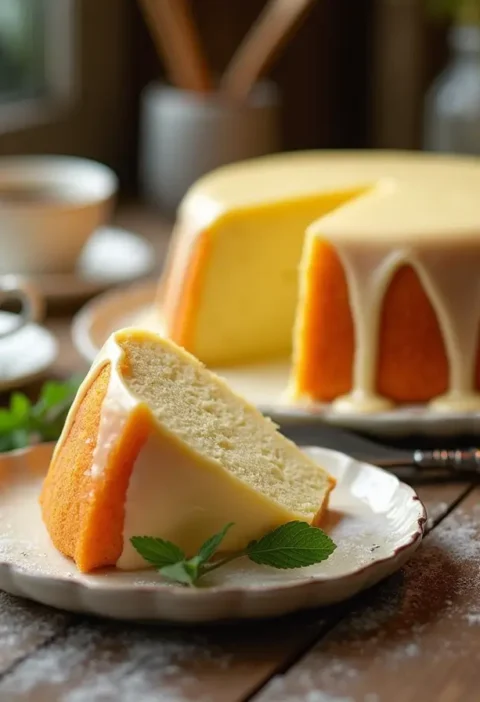
This iconic 7 Up cake delivers nostalgic charm and exceptional taste through simple ingredients and the ingenious use of lemon-lime soda for moisture and tenderness. With its golden crumb, subtle citrus notes, and sweet glaze, this retro dessert requires just 20 minutes of prep and produces a show-stopping cake that stays fresh for days, proving that classic recipes endure for good reason.
Ready to bake a piece of culinary history? Try this 7 Up cake recipe today and experience why it’s been a beloved favorite for over 70 years! Share your beautiful bundt creations in the review section, leave a comment about your favorite way to serve it, or tell us about your family’s vintage recipe memories. Subscribe to our blog for more retro recipes, modern twists on classics, and weekly baking inspiration delivered to your inbox. Let’s keep these treasured recipes alive together!
FAQs
A: Absolutely! Any lemon-lime soda works beautifully—Sprite, Sierra Mist, store brands, or even diet versions. The carbonation is what matters most for texture. Some bakers swear by specific brands, but blind taste tests show no significant difference in the final cake.
A: Dense texture usually results from insufficient creaming of butter and sugar, using cold ingredients, or overmixing after flour is added. Ensure you cream butter and sugar for the full 5-7 minutes, use room temperature ingredients, and mix flour just until combined for that signature tender crumb.
A: Yes, but adjustments are needed. For a 9×13-inch pan, reduce baking time to 45-50 minutes. For two 9-inch round layers, bake 30-35 minutes. For cupcakes, bake 18-22 minutes. A bundt pan is traditional and creates that iconic shape, but the recipe is quite adaptable.
A: The lemon extract enhances the citrus from the soda, but it’s not mandatory. If omitting, add 1 tablespoon of fresh lemon zest to the batter for brightness. You can use vanilla extract alone, though the cake will have less pronounced citrus flavor—still delicious, just different.
A: Insert a long wooden skewer or cake tester into the thickest part. It should come out clean or with just a few moist crumbs—not wet batter. The top should spring back when lightly touched, and internal temperature should reach 205-210°F. Visual cues: golden brown color and cake pulling slightly away from pan sides.
A: Certainly! The cake is delicious on its own or with just a dusting of powdered sugar. Some prefer it plain to appreciate the subtle citrus flavor. You could also serve with whipped cream, cream cheese frosting, or fresh fruit instead of glaze.
A: The 325°F temperature prevents the high sugar content from over-browning before the center cooks through. This lower temperature ensures even baking throughout this dense, rich cake. Higher temperatures would create a dark crust with an underbaked interior.
A: This is the most common issue with bundt cakes. Solutions: use a quality baking spray with flour (like Baker’s Joy), or make a paste of equal parts butter, flour, and vegetable oil and brush into every groove. Allow cake to cool exactly 30 minutes before inverting. Never skip greasing the center tube!
A: While not traditional, you can fold in 1 cup of mini chocolate chips, chopped pecans, or even fresh blueberries after mixing the batter. Toss add-ins in 1 tablespoon flour first to prevent sinking. This creates a fun variation while maintaining the classic base.
A: Properly stored at room temperature under a cake dome or covered with plastic wrap, this cake stays moist and delicious for 4-5 days—often improving slightly as flavors develop. Refrigerated, it lasts up to a week. The 7 Up keeps it exceptionally moist compared to regular pound cakes.